Supplies:
- Crayola Fine Line Markers - Black
- Crayola Watercolour Paints
- Crayola Crayons - Regular Not Washable
- Crayola Construction Paper - 22.9 cm x 30.5 cm - 1 piece per student
- Crayola Marker & Watercolour Paper - 22.9 cm x 30.5 cm (9" x 12")
- Crayola Scissors
- Crayola Paint Brushes
- Crayola Washable Glue Sticks
- Water Containers
- Paper Towels
Steps:
1
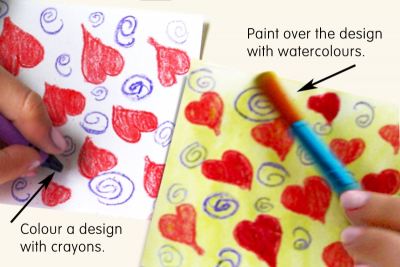
- Use crayons to draw a design on one of your small squares of paper.
- Leave some of the paper white.
- Press hard with the crayon.
- Paint watercolour over the design.
2
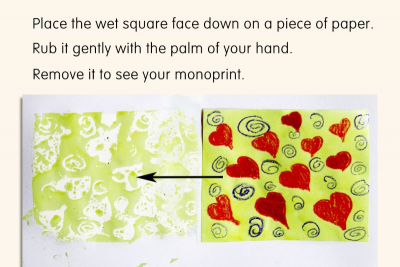
- Before the paint dries, place the square face down on a larger piece of paper.
- Rub it gently with the palm of your hand.
- Remove the small square to see your monoprint.
3
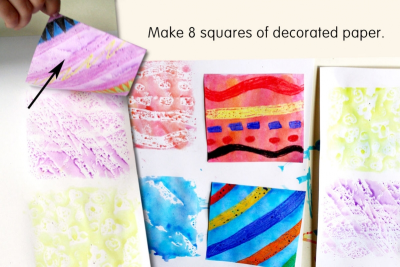
- Repeat with each of the remaining small squares.
- Make 8 squares of decorated paper.
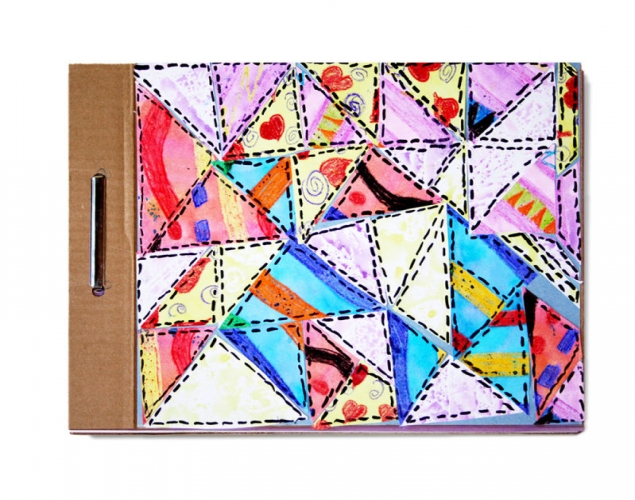
4
- Decide which papers you would like to use for your quilt.
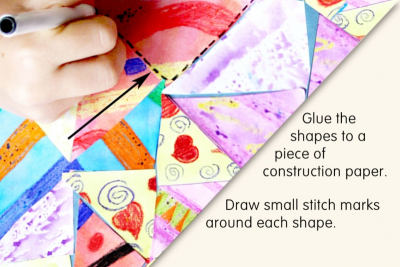
- Design a quilt block using geometric shapes.
- Arrange the shapes on a piece of construction paper or directly on the cardboard cover of your book.
- Once you are satisfied with the arrangement start gluing the shapes to the surface.
- Use a fine tip black marker to make small stitch marks around the edges of each shape.
5
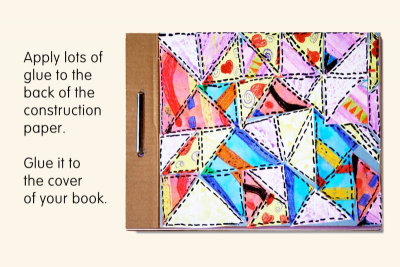
- Apply lots of glue to the back of the construction paper.
- Place it on top of the front of the book.
- Line up the edges carefully.
- Place a spare paper on top of the quilt.
- Gently rub over the spare paper with the palm of your hand.
- Make sure the quilt paper is nice and flat.
- Remove the spare paper.
Subjects:
Grades:
Grade 1,
Grade 2,
Grade 3,
Grade 4,
Grade 5,
Grade 6