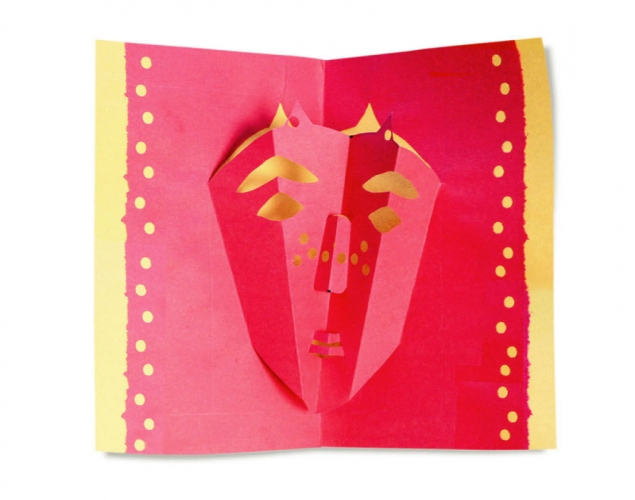
Supplies:
- Crayola Construction Paper - 22.9 cm x 30.5 cm (9" x 12")
- Crayola Scissors
- Crayola Washable Glue Sticks
- Pencils
- Rulers
- Hole Punch
Steps:
1
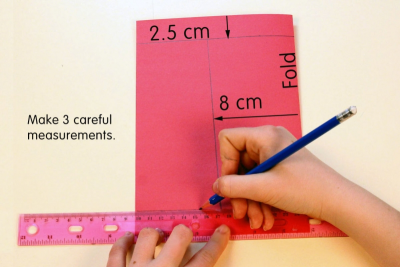
- Fold the paper in half, short end to short end.
- Draw a line 8 cm in from, and parallel to the fold.
- Draw a line 2.5 cm down from, and parallel to the top of the paper.
- Draw a line 2.5 cm up from, and parallel to the bottom of the paper.
2
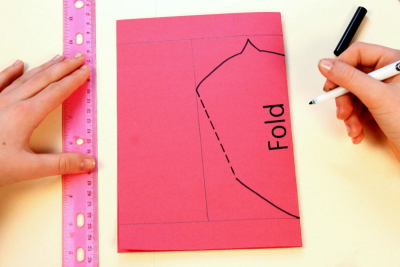
- The fold will be the line of symmetry for your mask.
- Draw the chin line and the forehead line starting at the fold.
- The forehead line should go to the 8 cm line.
- The forehead line cannot go above the 2.5 cm line or past the 8 cm line.
- The chin line cannot go below the 2.5 cm line or past the 8 cm line. - Draw dotted lines from the chin line to the forehead line.
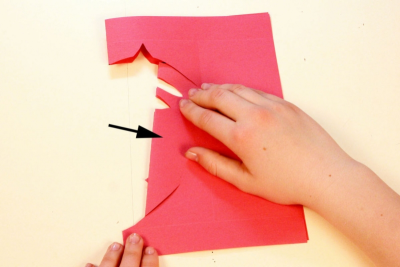
3
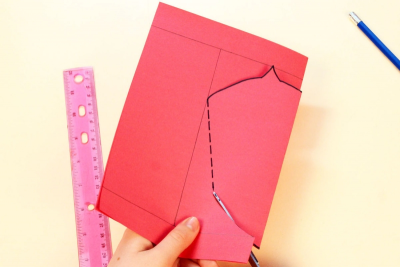
- Cut along the solid lines.
4
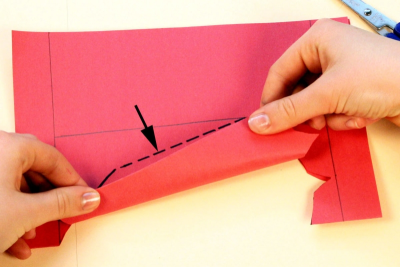
- Fold the paper from the centre fold to the dotted line.
- Fold the paper back and forth to make a firm crease.
5
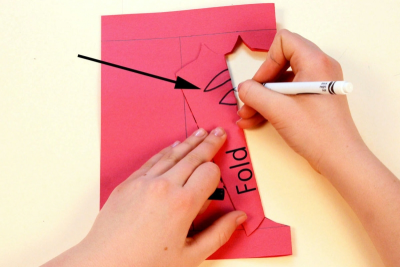
- Draw 1/2 an eyebrow and 1/2 an eye starting at the fold.
- Make sure the middle of the eyebrow and eye are at the fold.
6
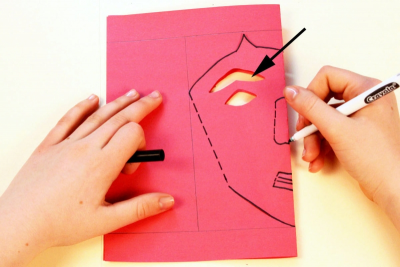
- Cut out the eye and eyebrow.
- Unfold the paper.
- Draw the nose.
- Draw solid lines at the top and bottom of the nose.
- Draw dotted lines connecting the top and bottom of the nose.
- Repeat for the mouth.
7
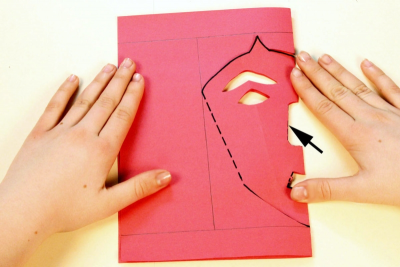
- Cut along the solid lines.
- Fold along the dotted line.
- Reverse fold the nose and mouth so they are tucked inside.
- Press along the folds to make firm creases.
8
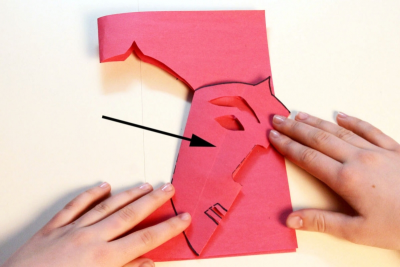
- Fold along the outer dotted line.
- Fold back and forth to make a firm crease.
9
- Gently reverse fold all the parts of the mask so they are inside the folded card.
- Make sure all the folds are flat.
- Gently press the paper along the folded areas to make firm creases.
10
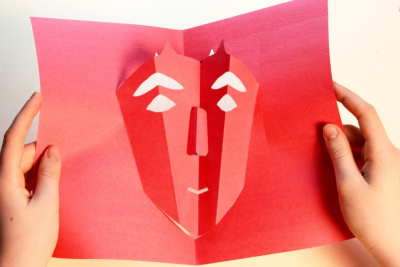
- Open the paper to check the folds.
- The mask should pop up.
11
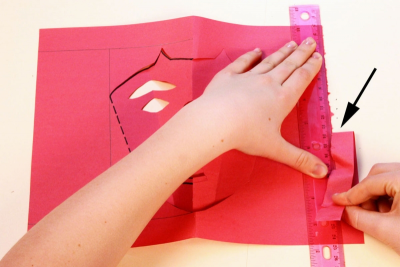
- Measure in about 2 cm from the outside edge of the paper.
- Hold a ruler firmly along this line and tear off the outside edge of the paper to make a soft edge.
- Use a hole punch to make some patterns along the edges of the paper and to add details to the mask.
12
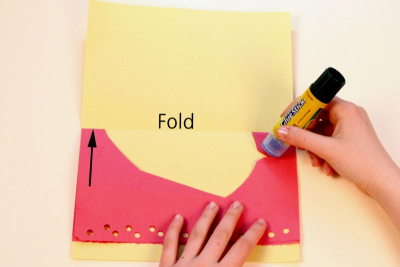
- Choose a contrasting colour of construction paper.
- Fold it in half short end to short end.
- Glue the mask into the folded paper.
- Be careful to line up the centre fold of the mask with the centre fold of the paper.
- Glue one half first, then the other.
13
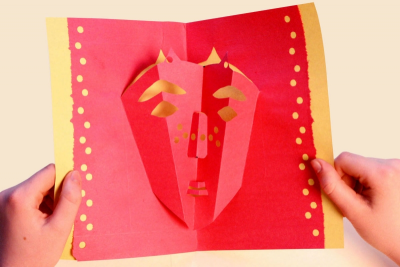
- Open up the card to see the mask pop up.
Subjects:
Grades:
Grade 4,
Grade 5,
Grade 6,
Grade 7,
Grade 8