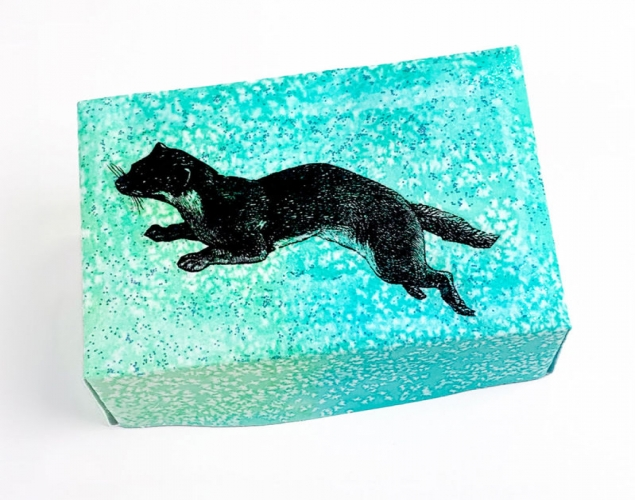
PHOTO TRANSFER BOX – Colour, Form, TextureStudents create a small box with a lid using watercolour and a photo transfer to make it unique.
Students create a small box with a lid using watercolour and a photo transfer to make it unique.
Supplies:
- Crayola Watercolours
- Crayola Paint Brushes
- Crayola Washable Glue Sticks
- Crayola Scissors
- Crayola Glitter Glue
- Cardstock Paper - 13.9cm x 21.6 cm *5.5" x 8.5") - 1 per student
- Cardstock Paper - 13.3 cm x 20.9 cm (5.25" x 8.25") - 1 per student
- Clear Packing Tape
- Table Salt in a Shaker
Steps:
1

PREPARING THE PAPER
- Use a piece of 13.9 cm x 21.6 cm (5.5” x 8.5”) size cardstock paper.
- Moisten the watercolour paints by dropping a brush load of water on each colour.
- Wet the paper with clear water.
2
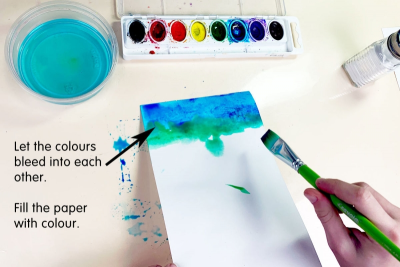
- Paint into the wet paper with some colour.
- this is the wet on wet technique - Add another colour and let the colours bleed into each other.
- Fill the paper with colour.
3
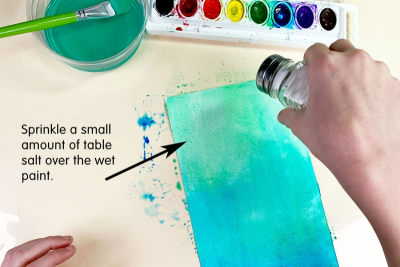
- Sprinkle a small amount of table salt over the wet paint.
- the salt will absorb the paint and leave small white speckles - Set the paper aside to dry.
4
MAKING THE PHOTO TRANSFER
- Cut out a black and white photocopied picture.
- Leave a small border of white paper around the image.
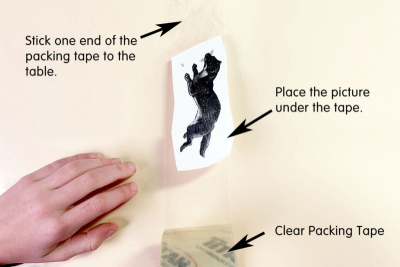
- Stick one end of the packing tape to the table.
- Place the picture under the tape.
- static electricity may pull the picture to the tape
5
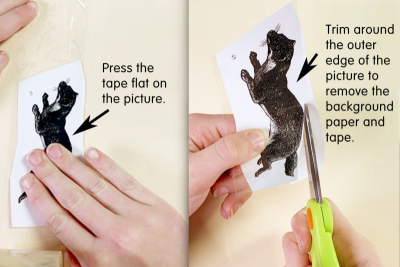
- Press the tape flat on the picture.
- Smooth out the tape and make sure it is completely stuck on the picture.
- Trim around the outer edge of the picture to remove the background paper and tape.
6
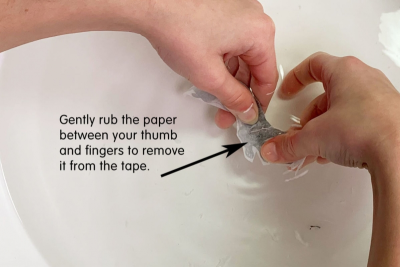
- Place the picture into a basin of water.
- Let it sit for a few seconds.
- Hold the picture under the water.
- Rub the picture between your fingers and thumb to remove the white paper from the tape.
7
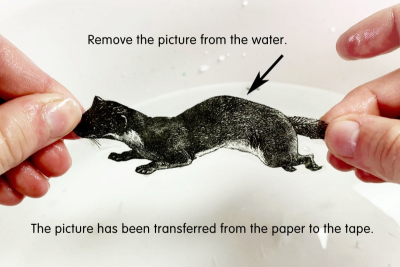
- Remove the picture from the water.
- The picture has been transferred from the paper to the tape.
- Set the picture aside to dry.
8
- Brush the salt off the dry painted paper.
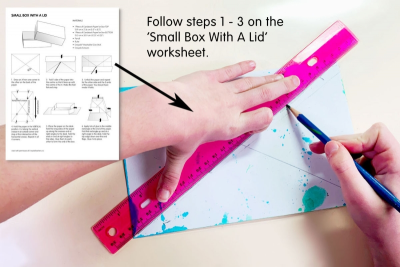
- Place the paper paint side down on the desk.
- Follow steps 1 - 3 on the 'Small Box With A Lid' worksheet. (Downloads - SmallBox.pdf)
9
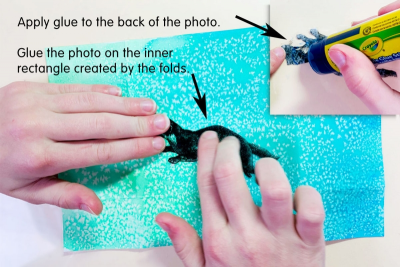
- Place the paper paint side up on the desk.
- Apply glue to the back of the photo.
- Glue the photo on the inner rectangle made by the folds.
- Press it flat and smooth.
10
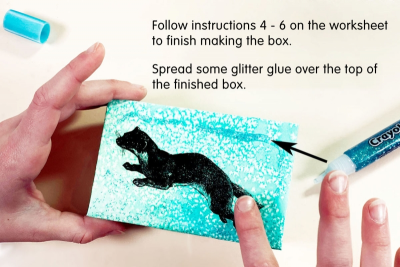
- Follow steps 4 - 6 on the 'Small Box With A Lid' worksheet to finish making the box top. (Downloads - SmallBox.pdf)
- Once the top is finished use a piece of 13.3 cm x 20.9 cm (5.25” x 8.25”) cardstock paper to make the bottom of the box.
- Spread some glitter glue over the top of the finished box.
Subjects:
Grades:
Grade 3,
Grade 4,
Grade 5,
Grade 6,
Grade 7,
Grade 8