Supplies:
- Crayola Crayons
- Crayola Glue Sticks
- Crayola Markers
- Crayola Scissors
- Crayola Marker & Watercolour Paper - 22.4 cm x 30.5 cm (9" x 12") - 2 sheets per student
- Elastic Bands - Medium Length - 1 per student
- Small Tree Branch - about .5 cm (½") diameter x 12 cm (5") long
- Hole Punch
- Cardstock Paper - 11 cm x 11 cm (4.5" x 4.5") - 3 per student
- Paper Lunch Bags - 13 cm x 27 cm (5" x 11") - 3 per student
Steps:
1
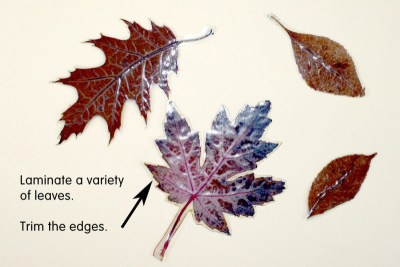
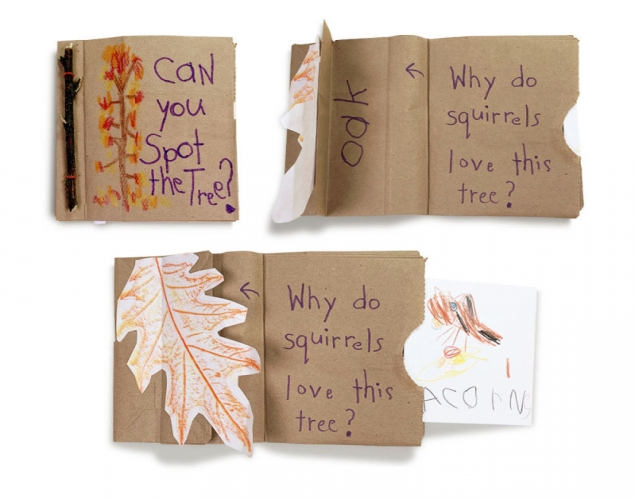
Prepare The Leaves
- Gather lots of different leaves.
- Place the leaves between parchment paper and put some books on top of them.
- Allow them to dry for one day.
- Laminate the leaves.
- Cut them out.
- Leave a small border around the edge so the laminate won't separate.
2
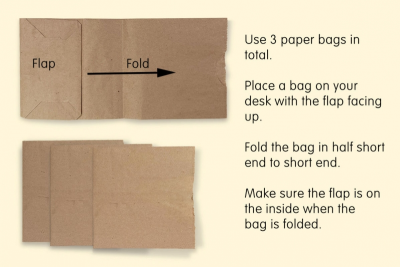
- Use 3 paper bags in total.
- Place a bag on your desk with the bottom flap facing up.
- Fold the bag in half short end to short end.
- Make sure the flap is on the inside when the bag is folded.
- Repeat for the other 2 bags.
3
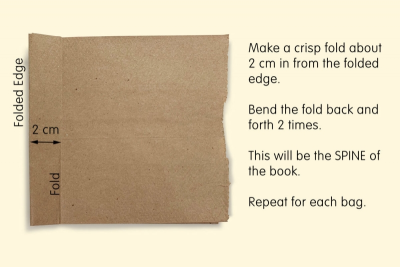
- Place a folded paper bag on the table.
- Make a crisp fold about 2 cm in from the folded edge.
- Bend the fold back and forth 2 times.
- This will be the SPINE of the book.
- Repeat for each bag.
4
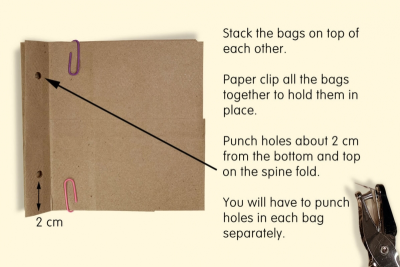
- Stack the bags on top of each other.
- Make sure the edges line up.
- Paper clip all the bags together to hold them in place.
- Punch holes about 2 cm from the top and bottom on the spine fold.
- You will have to punch holes in each bag separately.
- Make sure the holes line up.
5
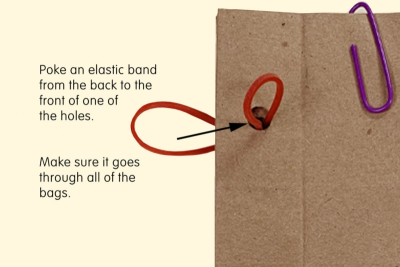
- Poke an elastic band from the back to the front of one of the holes.
- Make sure it goes through all of the bags.
6
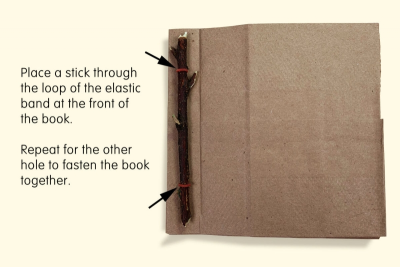
- Place a stick through the loop of the elastic band at the front of the book.
- Repeat for the other hole to fasten the book together.
7
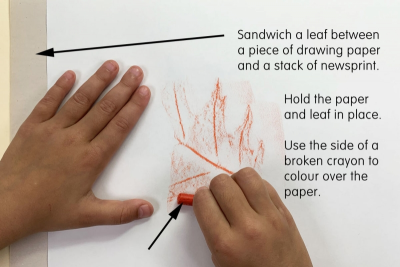
- Sandwich a leaf between a piece of drawing paper and a stack of 5 pieces of newsprint paper.
- Use the side of a broken crayon to colour over the paper.
- Try adding more than one colour.
- Make rubbings for the other 2 leaves.
- Cut out the rubbings.
8
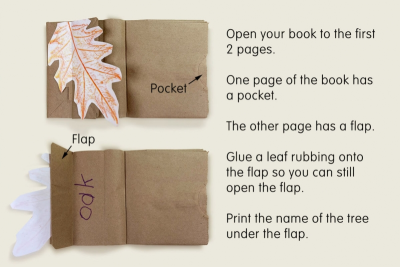
- Place your book on the table.
- Open it to the first 2 pages.
- One page of the book has a pocket.
- The other page has a flap. - Glue a leaf rubbing onto the flap so you can still open the flap.
- Print the name of the tree under the flap so it is hidden.
- Print your question on the pocket page.
9
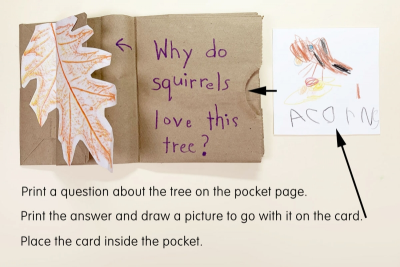
- Print a question about the tree on the pocket page.
- Print the answer to your question on a piece of 10 cm x 10 cm cardstock paper.
- Draw a picture to go along with your answer.
- Place the card inside the pocket.
- Make questions and answer cards for the rest of your book.
10
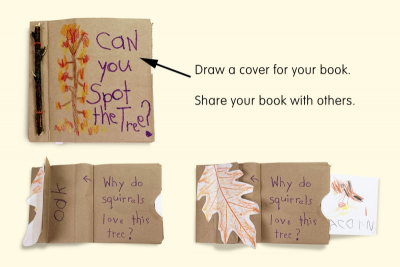
- Draw a cover for your book.
- Share your book with others.
Subjects:
Grades:
Grade 1,
Grade 2,
Grade 3