Supplies:
- Crayola Broad Line Markers
- Crayola Scissors
- Cardstock Paper - 21.6 cm x 28 cm (8 ½" x 11") - 2 per student
- Ball Point Pens - 1 per student
- Styrofoam Boards - 10.8 cm x 14 cm (4 ¼" x 5 ½") - 1 per student
- Small Pieces of Sponge - about 3 cm x 3 cm (1 ¼" x 1 ¼") - 1 per student
- Water Containers
- Paper Towels
Steps:
1

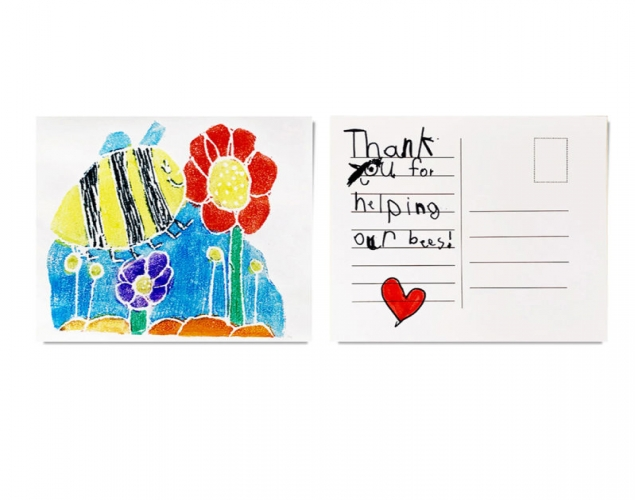
- Think of the pollinators you know and what they need to stay healthy.
- Use a ball point pen to draw a picture of a pollinator in action on the Styrofoam board.
- Cut a soft shape around your picture – or you can skip this step and leave it as a rectangle.
2
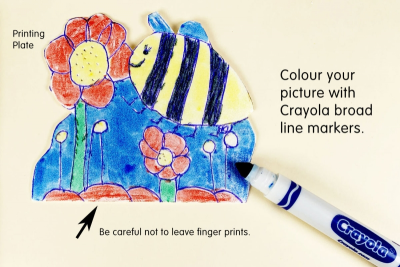
- Colour your picture with Crayola broad line markers.
- Be careful not to leave fingerprints.
- This is your printing plate.
3
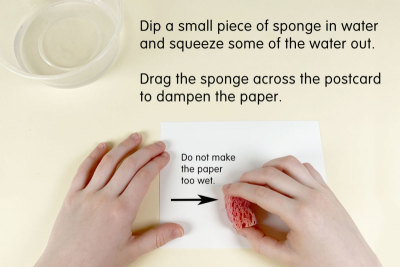
- Dip a small piece of sponge in water and squeeze some of the water out.
- Drag the sponge across the postcards to dampen the paper.
- Do not get the paper too wet.
- The moisture in the paper will pick up the marker ink.
- If the paper is too wet the ink will smear and the print will be blurry.
- If the paper is too dry it won't pick up the ink and the print will be pale.
4
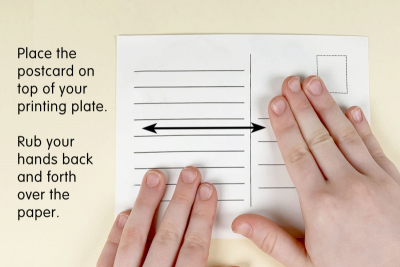
- Place the postcard on top of your printing plate.
- Hold it firmly in place and rub your hands back and forth over the paper.
- Feel where the edges of the printing plate are and be sure to press on them.
5
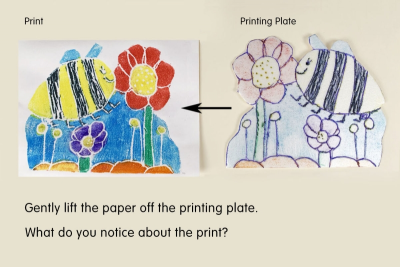
- Gently lift the paper off the printing plate.
- What do you notice about the print?
6
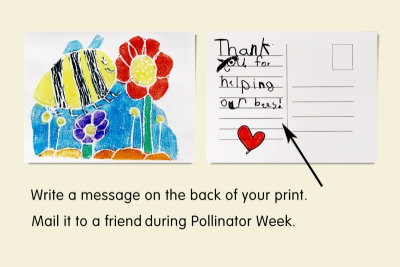
- Write something about pollinators or a thank you for being bee friendly on the back of the print.
- Mail it to a friend during Pollinator Week.
Subjects:
Grades:
Grade 1,
Grade 2,
Grade 3