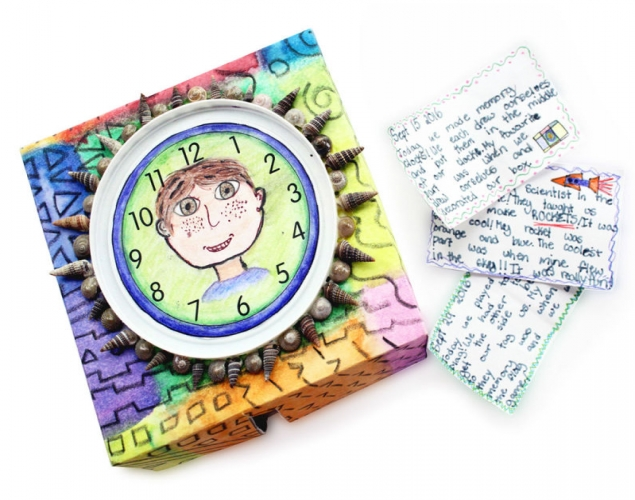
MEMORY CLOCK – Passage of Time, Pattern, ColourStudents design and construct a 3-dimensional clock box which they use to store written reflections of their favourite moment of the week. At the end of the year they read all of their reflections and use them in an artwork that shows the passage of time.
Students design and construct a 3-dimensional clock box which they use to store written reflections of their favourite moment of the week. At the end of the year they read all of their reflections and use them in an artwork that shows the passage of time.
Supplies:
- Crayola Scissors
- Crayola Watercolour Paints - 24 Count
- Crayola Crayons - NOT Washable - 24 Count
- Crayola Paint Brushes
- Crayola No-Run School Glue
- Water Containers
- Paper Towels
- Large Paper Clips - 8 per student
- Rulers
- Light Weight Bristol Board - 29 cm x 29 cm (11 ¾" x 11 ¾") - 1 per student
- Light Weight Bristol Board - 30.5 cm x 30.5 cm (12" x 12") - 1 per student
- Plastic Lid about 11.5 cm (4 ½") Diameter - 1 per student
Steps:
1
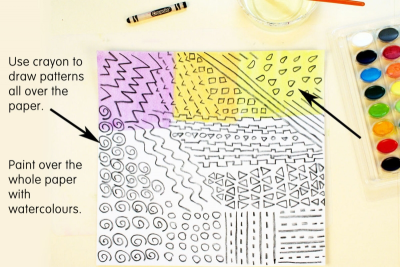
- Use crayons to draw patterns over the 30 cm x 30 cm (12" x 12") Bristol board.
- Press hard with the crayon.
- Paint over the whole paper with watercolours to create a crayon resist design.
2
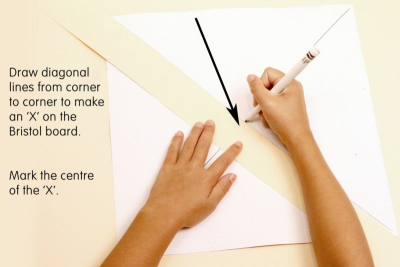
- Draw diagonal lines from corner to corner on the back of the Bristol board to make an 'X'.
- Mark the centre of the 'X'.
3
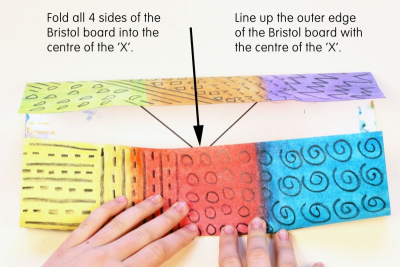
- Fold all 4 sides of the Bristol board into the centre of the 'X'.
- Make sure the outer edge of the Bristol board lines up with the centre of the 'X'.
- Make sure you fold all 4 sides into the 'X'.
4
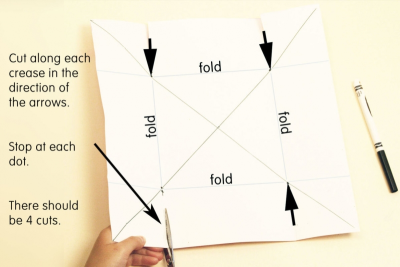
- Unfold the Bristol board.
- Mark a dot at the intersection of the folds in the 4 corners.
- Draw a small arrow along each crease going from the outer edge of the Bristol board to the dot.
- Make sure the arrows are on opposite sides of the Bristol board and facing each other.
- Cut along each crease in the direction of the arrow and stop at each dot.
- There should be 4 cuts.
5
- Place the Bristol board with the painted side facing down.
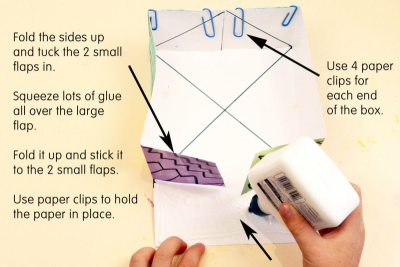
- Fold the sides up and tuck the 2 small flaps in.
- Put lots of Washable glue all over the large flap and fold it up to make the box.
- Place a large paper clip on both ends of each flap to hold the paper in place until the glue dries.
- You should use 4 paper clips on each side of the box.
6
- Refer to the Proportions of the Face worksheet to help you draw your self-portrait on the clock face. (Downloads - Proportions_Face.pdf)
- Use watercolour pencils to paint it.
- Remember to fill the background with colour too.
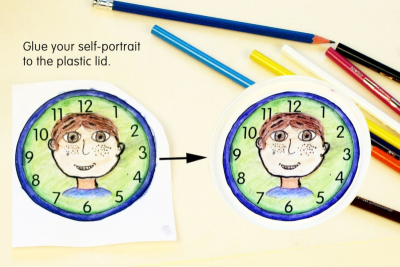
- Cut out the clock face.
- Glue it to the plastic lid.
7
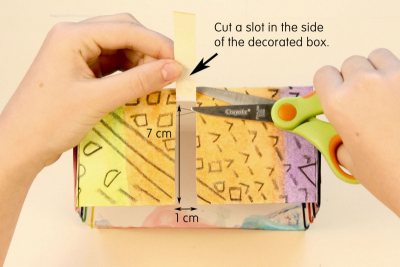
- Cut a slot about 7 cm x 1 cm in the side of the decorated box.
- This will be the top of the box.
8
- Use the 29 cm x 29 cm (11.75" x 11.75") piece of Bristol board.
- Follow the same steps as you did for the top of the box to make the bottom of the box.
- Put the box together.
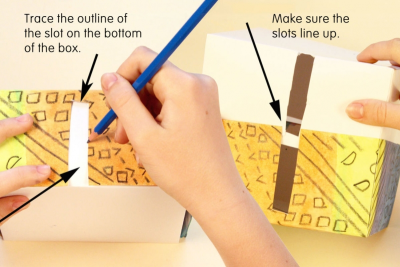
- Trace the outline of the slot onto the bottom of the box.
- Separate the box and cut out the slot.
- Put the box together making sure the slots line up.
- Tape the box together on the slot side and the side opposite it using clear tape.
9
- Glue the plastic lid to the top of the box.
- Create a pattern with embellishments and glue them around the outer edge of the plastic lid.
- Use the clock for reflection throughout the school year.
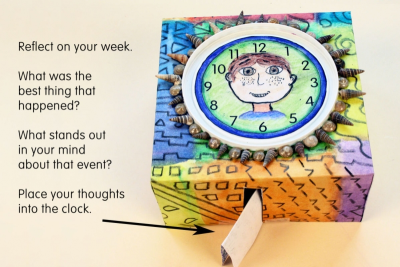
- At the end of each week reflect on the past 7 days.
- What was the best thing that happened?
- What stands out in your mind about that event? - Create a small, decorated note that includes the date and answers to these questions.
- Place the note into the clock.
10
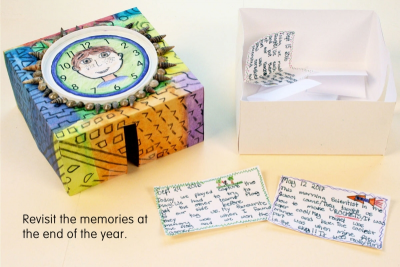
- Open the clock at the end of the year.
- Revisit the memories and think about the passage of time.
- Work with the notes you have written to create an artwork that represents the passage of time, for example,
- place the notes in chronological order
- share some of the reflections in small groups
- create a 'Memories' book with the notes as the pages
- use the notes in a personal collage
- create a short video using the notes as props - Share your artwork with the class.
Subjects:
Grades:
Grade 4,
Grade 5,
Grade 6,
Grade 7,
Grade 8