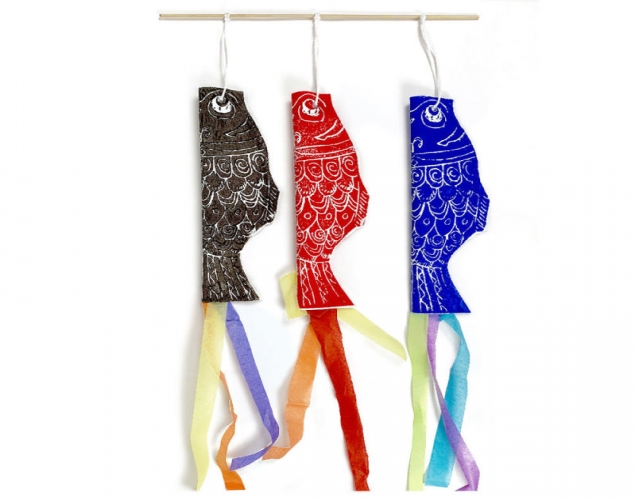
KOINOBORI - JAPANESE WINDSOCKS – Printmaking, PatternAs part of a study about Japanese culture and the Children's Day Festival students use a Styrofoam board and washable paint to make 3 prints of a Japanese inspired carp, and then use the prints to create a balanced hanging of 3 koinobori windsocks.
As part of a study about Japanese culture and the Children's Day Festival students use a Styrofoam board and washable paint to make 3 prints of a Japanese inspired carp, and then use the prints to create a balanced hanging of 3 koinobori windsocks.
Supplies:
- Crayola Washable Paint
- Crayola Marker & Watercolour Paper - 22.9 cm x 30.5 cm (9" x 12") - 3 pieces per student
- Crayola Washable No-Run Glue
- Crayola Scissors
- Tissue Paper - variety of colours
- Ball Point Pen - 1 per student
- Soft Paint Roller
- Plastic Tray
- Hole Punch
- Light Weight String
- Bamboo Skewers - 30.5 cm (12") long - 1 per student
- Old Magazines
- Newsprint or Newspaper
- Scratch-Foam Boards or Styrofoam Trays - 15.2 cm x 22.9 cm (6" x 9") - 1 per student
Steps:
1
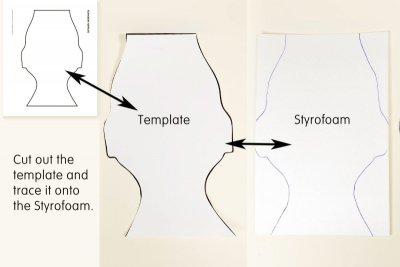
- Cut out the koinobori template. (Downloads - KoinoboriTemplate.pdf)
- Place the template on the Styrofoam.
- Use a ball point pen to trace around the template.
- Remove the template.
- Cut out the Styrofoam shape.
2
- Fold the template in half long end to long end.
- View the folded paper with the crease at the bottom.
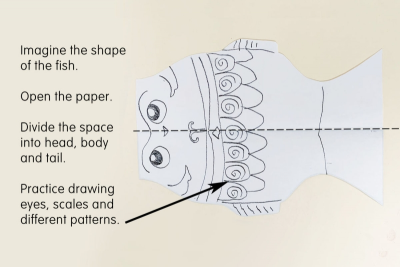
- Compare it to the image of the Japanese Windsock.
- Imagine the shape of the fish,
- fin at the top;
- tail at one end;
- big open mouth at the other end. - Open the paper.
- Divide the space into head, body and tail.
- Practice drawing eyes, scales and different patterns to decorate the fish.
3
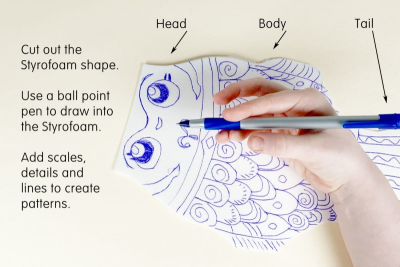
- Use your practice drawing as a guide.
- Draw into the Styrofoam shape using a ball point pen.
- Add scales, details and lines to create patterns.
- This is your printing plate.
4
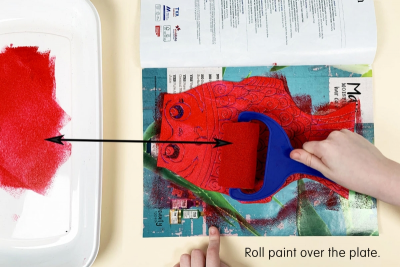
- Place the Styrofoam plate on a page of an open magazine.
- Pour some paint into a plastic tray.
- Gently roll the soft roller into the paint to cover the roller with paint.
- Roll the paint over the Styrofoam plate – this is calledinking the plate.
5
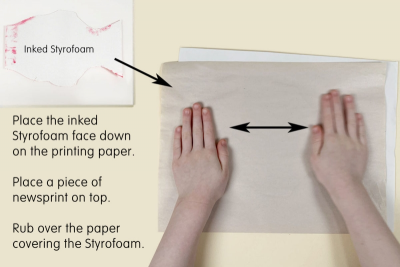
- Place a piece of printing paper on a stack of newsprint.
- Gently lift the inked plate off the magazine page.
- Place the inked Styrofoam plate face down on the printing paper.
- Place a piece of newsprint on top of the inked plate.
- Rub your hands, or a printmaking brayer, over the newsprint that is covering the Styrofoam plate.
- Press hard as you rub your hands over the entire plate.
- This will transfer the paint to the paper.
6
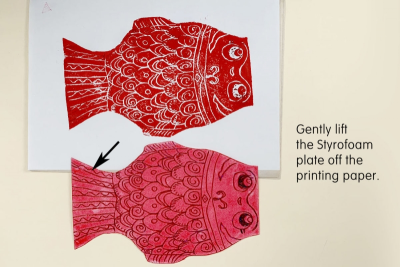
- Remove the newsprint.
- Gently lift the Styrofoam plate off the printing paper to see your print.
- Place it in a safe place to dry.
7

- Cut out the print.
- Fold the fish in half long end to long end.
- Place the paper with the print side facing down.
- Glue strips of tissue paper to the end of the tail.
- Apply glue to the outer edge of half the fish.
- Do NOT put glue along the mouth end.
8
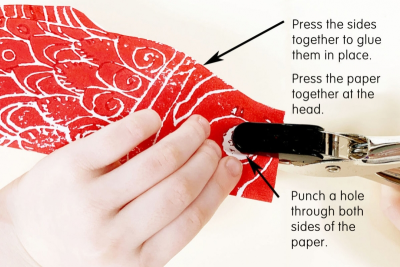
- Press the sides together to glue them in place.
- Press the paper together at the head.
- Use a hole punch to punch a hole through both sides of the paper.
9
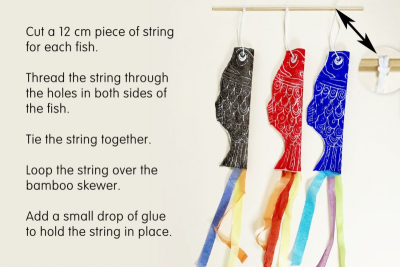
- Cut a 12 cm piece of string for each fish.
- Thread the string through the holes on both sides of the fish.
- Tie the string together.
- Loop the string over the bamboo skewer.
- Space the fish out so they are balanced.
- Add a small drop of glue where the string and bamboo skewer meet to hold the string in place.
Subjects:
Language Arts,
Mathematics,
Social Studies,
Visual Arts
Grades:
Grade 1,
Grade 2,
Grade 3,
Grade 4,
Grade 5,
Grade 6