
Supplies:
- Crayola Air Dry Clay
- Crayola Acrylic Paint
- Crayola Paint Brushes
- Flat Wooden Slats .5 cm thick - 2 per group
- Rolling Pins - 1 per group
- Small Bowls - 1 per student
- Water Containers
- Paper Towels
- Fresh Leaves
- Plastic Wrap
- Large Plastic Container Lids - about 15 cm (6") diameter - several per group
Steps:
1

- Set up stations for rolling out clay slabs - one per group of students.
- Tape a sheet of wax paper on desk.
- Tape a wooden slat on each side of the wax paper.
- Place a rolling pin at each station.
2
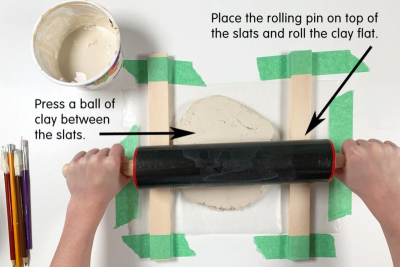
- Press a ball of clay between the wooden slats.
- Place the rolling pin on top of the wooden slats and roll the clay flat.
- Make sure the slab has uniform thickness.
- Roll the clay slab big enough for the circle you plan to use - about 15 cm (6") diameter.
3
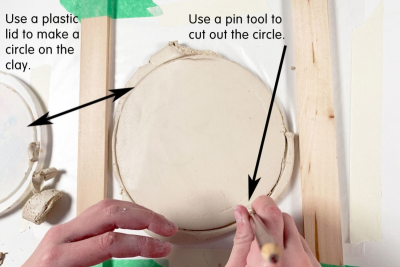
- Use a large plastic container lid to make a circle on the clay slab.
- Use a pin tool or plastic knife to cut out the circle.
4
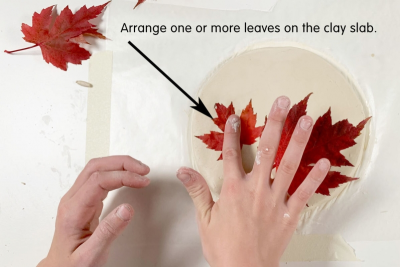
- Move the clay slab to a fresh piece of wax paper that has been taped to the desk.
- This will help you remove the clay from the table when you are finished. - Arrange one or more leaves on the clay slab.
- Make sure the leaves are still soft.
5
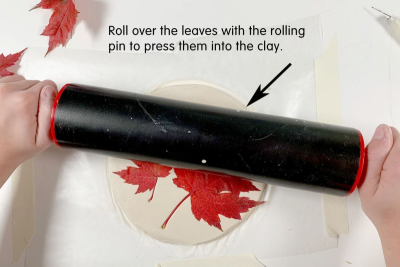
- Roll over the leaves with the rolling pin to press them into the clay.
- Gently remove the leaves.
6
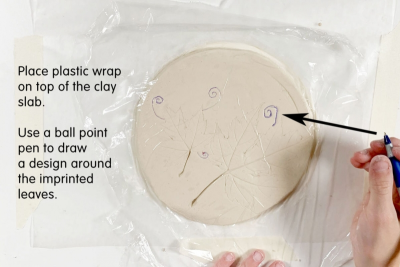
- Place plastic wrap on top of the clay slab.
- Make sure it is flat and smooth.
- Use a ball point pen to draw a design in the clay around the imprinted leaves.
- Remove the plastic wrap when you are finished.
7
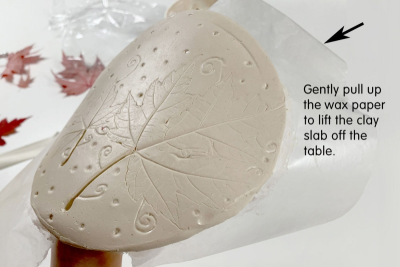
- Remove the tape from the wax paper.
- Gently pull up the wax paper to lift the clay slab off the table.
- Remove the wax paper from the back of the clay.
8
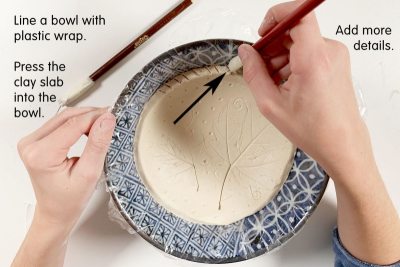
- Line a bowl with plastic wrap.
- Gently press the clay slab into the bowl.
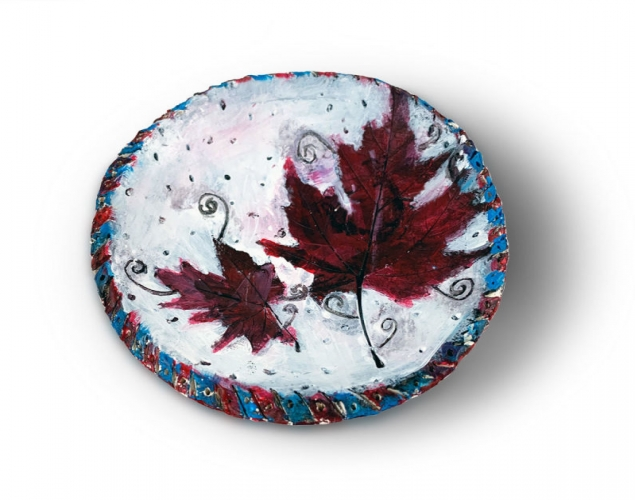
- Add more details to the rim.
- Allow the clay to dry for one week.
9
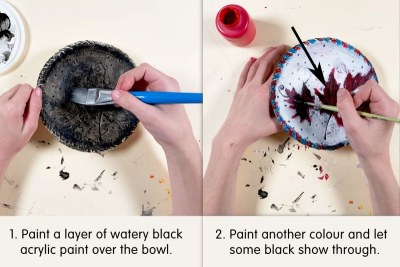
- Paint a layer of watery black acrylic paint over the bowl.
- Allow it to dry thoroughly.
- Paint another watery acrylic colour over the black paint.
- Allow some of the black paint to show through.
- Paint the back of the bowl too.
Subjects:
Language Arts,
Science,
Social Studies,
Visual Arts
Grades:
Grade 4,
Grade 5,
Grade 6,
Grade 7,
Grade 8