Supplies:
- Crayola Model Magic - Assorted Colours
- Crayola Washable No-Run School Glue
- Crayola Scissors
- Crayola Glitter Glue
- Paint Stir Sticks - 1 per student
- Googly Eyes and Other Embellishments
- Pipe Cleaners - 3 per student
- Ribbon
- Bamboo Skewers - 30.5 cm (12") long - 2 per student
- Felt Pieces - 22.9 cm x 30.5 cm (9" x 12") - 1 per student
Steps:
1
- Mix Model Magic colours together to get the colour you need for the head of your puppet.
- For example, to make brown mix red, yellow and blue together. - You need to mix an amount about the size of a tennis ball in order to have enough to make the head and hands.
- Place some of the mixed Model Magic aside and roll the rest into a ball.
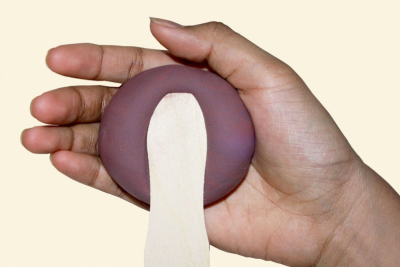
- Hold the ball in the palm of your hand and place the paint stir stick on top of it.
- Make sure the stick covers the whole ball.
2
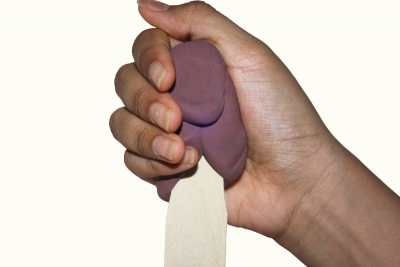
- Wrap the Model Magic around the stick.
- Form the head.
- Add enough details to give the puppet a personality.
- Stick pieces of Model Magic to the head for things like ears and hair.
- Press things like buttons and googly eyes into the Model Magic to make them stick.
3

- Choose a piece of felt for the body of the puppet.
- Fold it in half, short end to short end.
- Place the dress pattern on top of the felt.
- Make sure the top of the pattern is along the fold. Cut out the dress.
- Remember to cut out the small opening at the top of the dress.
4
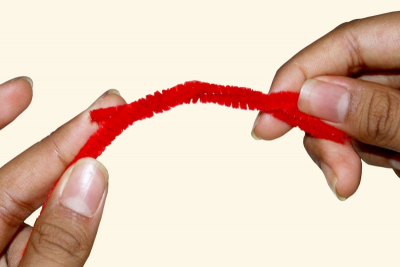
- Choose two pipe cleaners to use for the arms.
- Make an X with the two ends.
- Twist them together to make one long pipe cleaner.
5
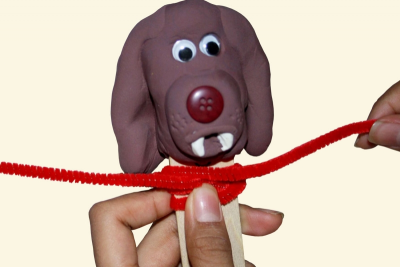
- Wrap the long pipe cleaner around the paint stick just below the chin of the head you created.
- Pull it tight.
- Make sure the arms are the same length on both sides of the puppet.
6

- Slip the dress onto the stick FROM THE BOTTOM.
- DO NOT try to put it over the head.
- Fold the arms down along the stick.
- Gently insert the stick and arms into the opening at the top of the dress.
- Pull the felt dress up the stick making sure the arms are inside.
7
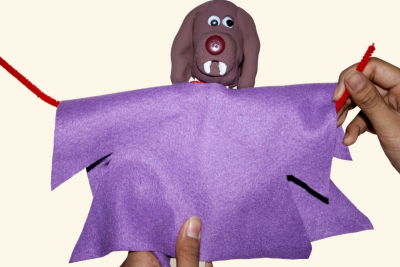
- Once the dress is in place, pull the pipe cleaners up and out to form the arms.
- Tie a ribbon or pipe cleaner around the waist to hold the dress in place.
8
- Set the puppet aside.
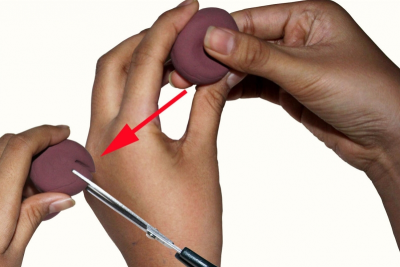
- To make the hands, roll two balls of Model Magic the same size.
- Gently flatten the balls and use scissors to make 4 cuts for fingers along one edge.
9
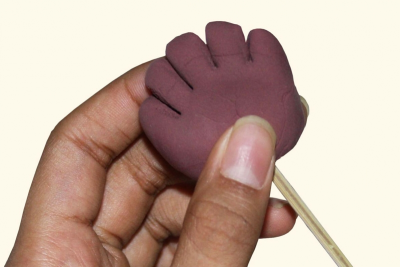
- Stick the skewer into the hand.
- Make sure it goes in as far as possible.
- Gently pinch the bottom of the hand to secure it to the stick. Round the fingers and add details.
10
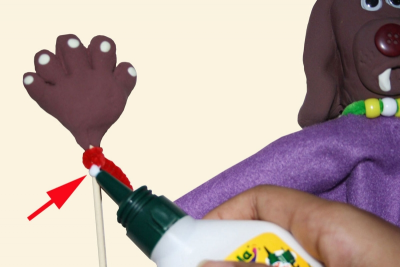
- Attach the end of the pipe cleaner to the skewer close to the bottom of the hand.
- Put a small amount of glue around the edge of the pipe cleaner.
- Repeat for the other hand.
11
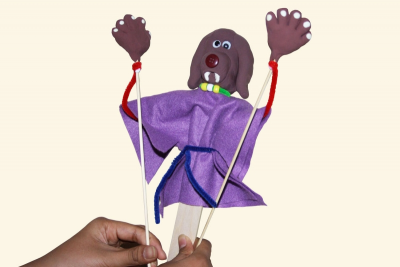
- Allow the puppet to dry for 2 days.
- When it is dry use your puppet to tell a story.
- Move the hands by holding the stick and one skewer in one hand, and holding the opposite skewer in your other hand.
Subjects:
Language Arts,
Visual Arts
Grades:
Grade 2,
Grade 3,
Grade 4,
Grade 5,
Grade 6,
Grade 7,
Grade 8