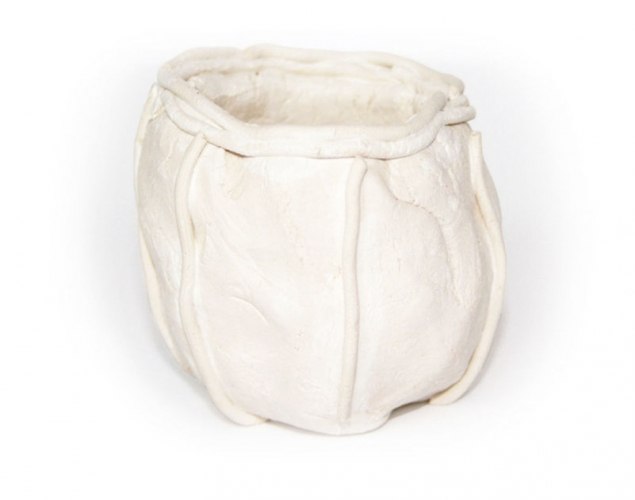
Supplies:
- Slip
- Toothbrush
- Plastic Placemat
- Paper Towels
- Crayola® Air Dry Clay 1.13 kg white
Steps:
1
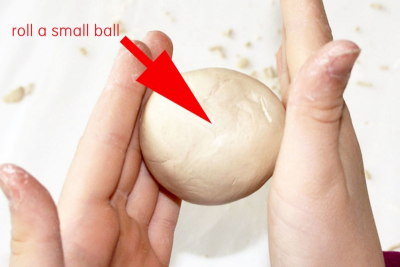
- Roll a small ball of clay about the size of a clementine orange.
2
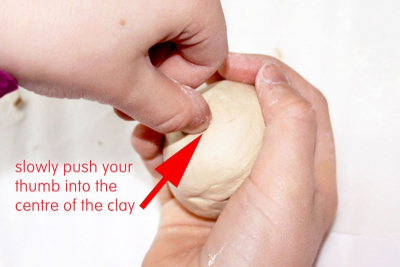
- Hold the ball in one hand.
- Slowly push your thumb into the centre of the clay.
3
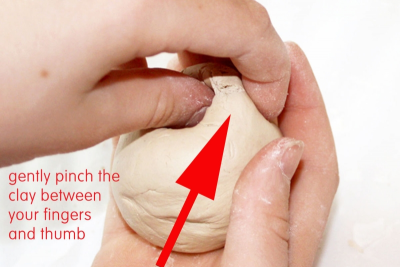
- Gently pinch the clay between your thumb on the inside, and your fingers on the outside while slowly turning the ball of clay in your hand.
4

- Apply even pressure as you turn the clay.
- Check to see that the clay is the same thickness on the walls and rim of the pot.
5
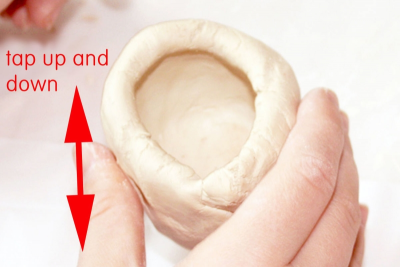
- Gently tap the pot on the table to make a flat base.
6
DECORATE THE POT
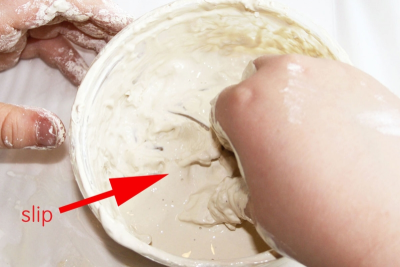
- Make some SLIP by mixing some clay with water until it is like a creamy milkshake.
7
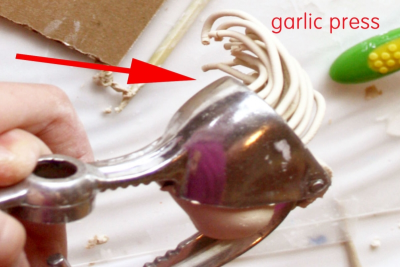
- Place a small piece of clay into a garlic press and squeeze it out.
- Use the clay strings to decorate your pinch pot.
8
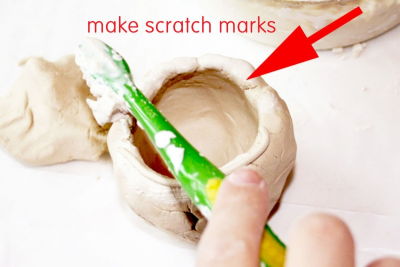
- Use a toothbrush to make some scratch marks where you want to add clay.
- This is called SCORING the clay.
- Use the toothbrush or your fingers to add some slip to the score marks.
9
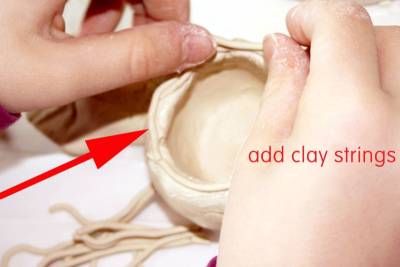
- Place the clay string on top of the scored clay.
- Gently press it into the clay.
- Be sure it is securely fastened.
- Continue in this way until you are satisfied with your design.
10

- Allow the pinch pot to dry for about 5 days.
- Your pot is ready to be painted.
Subjects:
Grades:
Grade 1,
Grade 2,
Grade 3,
Grade 4,
Grade 5,
Grade 6,
Grade 7,
Grade 8