Supplies:
- Crayola Washable No-Run School Glue
- Crayola Scissors
- Crayola Washable Project Paint - Green
- Crayola Paint Brush Set - 5 Count
- Crayola Construction Paper - 22.9 cm x 30.5 cm (9" x 12")
- Crayola Glitter Glue
- Crayola Broad Line Markers - 8 Count
- Paper Lunch Bags - 1 per student
- Water Containers
- Paper Towels
- Index Cards - 4 per student
- Pencils
- Heavy Weight Paper - 21.5 cm x 27.9 cm cm (4 ¼" x 5 ½") per student
Steps:
1
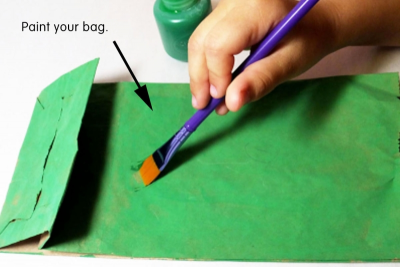
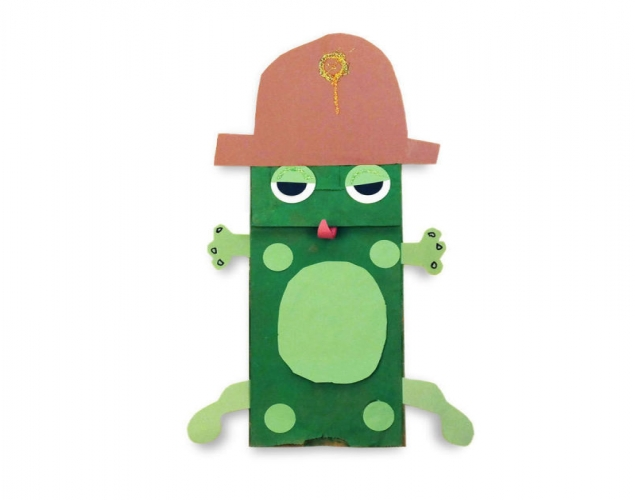
- Paint the bag green.
2
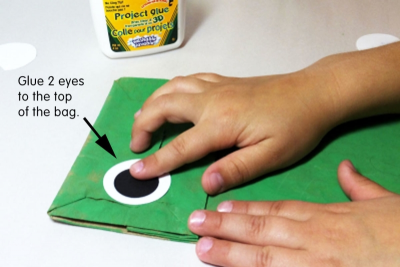
- Cut out two large circles for outside of the eyes.
- Cut out two smaller circles and place them inside the larger circles.
- Use glue to attach both circles together.
- Add both eyes to the top of the paper bag.
3
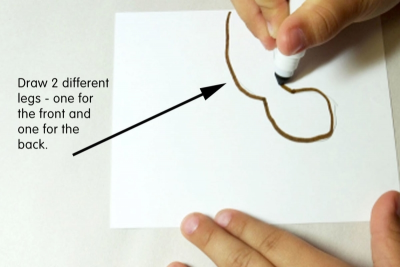
- Use heavier paper to make stencils for the legs.
- Draw two different legs, one for the front and one for the back.
- Cut them out.
4
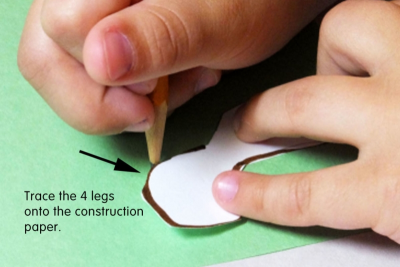
- Use the stencils to trace the four legs onto the construction paper.
- Cut out the legs.
5
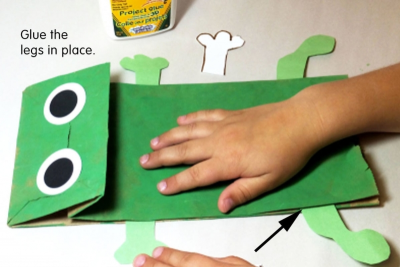
- Put glue on the edge of the legs.
- Glue all four legs in place on the back of the painted side of the bag.
6
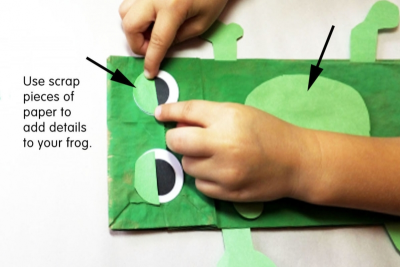
- Use scrap pieces of construction paper to add details to your frog.
- Use contrasting colours so the details will stand out.
- Cut out a circle a little bigger than the frog's eyes.
- Cut the circle in half to make two semi-circles for the eyelids.
- Try to make both eyelids equal.
- Glue the semi-circles on top of the eyes to make eyelids.
7
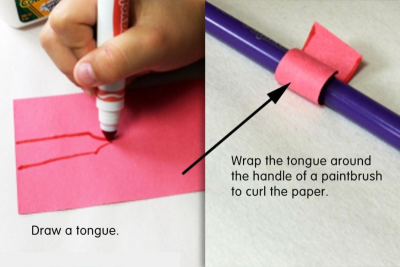
- Draw a tongue.
- Remember frogs like to catch insects that fly.
- Wrap the paper tongue around the handle of a paintbrush to curl the paper.
8
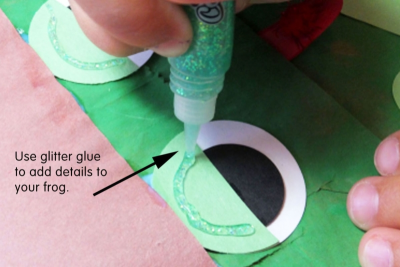
- Use glitter glue to add special details to your frog.
- Your frog puppet is now ready for you to use when you share the life cycle of a frog with your class.
9
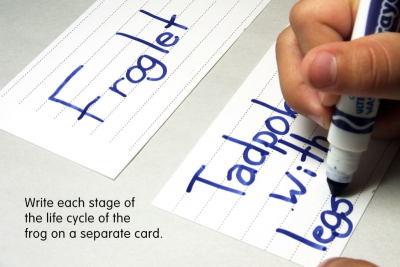
- Write each stage of the life cycle of the frog on a separate file card.
- Draw a picture to go with your writing.
10
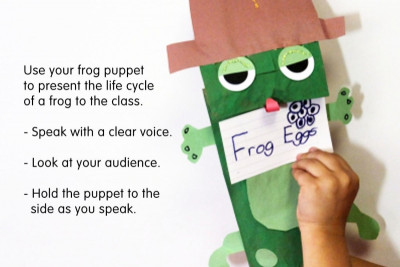
- Use your puppet to present the life cycle of the frog to the class.
- Work with a partner to practice reporting. Remember to:
- Speak with a clear voice
- Look at your audience
- Hold the puppet to the side so you are facing the audience
Subjects:
Grades:
Kindergarten,
Grade 1,
Grade 2,
Grade 3