Supplies:
- Crayola Marker & Watercolour Paper - 22.9 cm x 30.5 cm (9" x 12")
- Crayola Crayons - 24 count
- Rulers
- Pencils
- Toothpicks
- Tissues
Steps:
1

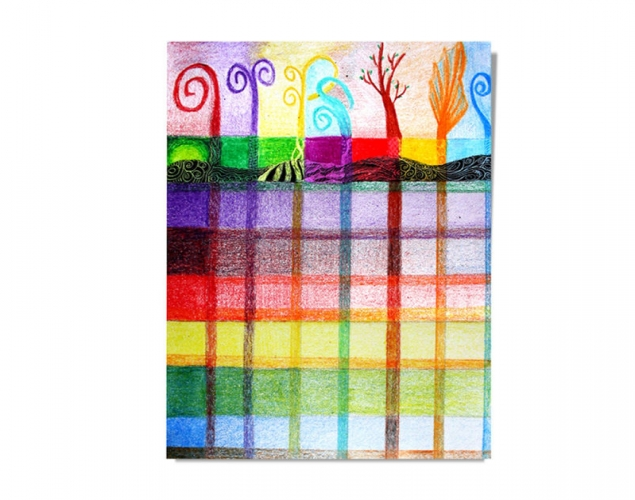
- Divide your paper into a grid.
- Use the width of your ruler for the width of each box.
- Colour the outside box in the bottom row blue.
- Continue to fill in each box in that row.
- Change the pressure so the colour gradually goes from dark to light.
- This is called gradation.
2
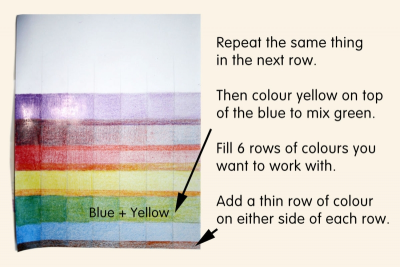
- Repeat the same thing in the next row.
- Once the blue is done, apply yellow on top of the blue.
- Notice what happens to the colour.
- Continue in this way choosing colours that you like to work with.
- Fill 6 rows of colour.
- Next add a thin strip of colour on either side of the rows.
- See what happens when you colour a contrasting colour on top of the original colour.
3
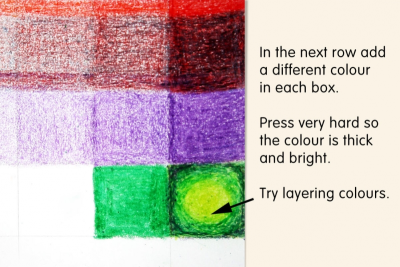
- In the last row add a different colour in each box.
- Press very hard so the colour is thick and bright.
- Try layering contrasting colours.
4
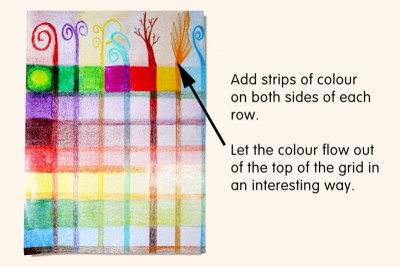
- Now start adding thin strips on either side of each row like you did before.
- Use colours that you like to work with.
- Notice what happens as the same colour mixes with each new colour.
- Let the colour flow out the top of the grid in some interesting way.
- This will help you to remember what colour is on top of each row.
5
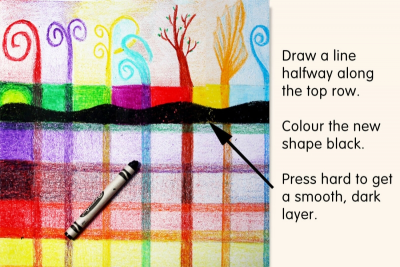
- Use a black crayon to draw a line halfway along the top row – the last row you coloured.
- Colout the new shape black.
- Colour right over top of the other colours.
- Press hard so you get a smooth, dark black layer.
6
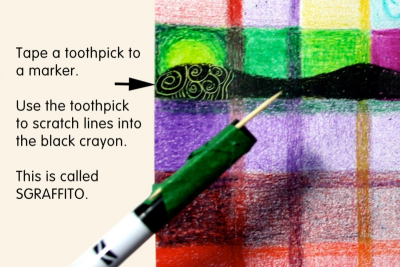
- Tape a toothpick to the end of a marker to make a scratch tool.
- This will make it easier to draw with.
- Use the toothpick to scratch lines into the black crayon.
- This technique is called sgraffito.
- You can polish the finished drawing by rubbing it lightly with a tissue.
7
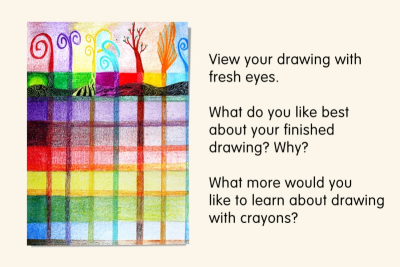
- View your drawing with fresh eyes.
- What do you like best about your finished drawing? Why?
- What more would you like to learn about drawing with crayons?
Subjects:
Grades:
Grade 3,
Grade 4,
Grade 5,
Grade 6,
Grade 7,
Grade 8,
Grade 9