Supplies:
- Crayola Broad Tip Markers, 16 Count
- Crayola Washable Glue Sticks
- Small Envelopes - 5 per student
- Small Pieces of Sponge, 3 cm x 3 cm (2" x 2") - 1 per student
- Water Containers
- Paper Towels
- Overhead Transparencies or Poly File Folders
- Masking Tape
- Ribbon
Steps:
1
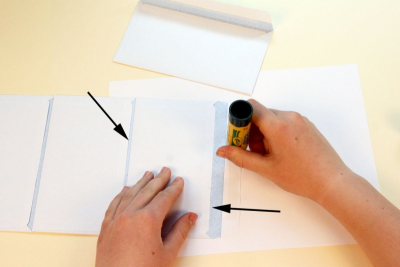
- Spread glue on the inside flap of one envelope.
- Make sure the glue goes over the whole flap and stops at the crease.
- Hold another envelope front side facing down.
- Place it onto the glued flap so that it lines up with the crease.
- Glue all 5 envelopes together.
2
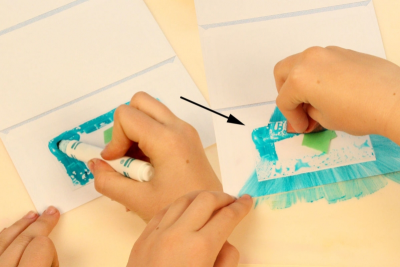
- Tape the small piece of plastic to the back of one of the envelopes.
- Draw lots of colour on the plastic with the flat side of the marker.
- Wet the sponge with a small amount of water and then squeeze most of the water out.
- Drag the dampened sponge through the marker and onto the envelope.
- Continue in this way until the whole envelope is filled with colour.
3
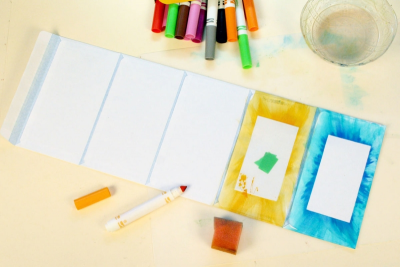
- Gently remove the plastic from the envelope.
- You have made a stencil print.
- Continue in this way until all the envelopes are filled with colour.
4
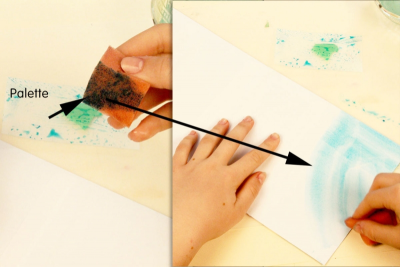
- Turn the envelopes over.
- Use the small piece of plastic as a palette.
- Draw lots of marker onto the plastic.
- Dampen a sponge and dab it into the marker ink.
- Paint the envelopes with the sponge.
- Use lots of different colours.
5
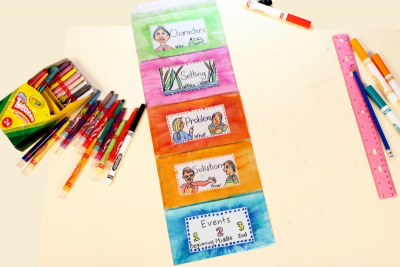
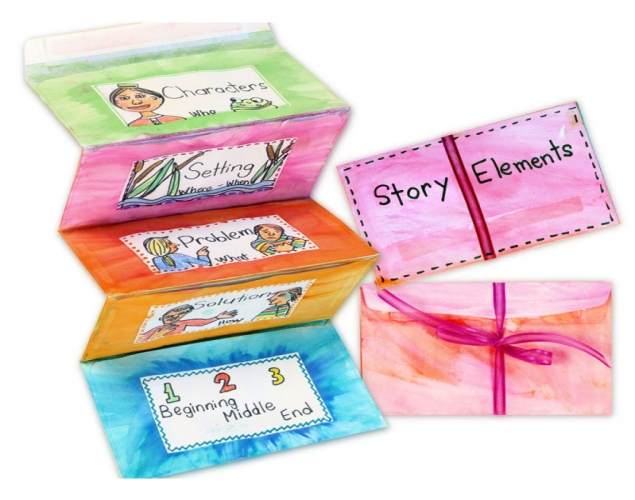
- Write the title of a different story element on each envelope.
- Characters
- Setting
- Problem
- Solution
- Events - Use line and colour to draw a picture that illustrates each element.
- Frame each rectangle with a different border pattern.
6
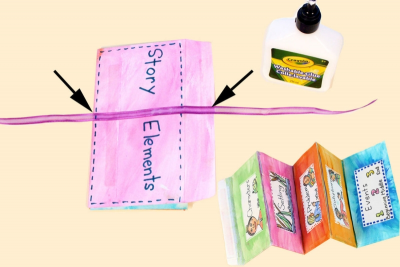
- Fold the pages accordion style.
- Make the first envelope with the flap the cover of your book.
- Cut a piece of ribbon long enough to wrap around the folded stack of envelopes and across the flap.
- Glue the ribbon across the top envelope and flap at right angles to the bottom of the envelope.
7
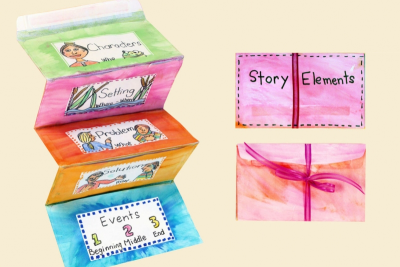
- Use the ribbon to tie the book together.
- Place written information about your stories inside each envelope.
Subjects:
Grades:
Grade 3,
Grade 4,
Grade 5,
Grade 6