Supplies:
- Crayola Washable Paint
- Crayola Scissors
- Crayola Paint Brushes
- Crayola Construction Paper
- Crayola Marker & Watercolour Paper - 22.9 cm x 30.5 cm (9" x 12")
- Crayola Washable Glue Sticks
- Water Containers
- Paper Towels
- Heavy White Paper - 45.7 cm x 61 cm (18" x 24")
- Description of the Traditional Cree Calendar (Included)
Steps:
1
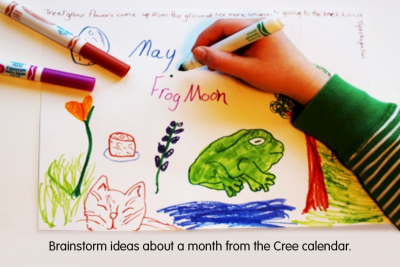
- Choose a month from the Cree Calendar.
- Imagine the changes, cycles, and patterns in nature occurring in this month.
- Using a variety of colours, brainstorm ideas about the month you have chosen in words and pictures.
- Record your ideas in your sketchbook or on a blank piece of paper.
2

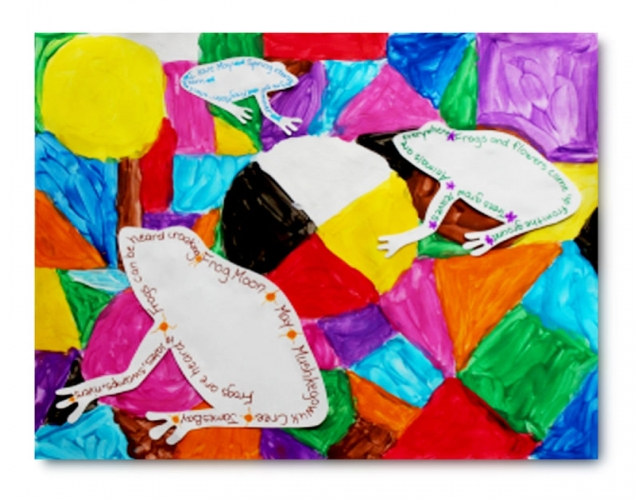
- Create a background for your chosen month.
- Use a pencil and ruler to make interesting patterns from geometric shapes
- Use a variety of colours to paint each shape.
- Make sure different colours are used on each shape creating contrast.
3
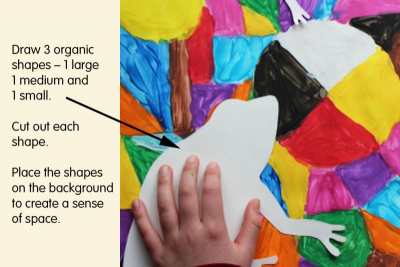
- Draw an organic shape of an animal or plant included in the brainstorming activity on construction paper or heavier white paper.
- Draw the shape 3 times – one large, one medium, and one small.
- Cut out each shape.
- Place the shapes on the painted geometric background.
- Move the shapes around to create a sense of space.
- large in the foreground
- medium in the middle ground
- small in the background
4
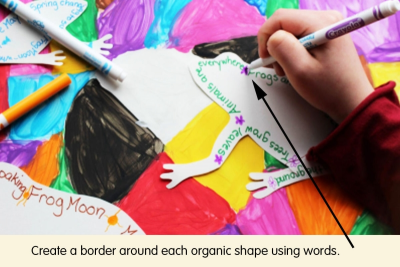
- Create a border around each organic shape by using words to describe the:
- Cree calendar month
- changes and cycles you notice taking place during the month
- the things you love about this time of year - Use warm colours to write on the large organic shape.
- Use cooler colours on the two smaller organic shapes to show that you are moving back in space.
- Draw small symbols or images to mark the end of a thought or feeling, creating a pattern of words and symbols.
5
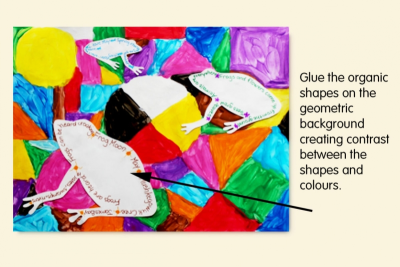
- Place the organic shapes on the painted geometric background creating contrast between the shapes and colours.
- Glue the shapes to the painted background.
Subjects:
Grades:
Grade 4,
Grade 5,
Grade 6