Supplies:
- Crayola Washable Glue Sticks
- Crayola Construction Paper - 22.9 cm x 30.5 cm (9" x 12") - 2 pieces per student
- Crayola Marker & Watercolour Paper - 22.9 cm x 30.5 cm (9" x 12") - 6 pieces per student
- Crayola Scissors
- Waxed Dental Floss
- Sharp Sewing Needle - 1 per student
- Rulers
- Duct Tape
- Large Paper Clips - 4 per student
- Corrugated Cardboard - 22.9 cm x 30.5 cm (9" x 12") - 2 pieces per student
Steps:
1
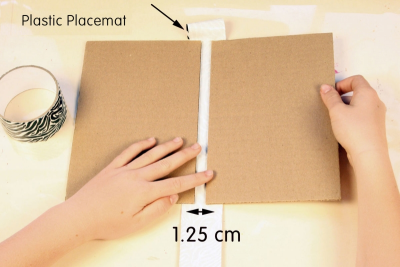
- Work on a plastic placemat or smooth table.
- Cut a piece of duct tape twice the length of the cardboard.
- Roll one end of the tape under itself and stick it to the plastic placemat.
- Visualize a vertical line running from top to bottom in the middle of the tape.
- Place the 2 pieces of corrugated cardboard on top of the tape so that they are beside each other on either side of the centre line, and with a space about 1.25 cm between them.
2
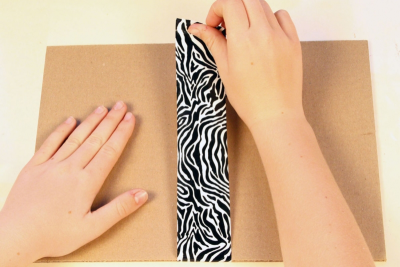
- Tape the cardboard pieces together so that the tape wraps around both sides of the cardboard.
3
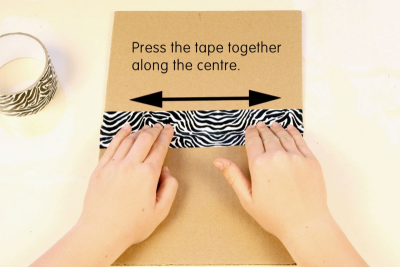
- Press the tape together along the centre.
- This will be the spine of the book.
4
- Stack the white paper onto the 2 sheets of coloured construction paper (these will be the endpapers).
- Fold the pile of papers in half short end to short end.
- Open the papers and paper clip the pile together.
- Place the clips on either side of the fold, top and bottom.
- Place the pile of papers on the desk with the construction paper facing up.
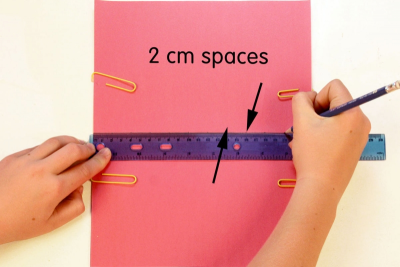
- Draw a line along the fold.
- Use a ruler to mark off 2 cm spaces along the line.
- Be sure you are working on the construction paper side.
- Be sure these marks are exactly on the line.
5
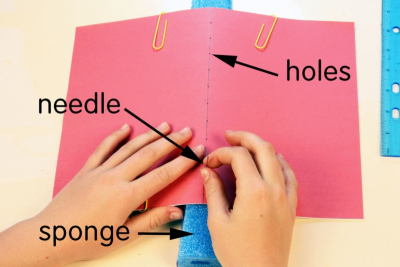
- Place the pile of papers on top of a piece of thick sponge.
- Use a sharp darning needle to poke holes through the paper at the 2 cm marks.
6
- Thread your needle with a piece of waxed dental floss about twice as long as the width of the pages.
- Push the needle through the bottom hole on the construction paper side.
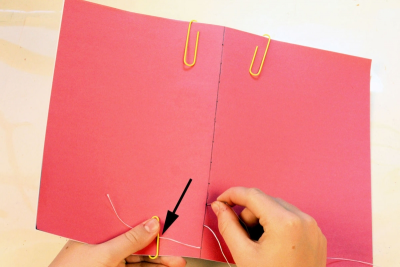
- Hook the end of the dental floss under the paper clip.
- Sew a running stitch in and out of the holes until you reach the last hole at the top of the paper.
7
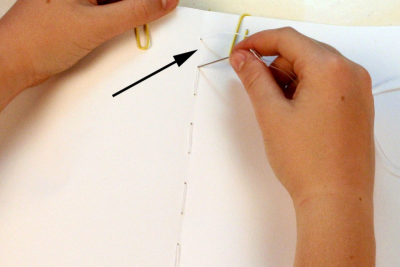
- Flip the papers over
- Sew a running stitch in and out of the holes until you reach the bottom.
- Stop sewing when the last stitch at the bottom is on the coloured construction side of the papers.
8
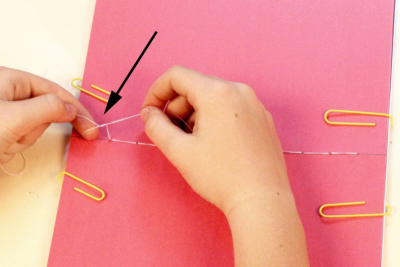
- Tie the 2 ends of the dental floss together.
- Press the ends along the sewn line and towards the centre of the pages.
9
- Place the papers on your desk with the construction paper facing up.
- The stitching line is the centre of the paper and the line of symmetry.
- Completely cover one half of the construction paper with glue.
- Make sure you do not leave any dry spots.
10
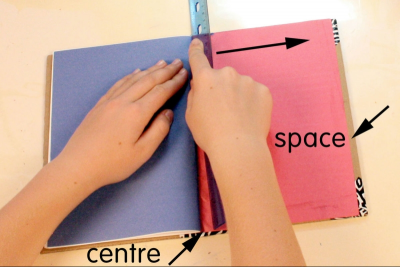
- Place the pages on the inside of the corrugated cardboard.
- Make sure the fold is on the centre of the taped spine.
- Carefully flatten the endpaper using a ruler to smooth away any bubbles.
- Start at the centre of the book and work your way out to the edges.
- There will be a space at the side of the book where the coloured paper does not cover the cardboard.
- Repeat this process on the other side of the pages.
11
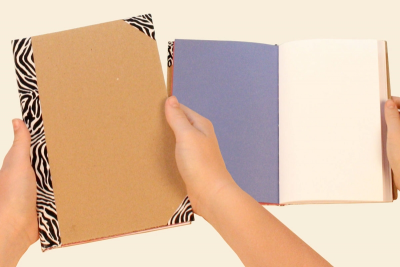
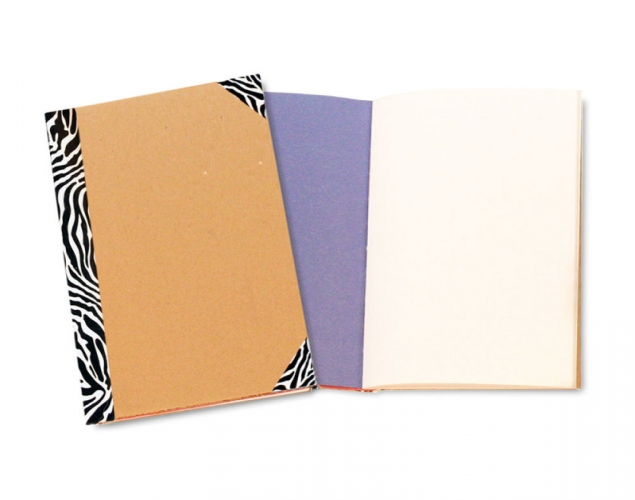
- Your book is ready to use.
Subjects:
Grades:
Grade 2,
Grade 3,
Grade 4,
Grade 5,
Grade 6,
Grade 7,
Grade 8,
Grade 9,
Grade 10