Supplies:
- Crayola Marker & Watercolour Pad, 60 Pages
- Crayola Crayons, 24 Count
- Crayola Scissors
- Crayola Washable Glue Stick
- Crayola Fine Line Markers
- Crayola Construction Paper - Assorted Colours - 22.9 cm x 30.5 cm (9" x 12")
- Rulers
- Pencils
Steps:
1
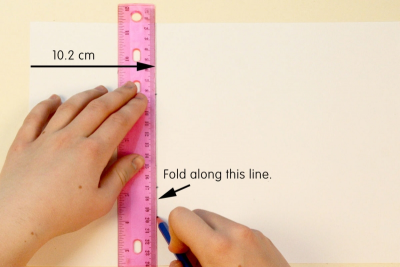
- Measure in 10.2 cm (4") from the short end of the paper.
- Lightly draw a line through the 10.2 cm mark and parallel to the short end of the paper.
- Fold the paper along this line.
- Accordion fold the rest of the paper so that each fold is the same size as the first one.
- There should be 2 folds and 3 sections on the paper. - Repeat this on 2 more papers.
2
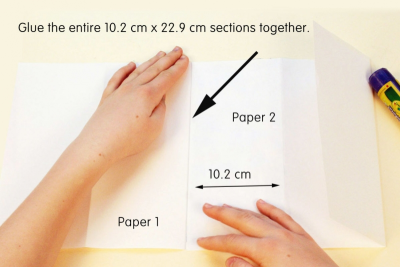
- Glue the papers together overlapping the end sections of each paper.
- Be sure to glue the entire 10.2 cm x 22.9 cm section of one paper to the 10.2 cm x 22.9 cm section of the other piece of paper. - The paper should be 71.4 cm (28") long when you have finished gluing the 3 papers together.
3
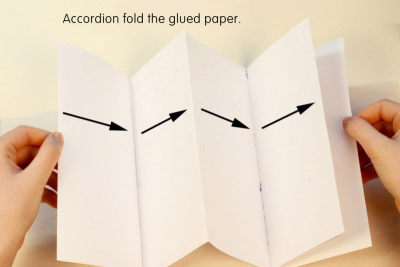
- Accordion fold the glued papers.
- Make crisp folds and be sure all the edges line up.
- There should be 7 sections.
4
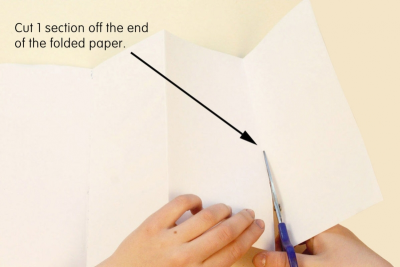
- Cut one section off the end of the folded paper.
- There should be 6 sections left.
5
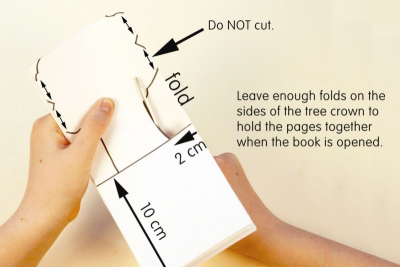
- Measure 10 cm up from the bottom of the folded paper.
- Draw a line through the 10 cm mark and parallel to the short end of the folded paper.
- Measure in 2 cm from both ends of the line and mark the spots.
- Start the trunk of your tree at the 2 cm spots.
- Draw the trunk about half way up the paper then draw the crown of the tree.
- Make sure you leave enough folds on the sides of the tree crown to hold the pages together when the book is opened.
- Cut away the negative shapes from the tree drawing.
6
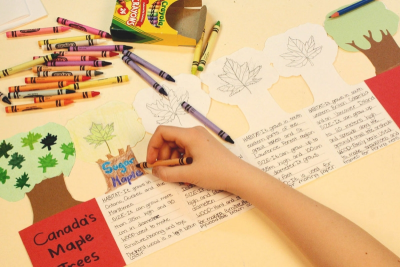
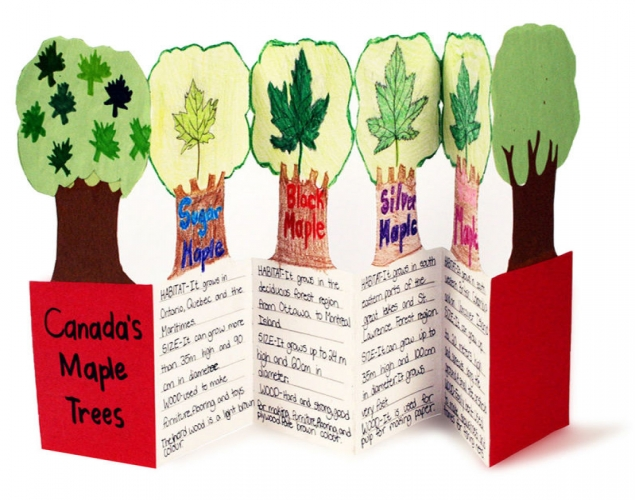
- Use construction paper to make a cover for the front and back of the book.
- Use a separate page for each tree.
- Include:
- the name of tree
- a drawing of its leaf
- written information about the tree - Use the front and back of the book.
- There should be 10 different maple trees.
Subjects:
Language Arts,
Mathematics,
Science,
Visual Arts
Grades:
Grade 3,
Grade 4,
Grade 5,
Grade 6