Supplies:
- Crayola Crayons - 24 Count
- Cardstock Paper - 12.7 cm x 12.7 cm (5" x 5") - 2 pieces per student
- Toothpicks
- Pencils
Steps:
1
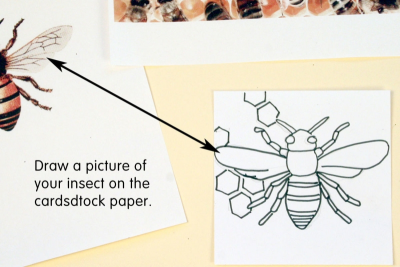
- Find pictures of the insect you want to draw.
- Use the picture as a guide to draw the insect on the cardstock paper.
- Add a few details in the background.
2
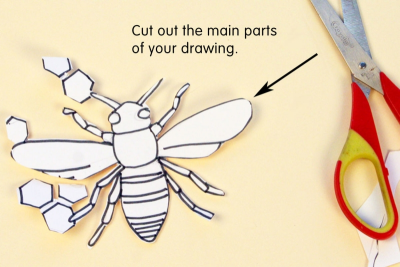
- Cut out the main parts of your drawing.
- Place the cut-out on a piece of cardstock paper.
- Trace around it.
3
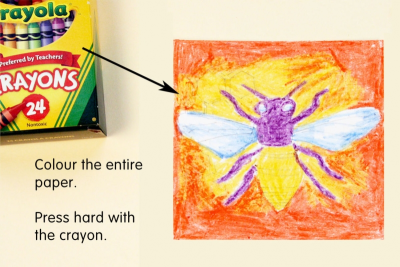
- Colour the entire paper with different colours of crayon.
- Press hard to cover the paper with a thick layer of wax colour.
4
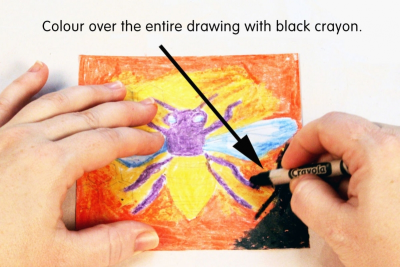
- Place your drawing on a piece of newsprint paper.
- Cover the entire drawing with black crayon.
- Press hard and colour in different directions overlapping the colour as you go.
- Use a tissue to brush the small bits of crayon onto the newsprint as you work.
5
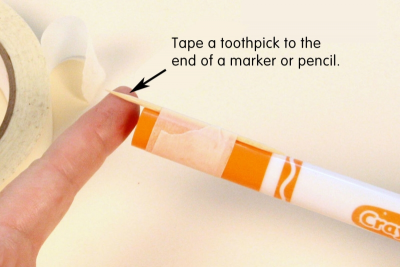
- Tape a wooden toothpick to the end of a marker.
- Leave about 1.5 cm extending past the end of the marker.
6
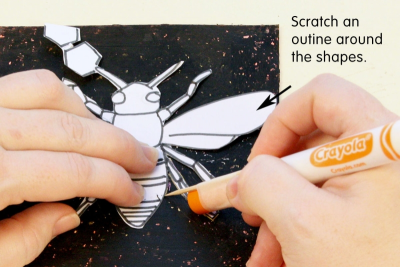
- Place the cutout drawing on top of the black crayoned paper.
- Use the toothpick tool to scratch an outline around the shapes.
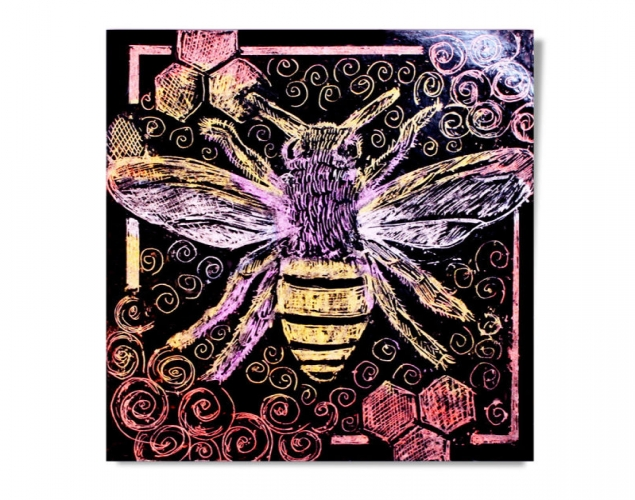
7
- Scratch different patterns into the surface.
- Use line and shape to create contrast and rhythm.
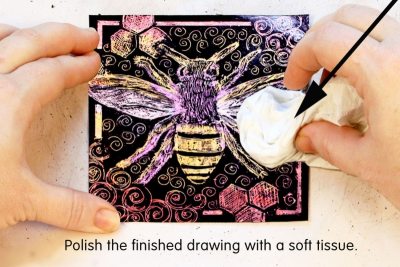
- Polish the finished drawing with a soft tissue.
8
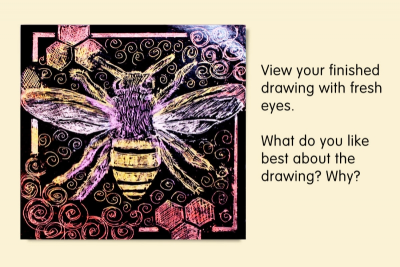
- View the finished drawing with fresh eyes.
- Are there spots that need attention?
- Have you used different lines and shapes to create patterns?
- Does the insect stand out against the background?
- Do the colours and patterns move your eye through the composition?
- Does the design suggest the energy of the insect?
- Does the surface shine?
- Is the paper in good condition?
- What do you like best about your drawing? Why?
Subjects:
Language Arts,
Science,
Visual Arts
Grades:
Grade 4,
Grade 5,
Grade 6,
Grade 7,
Grade 8,
Grade 9