Supplies:
- Crayola Tempera Paint
- Crayola Paint Brushes
- Crayola Glue Sticks
- Crayola Scissors
- Crayola Painting Paper - 22.9 cm x 30.5 cm (9" x 12")
- Crayola Construction Paper
- Paper Towels
- Water Containers
Steps:
1
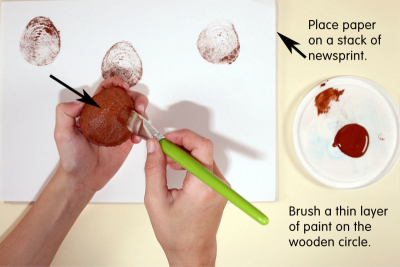
- Place the paper on a stack of newsprint or newspaper to cushion it.
- Brush a thin layer of paint on the wooden circle.
- Press the wooden circle onto the paper and press hard.
- Lift it up to see your print.
- It should have crisp edges and clear woodgrain texture.
- Practice making some prints to find the right amount of paint and pressure needed to make a good clean print.
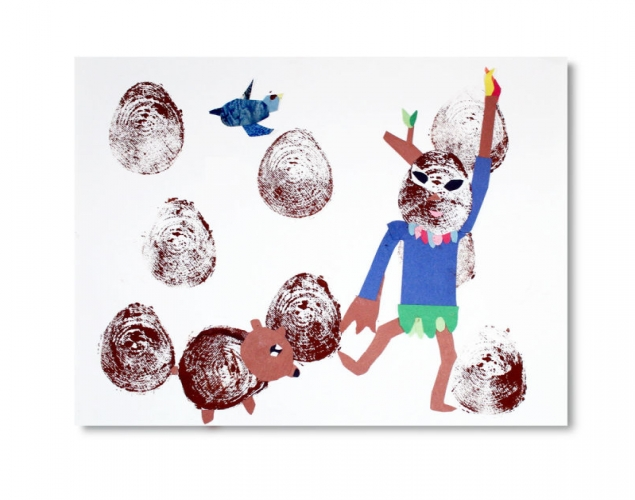
2
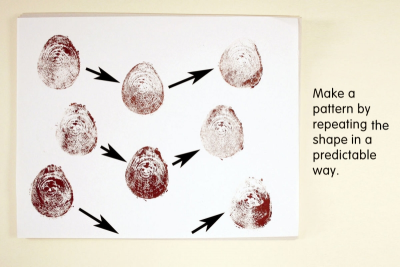
- Make a pattern by repeating the shape in a predictable way.
3
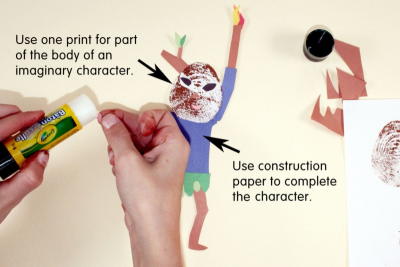
- Imagine characters that might live in the woods.
- Use one print for part of the body of an imaginary character, e.g., the head.
- Use construction paper to complete the character.
4
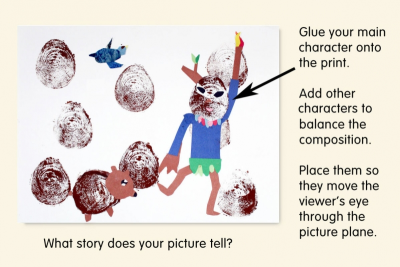
- Glue your main character onto the printed pattern.
- Add other characters to balance the composition.
- Place them so they move the viewer's eye through the picture plane.
- View the finished picture with fresh eyes.
- What story does it tell?
Subjects:
Language Arts,
Mathematics,
Science,
Visual Arts
Grades:
Grade 4,
Grade 5,
Grade 6