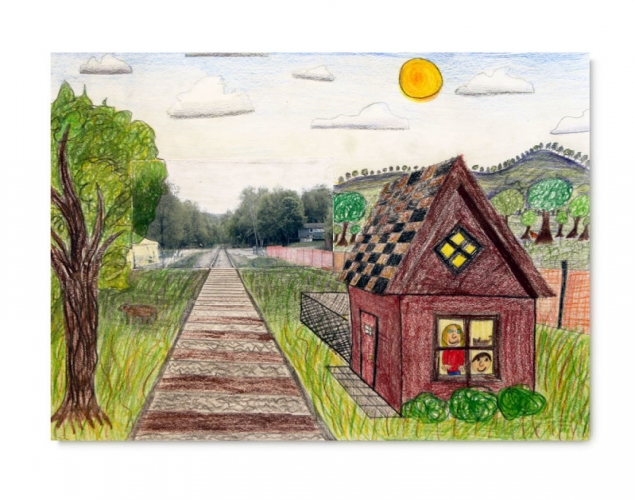
ALL ABOARD! – One-Point Perspective, Space, ColourStudents create a one-point perspective drawing and use coloured pencil techniques to create the illusion of depth.
Students create a one-point perspective drawing and use coloured pencil techniques to create the illusion of depth.
Supplies:
- Crayola Coloured Pencils - 24 Count
- Crayola Marker & Watercolour Paper - 22.9 cm x 30.5 cm (9" x 12")
- Crayola Washable Glue Sticks
- Pencils
- Erasers
- Rulers
Steps:
1
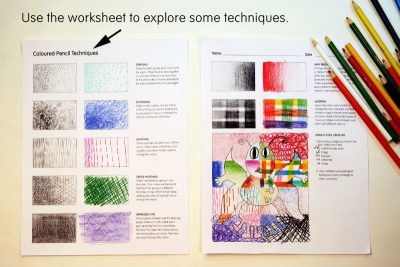
- Before beginning your perspective drawing use the Coloured Pencil Techniques worksheets to explore ways to use the coloured pencils. (Downloads - ColouredPencilWorksheet.pdf)
- You will use some of these techniques to colour your perspective drawing.
2
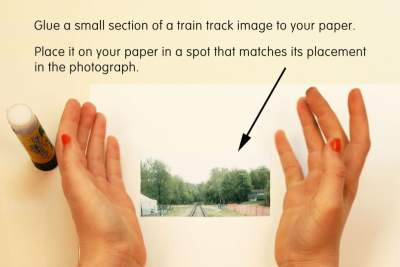
- Choose a photocopy of one of the train track pictures.
- Cut out a small section of your picture that includes a segment of the track.
- Glue it to your paper.
- Make sure you place it on the paper in a spot that matches its placement in the photograph,e.g.
- If you cut out a section that includes the horizon line, make sure you glue the section where the horizon line will be in your drawing.
- If you cut out a section that is in the foreground of the photocopy, make sure you glue your section in the foreground on your paper.
3
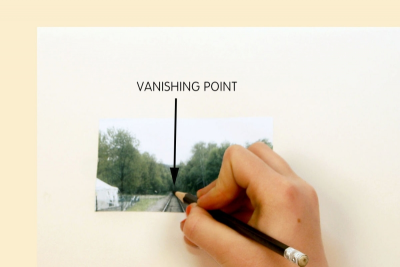
- Find the vanishing point on your drawing.
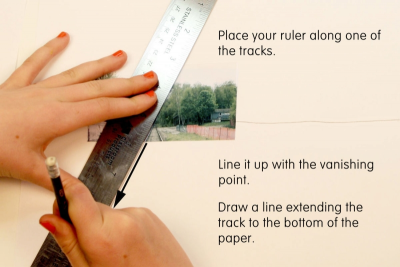
- Place your ruler along one of the tracks.
- Lightly draw a line extending the track in both directions
- Repeat for the other track.
- The spot where the 2 lines meet is the vanishing point.
4
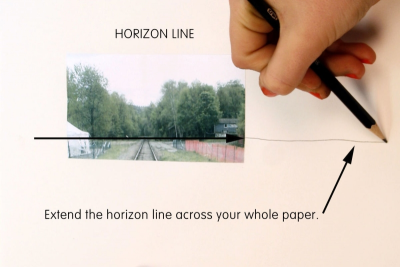
- Find the horizon line on your drawing.
- It is the horizontal line that passes through the vanishing point.
- sometimes called the eye-level line
- the line where the sky and earth seem to meet
- parallel to the bottom of the paper - Draw the horizon line across your whole paper.
5
- Place your ruler along one of the tracks.
- Line it up with the vanishing point.
- Draw a line extending the track to the bottom edge of your paper.
- Repeat for the other track.
6
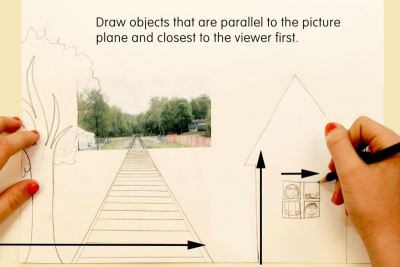
- Draw the objects that are parallel to the picture plane and closest to the viewer first, e.g.,
- the face of a building
- the track ties
- the trunk of a tree - Draw all vertical and horizontal lines parallel to the side or bottom of the paper.
- Draw the railway ties closer and closer together as they recede into the distance.
7
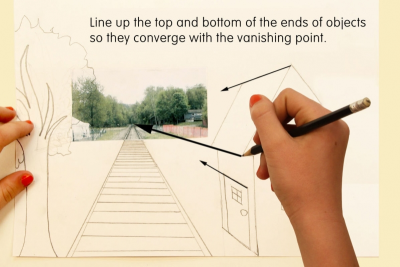
- Use your ruler to line up the top and bottom of the ends of objects so they converge with the vanishing point, e.g.,
- the sides of the house
- the roof line
- the top of the door - Draw the lines carefully to make sure the angles are correct.
- Add lots of details to your drawing to make it interesting.
- Erase any guide lines.
8
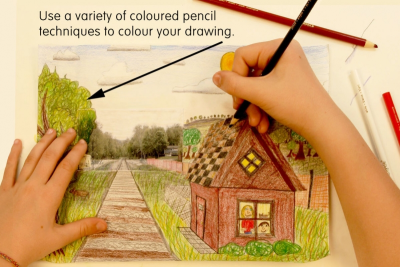
- Use a variety of coloured pencil techniques to colour your drawing.
- Remember that colour can help create the illusion of depth.
- colours of things closest to the viewer look bright
- colours in the distance look dull and pale
- details in the distance look fuzzy
- details in the foreground look sharp
Subjects:
Language Arts,
Mathematics,
Visual Arts
Grades:
Grade 6,
Grade 7,
Grade 8