Supplies:
- Crayola Scissors
- Crayola No-Run School Glue
- Crayola Construction Paper
- Crayola Glue Stick
- Crayola Markers
- Pencil
- Ribbon
- Bright Colour Cardstock
- Paper Plate
- Clear Tape
CIY Staff Tips:
- To give your eggs Crayola flair, draw the Serpentine Design from our Crayola Crayons onto the construction paper eggs.
Steps:
1
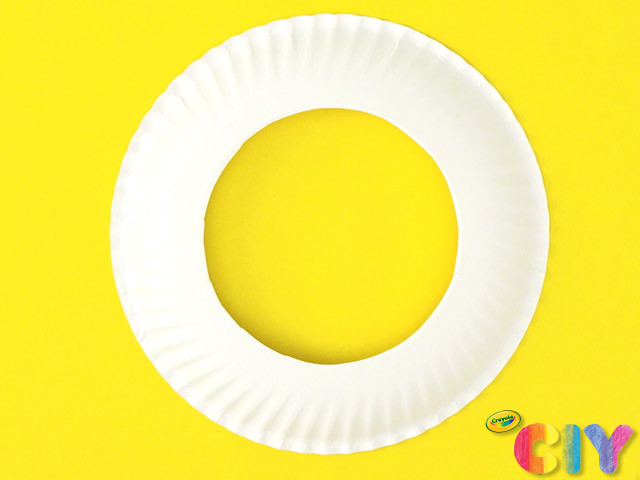
Cut out middle section of paper plate to create wreath base.
2
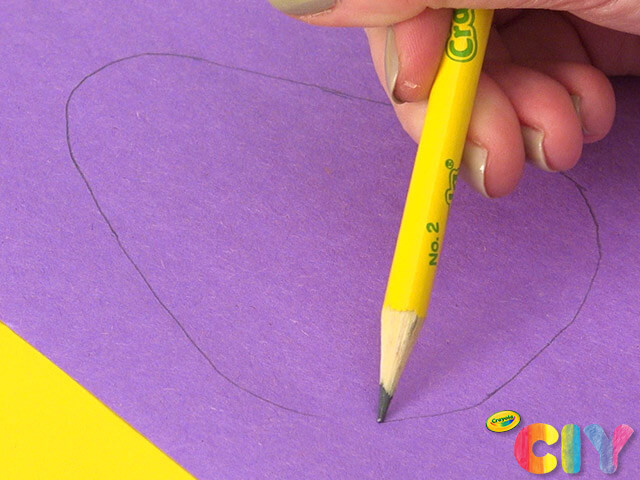
Sketch an egg shape on construction paper and cut out.
3
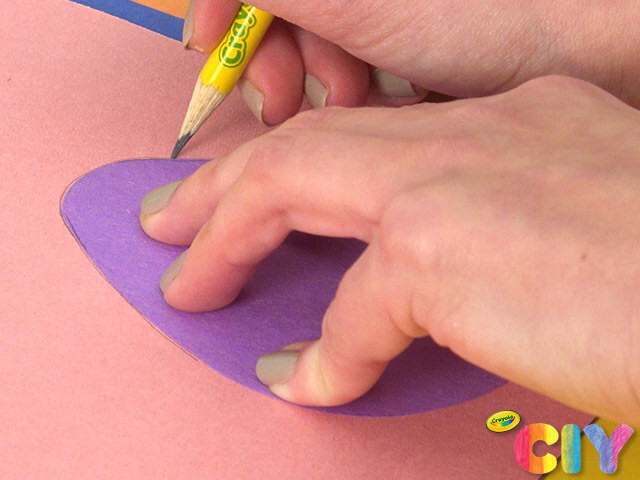
Use paper egg to trace 4–5 eggs on different colours of construction paper. Cut out.
4
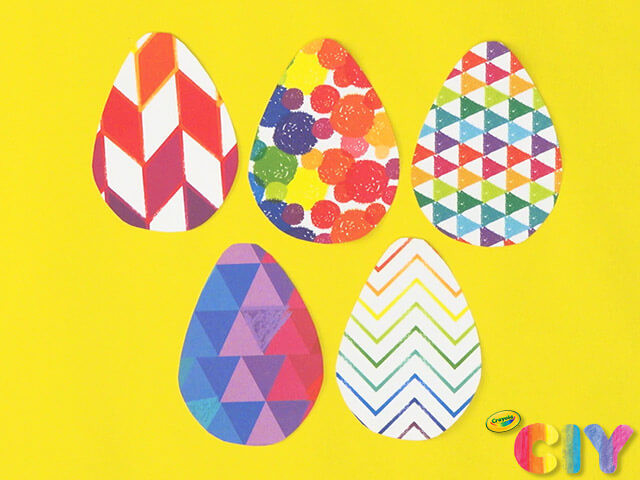
Use paper egg to trace 4–5 eggs on different patterns of cardstock. Cut out.
5
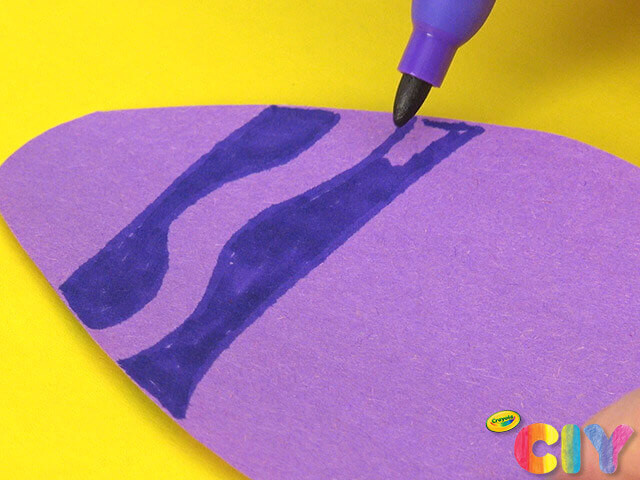
Draw designs on construction paper eggs with markers.
6
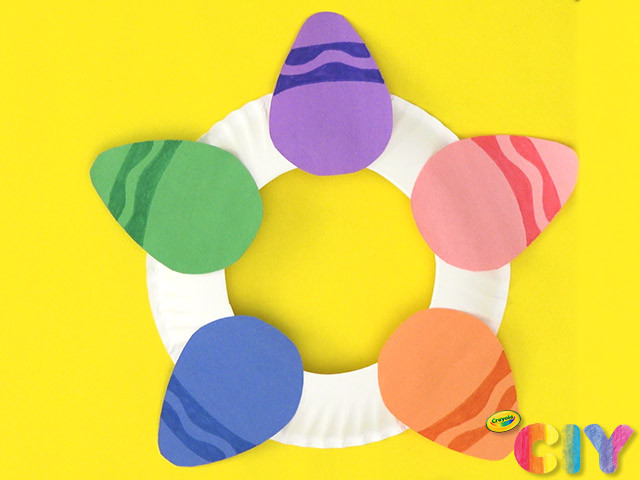
Glue construction paper eggs to plate, leaving space between eggs.
7
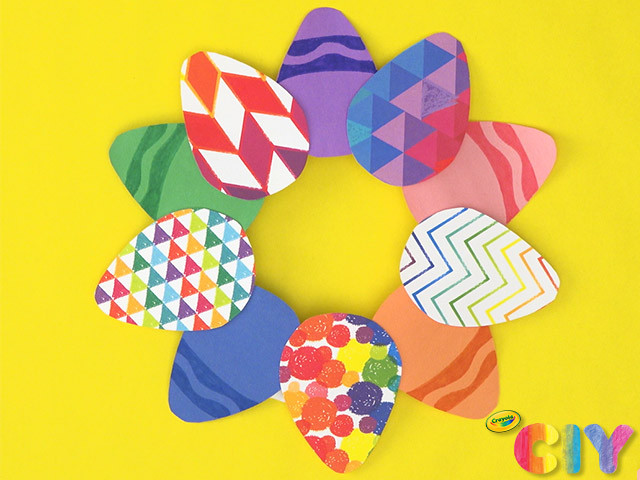
Glue cardstock eggs to plate in gaps between construction paper eggs.
8
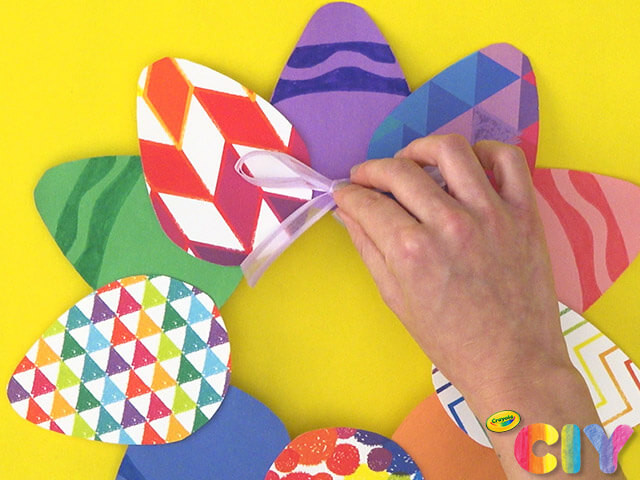
Tie a piece of ribbon into a bow and glue to top of wreath. Dry all glue steps 1–2 hours.
9
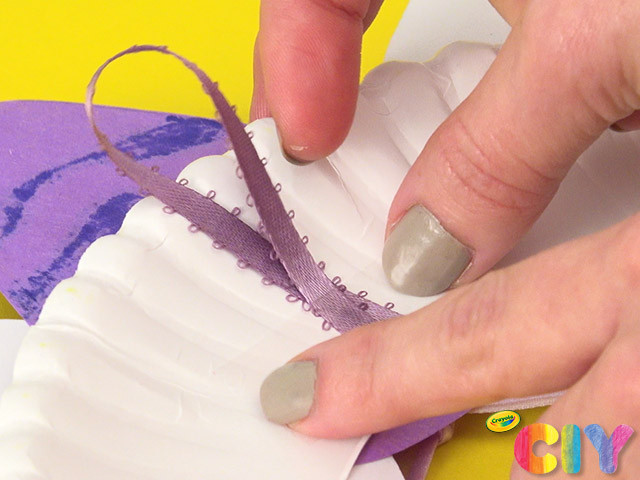
Loop a piece of ribbon and tape to the back of the wreath to hang.