Supplies:
- Crayola Scissors
- Crayola Glue Sticks
- Crayola Crayons
- Crayola Fine Line Markers
- Crayola Twistables Coloured Pencils
- Pencils
- Erasers
- Light Weight Cardboard such as Tag Manilla
Steps:
1
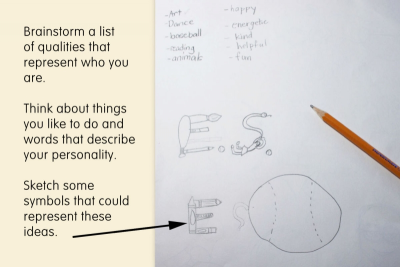
- Brainstorm a list of qualities that represent who you are.
- Think about the things you like to do and words that describe your personality.
- Sketch some symbols that could represent these ideas.
2
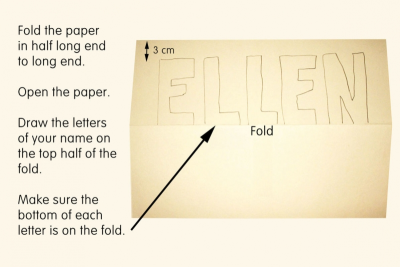
- Fold the paper in half lengthwise – long end to long end.
- Make a crisp fold.
- Open the paper.
- Draw the letters of your name on the top half of the fold.
- Leave a space of about 3 cm (1.25") from the outer edge of the paper to the top of your letters..
- Make the letters double outlined.
- Make sure the bottom of each letter is on the fold.
3
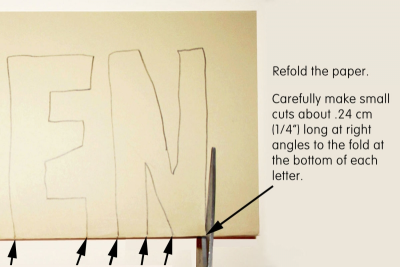
- Refold the paper.
- Carefully make small cuts about .24 cm (1/4 in) long at right angles to the fold at the bottom of each letter.
- These cuts will make it easier to cut out the letters.
4
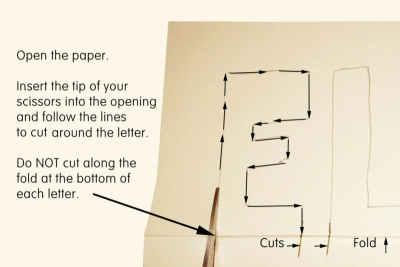
- Open the paper.
- Insert the tip of the scissors into the opening and follow the lines to cut around the letter.
- Do NOT cut along the fold at the bottom of each letter.
- Keep the background intact.
5
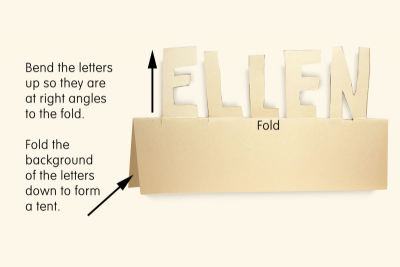
- Bend the letters up so they are at right angles to the fold.
- Fold the background of the letters down to form a tent.
- Prop up your nameplate to see how it looks.
6
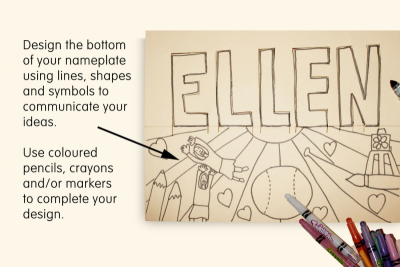
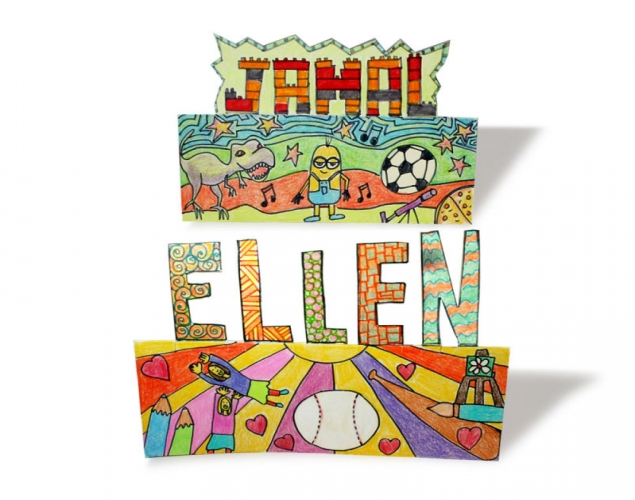
- Design the bottom of your nameplate using lines, shapes and symbols to communicate your ideas.
- Use coloured pencils, crayons and/or markers to complete your design.
- Use lots of colour and contrast to make your message stand out.
- Break up the space with lines and patterns to create a sense of rhythm.
7
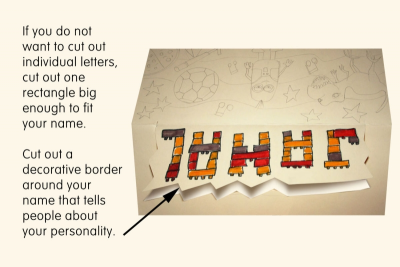
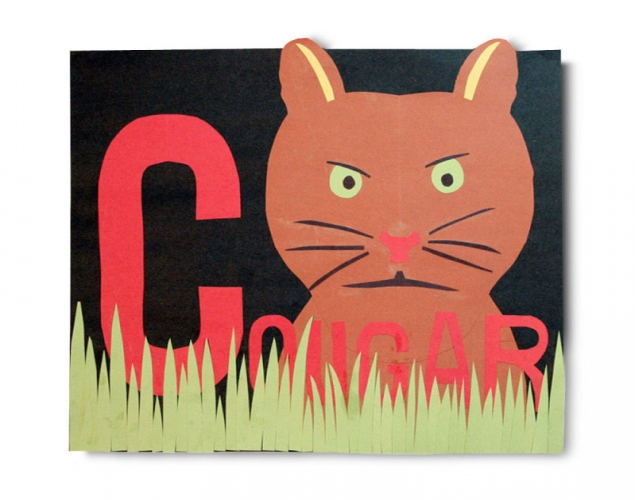
- If you do not want to cut out individual letters cut out one rectangle big enough to fit your name.
- Cut a decorative border around your name that tells people about your personality.
8
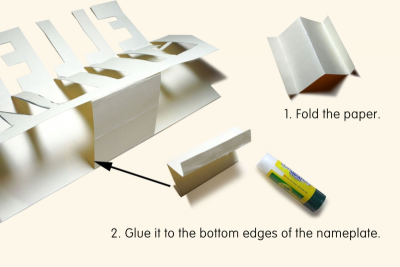
- When you have finished colouring the nameplate use a 7 cm x 11 cm (3" x 4.5") piece of tag manilla.
- Fold it in half, short end to short end.
- Fold the two outer edges up about 1 cm (1/2").
- It should look like an accordion fold.
- Make sure the biggest fold is facing up towards the fold of the nameplate.
- Glue one short edge of the paper to the inside of your nameplate.
- Place it along the bottom edge and in the middle.
- Glue the other short end to the opposite side of your nameplate.
- This will support the nameplate and keep it from falling over when you display it.
9
- Work with a partner.
- Take turns looking at each other's nameplates.
- Tell your partner what you think their design means.
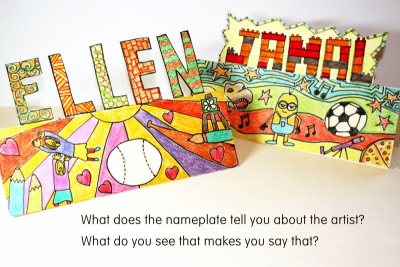
- What does the nameplate tell you about the artist?
- What do you see that makes you say that? - Now you tell your partner what you intended your design to mean.
- What did you learn about each other?
Subjects:
Grades:
Grade 4,
Grade 5,
Grade 6,
Grade 7,
Grade 8