Supplies:
- Crayola Air-Dry Clay - White
- Crayola Fine Line Markers - 12 Count
- Crayola Marker & Watercolour Paper - 22.9 cm x 30.5 cm (9" x 12")
- Crayola Acrylic Paint - 6 Count
- Crayola Paintbrushes - 5 count
- Pencils
- Paper Towels
- Water Containers
- Clay Carving Tools (only if available)
Steps:
1
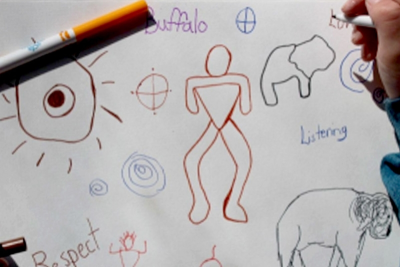
- Choose one of the 7 Grandfather teachings.
- Brainstorm words and images that you identify with the Grandfather teaching you have chosen.
- Close your eyes and remember the ancient petroglyphs that were introduced earlier, and are located throughout the world.
- Think about the animals that represent each of the teachings, remembering that the First Nations peoples living in different geographical locations, may have different animals that symbolize each teaching.
2
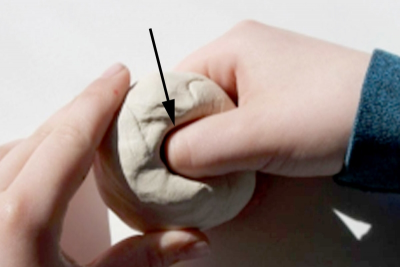
- Roll a round ball of clay in your hand.
- Make sure you do not have too much clay, just enough to fit in the palm of your hand.
- Press your thumb into the centre of the clay ball.
- Squeeze the clay between your thumb (inside the clay ball) and your fingers (outside the clay ball) until the wall of the clay pot feels about 1cm thick.
3

- Move the clay in a circular pattern as you slowly begin squeezing the clay from the bottom of your pot to the rim of your pot.
- Try to create a uniform thickness along the walls of the pot (1cm).
4
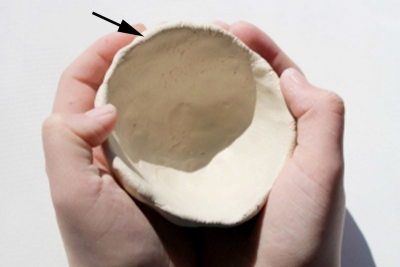
- Take your time and move slowly to create an even thickness.
- Remember to carve your initials into the base of your pinch pot.
5
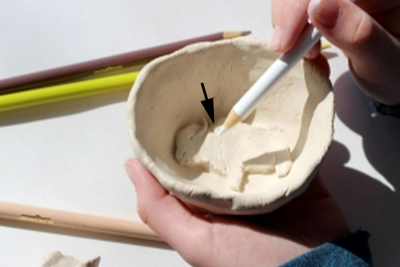
- Use a small piece of clay to create the animal that represents the Grandfather teaching you have chosen.
- Flatten the clay in your hands so it is about 0.5cm thick.
- Carve the animal from the clay using a pencil.
- Score (draw lines into the clay with a pencil) the back of the animal and the clay you are attaching the animal to.
- Paint each scored surface with slip (mixture of clay and water in the consistency of a heavy cream), and press together.
- Use the pencil to clarify and define the edges of the animal (relief sculpture).
6
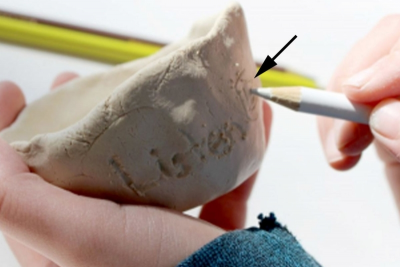
- Carve the Grandfather teaching you have chosen into the outside wall of the pinch pot.
- Add other words that have a similar meaning.
- Separate each word by carving an image that helps you understand the Grandfather teaching you have chosen.
- The carved words and images create texture.
- Let your clay pot dry before painting it (about 2 days).
7
- Choose a colour of acrylic paint to brush into the carved words and images.
- Use a small paint brush.
- This painting technique will emphasize the texture on the walls of the pinch pot.
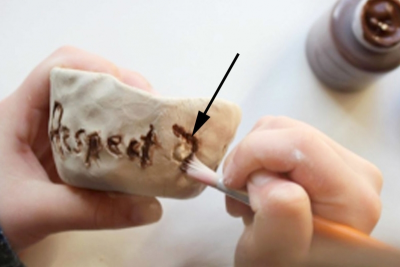
8

- Dampen a small piece of paper towel with water, and use it to lightly rub the painted, textured surface.
9
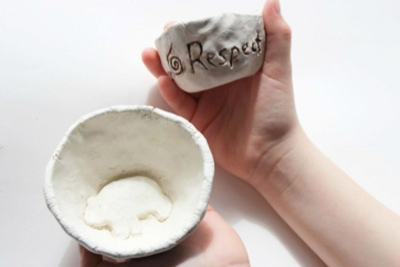
- Decide whether you want to add more colours to your pot with acrylic paint, or leave it in its natural form.
- The animal representing the Grandfather teaching is a relief sculpture.
- The words and images carved on the outside of the pot create a textured surface.
Subjects:
Language Arts,
Social Studies,
Visual Arts,
First Nations, Metis, Inuit
Grades:
Grade 3,
Grade 4,
Grade 5,
Grade 6,
Grade 7,
Grade 8