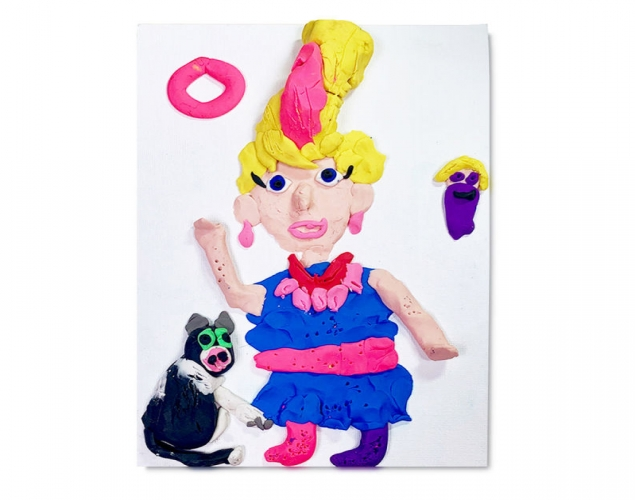
Supplies:
- Crayola Modeling Clay
- Canvas Boards - 15.2 cm x 20.3 cm (6" x 8") - 1 per student
- Toothpicks
Steps:
1
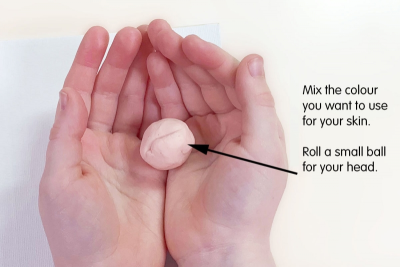
- Mix the colour you want to use for your skin.
- red + blue + yellow = brown
- orange + small amount of black = brown
- brown + white = skin tone - Mix enough for arms and hands, neck and ears.
- Roll a small ball for your head.
2
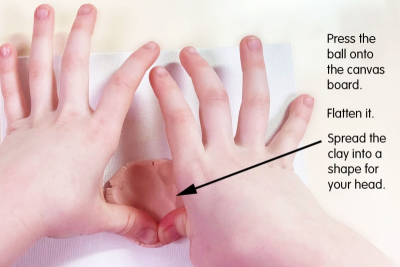
- Press the ball onto the canvas board.
- Flatten the ball with your fingers.
- Spread the clay into a shape for your head.
3
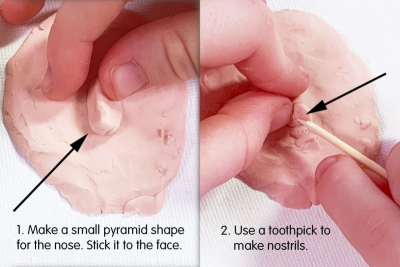
- Make a small pyramid shape for the nose.
- Stick it to the face.
- Use a toothpick to make the nostrils.
4
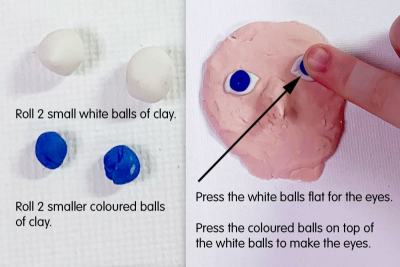
- Roll 2 small white balls of clay.
- Roll 2 smaller coloured balls of clay.
- Press the white balls flat on the face for the eyes.
- Press the coloured balls onto the white balls.
5
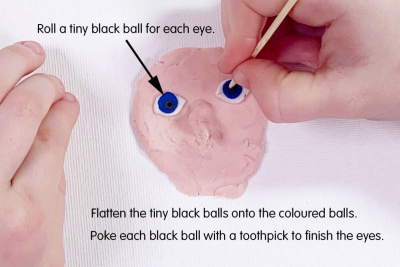
- Roll 2 tiny black balls of clay.
- Flatten the tiny black balls onto the coloured balls.
- Poke each black ball with a toothpick to finish the eye.
6
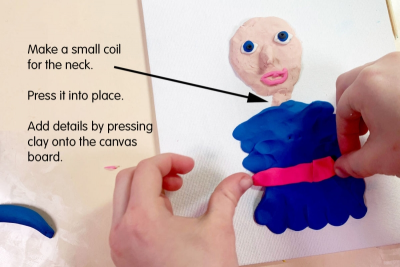
- Make a small coil for the neck.
- Press it into place.
- Add details by pressing clay onto the canvas board.
7
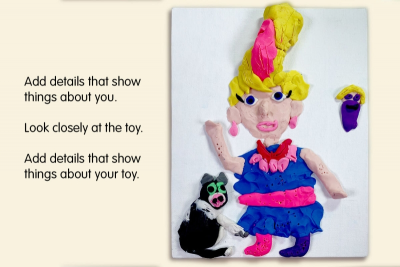
- Add details that show things about you.
- Look closely at your toy. Notice:
- the hair
- the arms and hands
- the legs and feet
- the clothes
- features on the face
- special characteristics - Add details that show something about your toy.
Subjects:
Language Arts,
Visual Arts
Grades:
Kindergarten,
Grade 1,
Grade 2,
Grade 3