Supplies:
- Crayola Air-Dry Clay - White
- Crayola Watercolour Paints - 24 Count
- Crayola Paint Brushes
- Corrugated Cardboard - 15.2 cm x 30.5 cm (6" x 12") - 1 per student
- Slip
- Bamboo Skewers - 1 per student
- Toothbrushes - 1 per several students
- Small Rolling Pins or Dowels
- Paper Towels
- Water Containers
- Clear Acrylic Varnish (optional)
Steps:
1
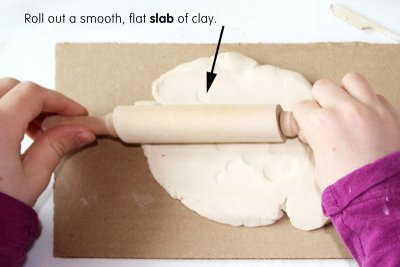
- Work on a piece of cardboard or other firm surface.
- Make a small ball of clay and flatten it with your fingers and the palm of your hand.
- Use a rolling pin or piece of dowel to roll it into a flat shape about 1.5 cm thick - this is called a slab.
2
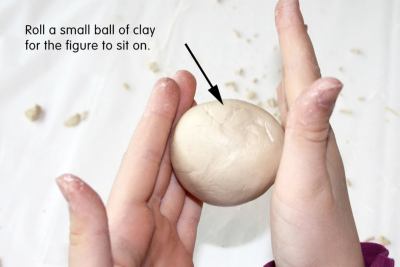
- Roll a small ball of clay for the figure to sit on.
3

- Use a bamboo skewer to scratch lines into the clay where you want to join the clay ball.
- This is called scoring the clay.
4
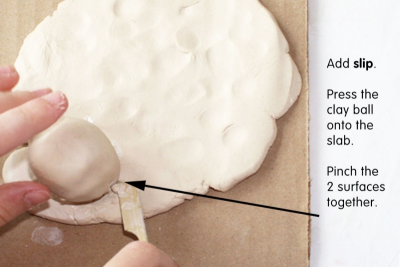
- Paint slip on top of the score lines.
- This is called score and sliptechnique.
- Place the clay ball on top of the scored and slipped spot.
- Use the flat side of a bamboo skewer or the back of your fingernail to join the edges to the slab.
- Smooth the clay with your finger.
- Add a small amount of slip if needed.
5
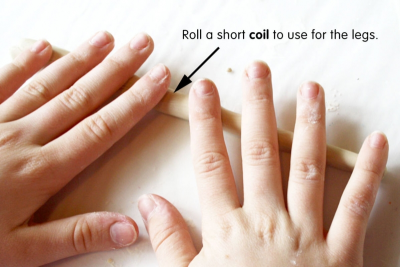
- Roll a long thin coil of clay for the legs.
- As you roll the clay spread your fingers and apply gentle, even pressure to slowly stretch the clay.
6
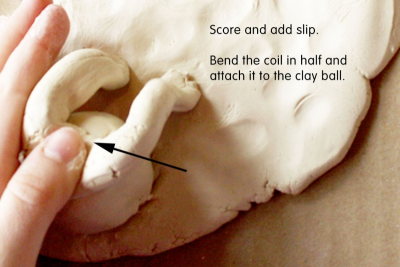
- Score and slip the spot where you will join the coil to the clay ball.
- Place the coil on the prepared spot.
- Use the back of your fingernail to join the edges to the ball.
- Smooth the clay with your finger.
7
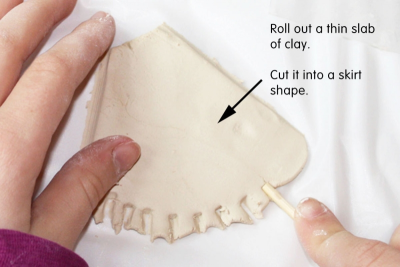
- Roll out a thin slab of clay for a skirt.
- Use a bamboo skewer to cut it into a skirt shape.
8
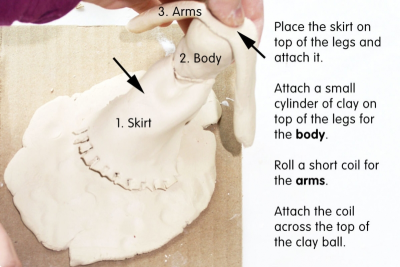
- Use the score and slip technique to attach the skirt on top of the legs.
- Roll a small cylinder of clay for the body.
- Use the score and slip technique to attach the body to the legs.
- Roll a short coil for the arms.
- Use the score and slip technique to attach it across the shoulders.
9
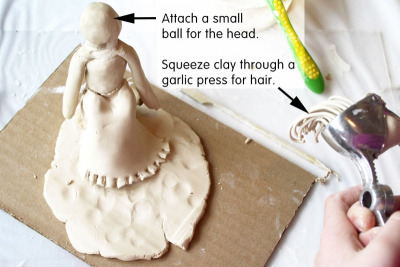
- Roll a small ball for the head.
- Make sure the size is in proportion to the body.
- Use the score and slip technique to attach the head to the body.
- Put some clay into a garlic press and squeeze it out.
- Attach it to the head for hair.
- Thin pieces of clay such as this will probably break off when they dry.
- If you don’t want this to happen make sure the thin bits are attached to each other or the body.
10
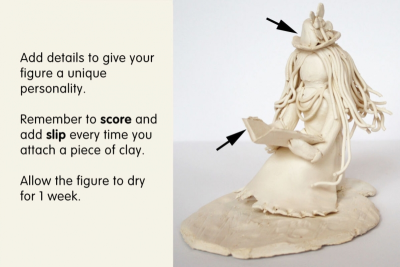
- Add details to give your figure a unique personality.
- Remember to use the score and slip technique every time you attach a piece of clay.
- Set the figure aside to dry for 1 week.
11
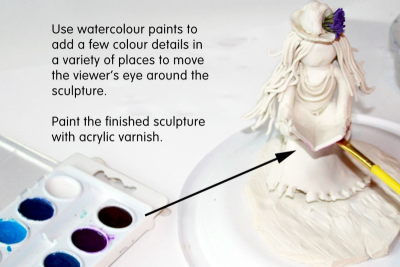
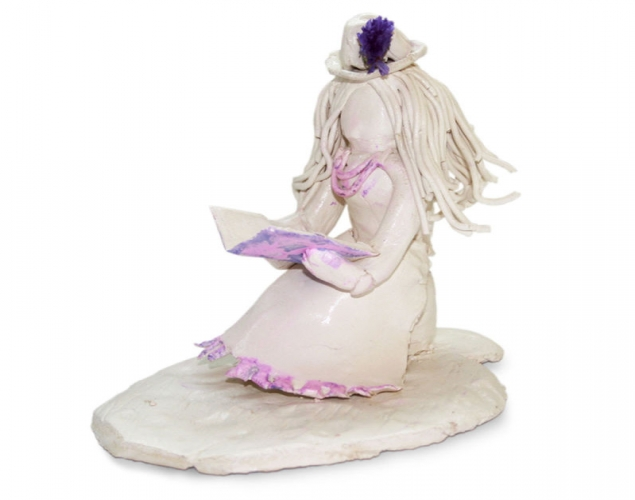
- Use watercolour paints to add a few colour details in a variety of places to move the viewer's eye around the sculpture.
- Paint the entire sculpture with clear acrylic varnish.
Subjects:
Language Arts,
Mathematics,
Visual Arts
Grades:
Grade 3,
Grade 4,
Grade 5,
Grade 6,
Grade 7,
Grade 8