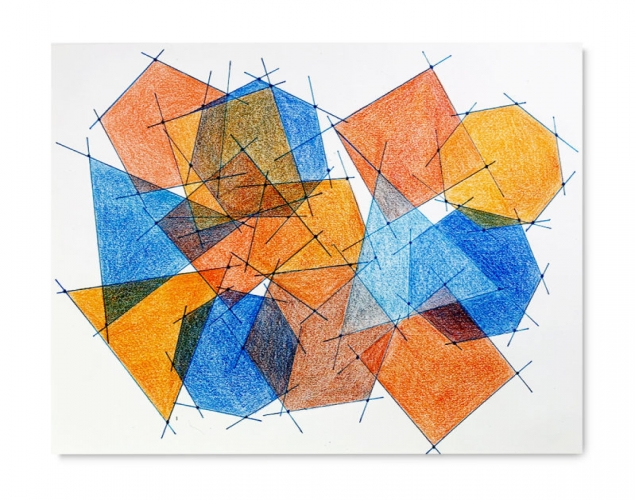
POLYGON SHAPES DESIGN – Colour, Transparency, ShapeStudents create a design using a variety of overlapping, regular polygon shapes, choose a specific colour scheme and use coloured pencils to apply colours so that they create the illusion of transparency;
Students create a design using a variety of overlapping, regular polygon shapes, choose a specific colour scheme and use coloured pencils to apply colours so that they create the illusion of transparency;
Supplies:
- Crayola Marker & Watercolour Paper - 22.9 cm x 30.5 cm (9" x 12")
- Crayola Coloured Pencils
- Crayola Fine Line Markers
- Pencils
- Rulers
- Erasers
Steps:
1
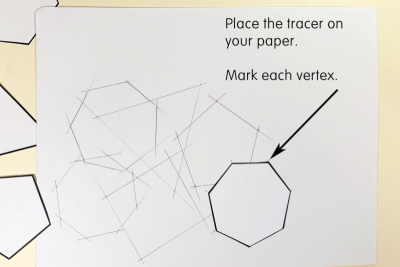
- Cut out the polygon tracers. (Downloads - PolygonTracers.pdf)
- Place a tracer on your paper.
- Mark each vertex.
2
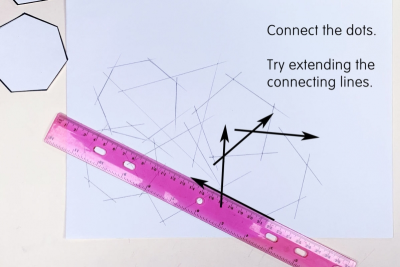
- Connect the dots of each vertex to create the polygon.
- Try extending the connecting lines to add interest to your design
- Use different polygons.
- Overlap the shapes.
- From time to time view your design from a distance.
- Is the design balanced?
- Does it move your eye through the picture plane?
3
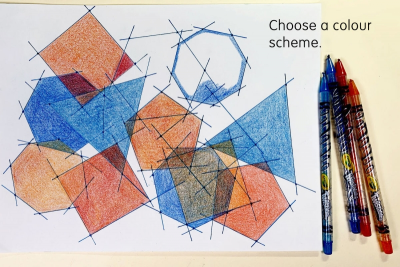
- Redraw the lines and dots with a fine line marker.
- Choose a colour scheme. (Colour Wheel Poster)
- Complementary - Uses colours on opposite sides of the colour wheel.
- Analogous - Uses colours that are next to each other on the colour wheel.
- Triadic- Uses 3 colours that are evenly spaced on the colour wheel. - Colour your design using the colours you have chosen.
- Blend the colours where the shapes overlap.
4
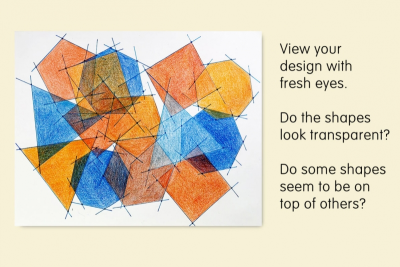
- View your design with fresh eyes.
- Do the shapes look transparent? Why?
- Do some shapes seem to be on top of other shapes?
- What do you see that makes you say that?
- Does your eye move through the picture plane? How?
- What do you like best about your design? Why?
Subjects:
Language Arts,
Mathematics,
Visual Arts
Grades:
Grade 6,
Grade 7,
Grade 8,
Grade 9