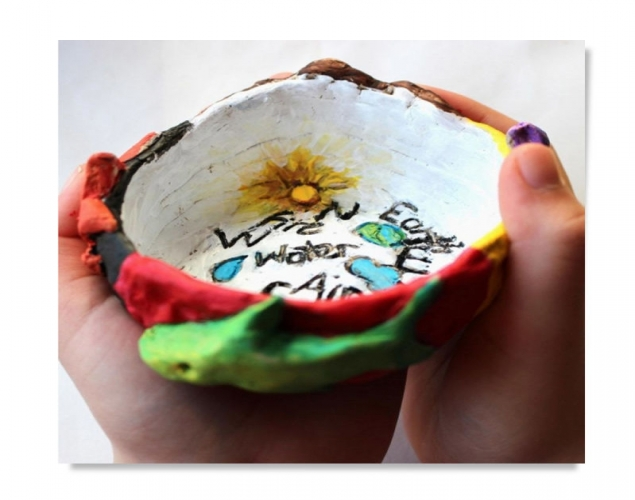
MEDICINE WHEEL – Directions, Elements, ClayStudents create and paint a clay coil pot. The circular bowl represents ideas connected to the medicine wheel. The students will reflect on relationships between: the 4 cardinal directions, the 4 elements, the 4 seasons, the medicine wheel, and themselves.
Students create and paint a clay coil pot. The circular bowl represents ideas connected to the medicine wheel. The students will reflect on relationships between: the 4 cardinal directions, the 4 elements, the 4 seasons, the medicine wheel, and themselves.
Supplies:
- Crayola Air-Dry Clay - White
- Crayola Acrylic Paint - 6 Count
- Crayola Paint Brushes - 5 Count
- Crayola Marker & Watercolour Paper - 22.9 cm x 30.5 cm
- Crayola Fine Line Markers - 12 Count
- Clay Carving Tools (only if available)
- Toothpicks
Steps:
1
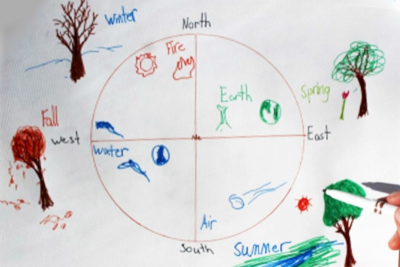
- Begin with a circle and divide it into 4 equal parts.
- Label the 4 cardinal directions.
- In each section identify one of the 4 elements (earth, air, water, and fire).
- Brainstorm images connected to each element.
- Reflect on each of the 4 seasons, thinking about the changes that occur during each season. - Brainstorm words and images connected to each season.
- Spring is in the east, summer is in the south, fall is in the west, and winter is in the north.
2
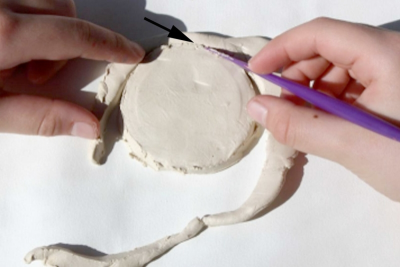
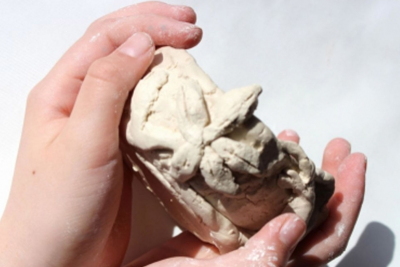
- Make a small slab of clay by flattening some clay in your hands and pressing it onto a flat surface.
- Press a cup into the clay to get a circle.
- Then cut away the excess clay with a popsicle stick, plastic knife, or clay cutting tool.
- This will be the base of your pot.
3
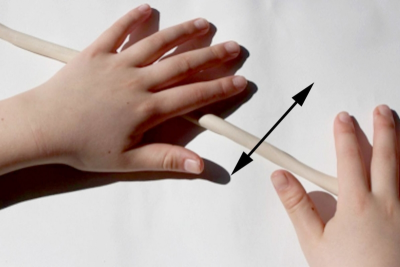
- Create clay coils by rolling clay into long cylinders with your hands.
- The clay coils will be used to make the walls of your pot.
4
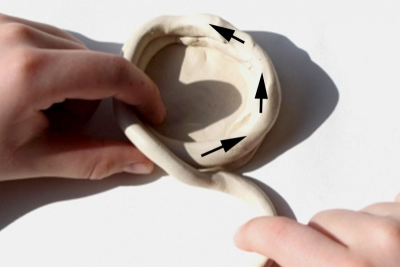
- Wind the coils around the circular base.
- Make sure you blend each end of the clay coils into the clay.
5
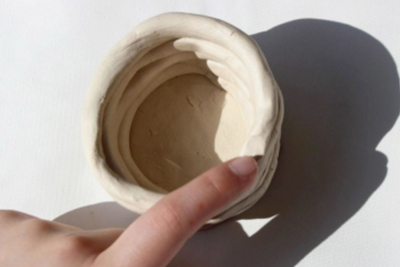
- Continue to attach the clay coils together by using your finger to blend the end into the clay.
- Build the coils up until your pot is high enough (5-10 cm).
6
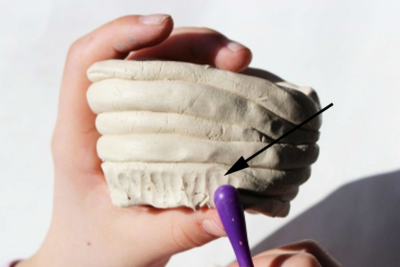
- Choose either the inside or outside of your pot to blend the coils together.
- Use the end of a paint brush, a popsicle stick, or a clay tool to blend the clay coils.
7
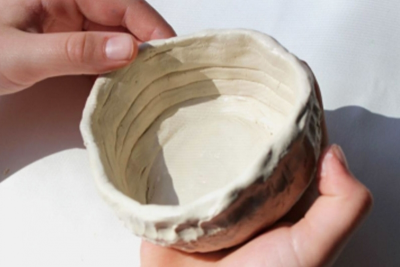
- Dip your hands in a little water to keep the clay moist.
- Smooth the walls and the edges with your fingers.
8
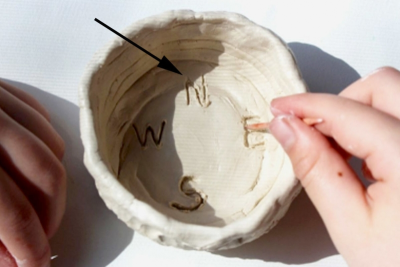
- Using a toothpick carve the letters for the 4 cardinal directions into the base of your pot.
9

- Carve words and images into your pot that symbolize the 4 elements (earth, air, water, and fire).
10
- Reflect on the images you drew for each season.
- Choose one image to represent each of the 4 seasons.
- Begin with spring.
- Flatten a small piece of clay and form a symbol for spring.
- Attach the clay onto the pot in the east direction.
- Score the clay and paint it with slip before you attach it. - Repeat this process for summer in the south, fall in the west, and winter in the north.
- When you have finished creating a relief sculpture around your walls allow the pot to dry for several days.
Subjects:
Language Arts,
Science,
Visual Arts,
First Nations, Metis, Inuit
Grades:
Grade 3,
Grade 4,
Grade 5,
Grade 6,
Grade 7,
Grade 8