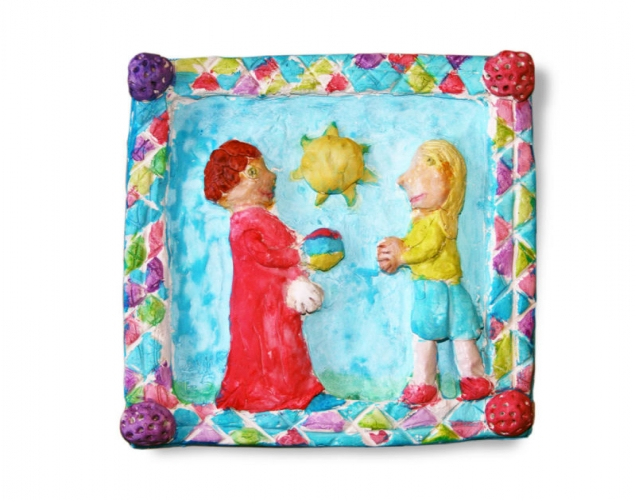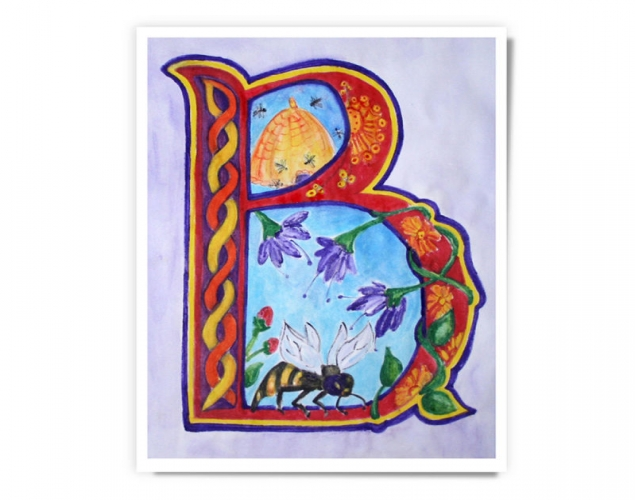
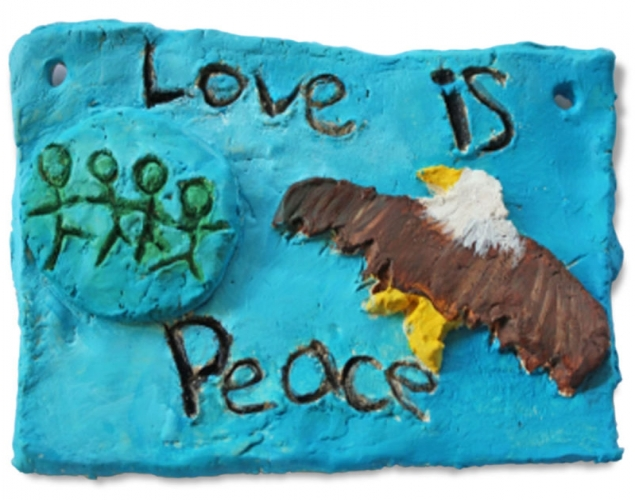
LOVE – Seven Grandfather Teachings, Haida Artist Bill ReidStudents create a relief sculpture using air dry clay and acrylic paints. They reflect on the meaning of love, animals that represent love, and how they understand the Grandfather teaching of love in their own life.
Students create a relief sculpture using air dry clay and acrylic paints. They reflect on the meaning of love, animals that represent love, and how they understand the Grandfather teaching of love in their own life.
Supplies:
- Crayola Fine Line Markers - 12 Count
- Crayola Air-Dry Clay - 1.13 kg White
- Crayola Acrylic Paint - 6 Count
- Crayola Variety Brush Set - 5 Count
- Crayola Marker & Watercolour Paper - 22.9 cm x 30.5 cm
- Various Clay Tools
- Water Containers
Steps:
1
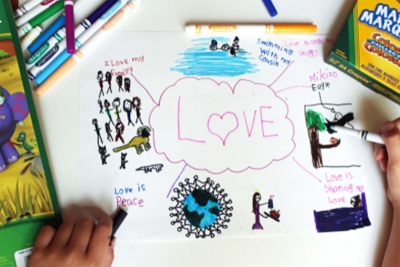
- Make a mind map. Begin with the word love, one of the 7 Grandfathers' teachings, in the centre of your mind map.
- Brainstorm words and images connected to the Grandfather teaching of love.
- Reflect on personal life experiences that are connected to and exemplify the Grandfather teaching of love.
- Close your eyes and think about the word love, how would you best express love through colour, pictures, and words?
2
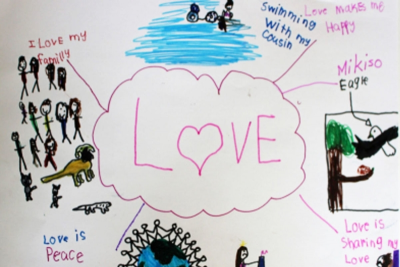
- Choose words connected to images that best exemplify the word love for you.
- What animal represents the Grandfather teaching love? You will be sculpting the images and carving the words into your clay tile.
3
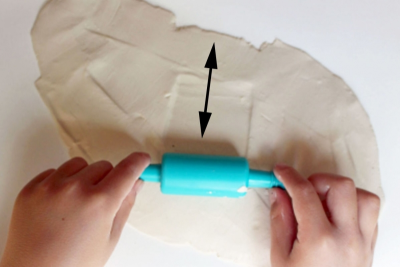
- Use air dry clay to make your tile.
- Take a handful of clay and flatten it by rolling the clay, pressing it with your hands, and lightly lifting it off a flat table and dropping it on the surface.
- Create a smooth, flat surface on the clay.
- Make sure your clay tile is about 1 cm (.25") thick.
4

- Use a flat edged clay tool or ruler to cut a rectangular tile out of the clay.
5
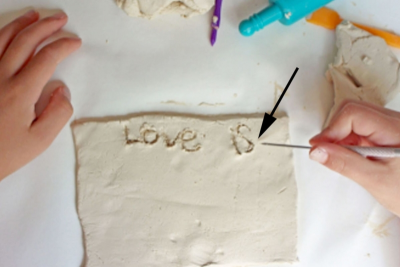
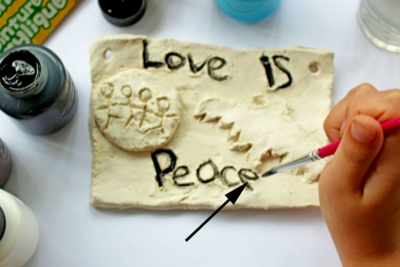
- Use a pointed clay tool or pencil to carve the words you chose that describe how you understand love.
- Make sure you do not cut through your clay tile.
- Carve the words into the surface of the clay.
6
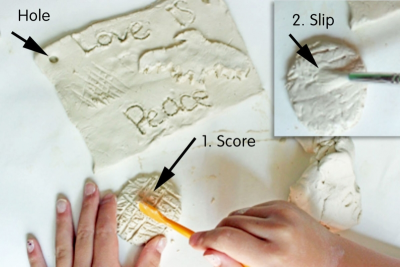
- Make 2 small holes on the top corners of the clay tile to allow you to hang your tile when it is complete.
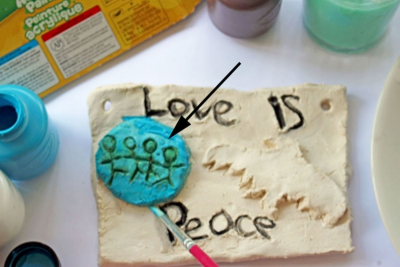
- Create a relief sculpture by cutting images that best express the Grandfather teaching love from your left over clay.
- To attach the images to the flattened tile, score the surface of the tile where the carved shape will attach, then score the back of the shape you will be attaching.
- Paint each surface with slip, which is a mixture of water and clay.
- Slip acts like a glue that will hold 2 pieces of clay together.
- Paint the back of the shape you want to attach with slip, and the area of the tile you want to attach it to.
- Press the clay pieces together.
7
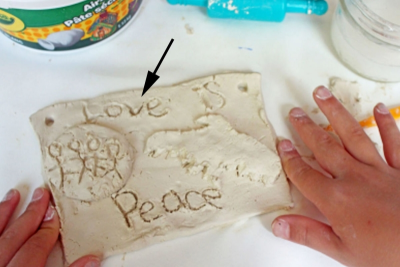
- Use your clay tools (pencils, rulers, etc.) to add detail to your relief sculpture.
- Make sure the words and images are clear.
- Allow your clay tile to dry for several days.
8
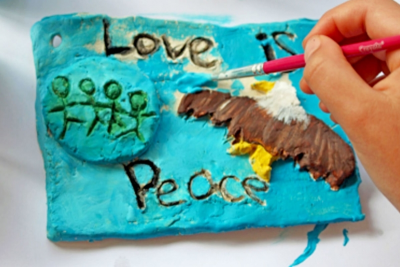
- Use black acrylic paint, a fine tipped paint brush, and water to paint the words. Adding black to the words will emphasize them, contrasting them with the background of the clay tile.
9
- Use a paint tray or plate to mix colours.
- Remember the primary colours are red, yellow, and blue.
- Secondary colours are made by mixing 2 primary colours together, for example, yellow + blue = green, red + yellow = orange, blue + red = purple.
- Begin by mixing the colours you would like to use, then paint the sculptural forms made on the clay tile.
10
- Choose a colour for your background.
- Add white to the colour if you need to contrast the background colour with the colour of your sculpted forms.
11
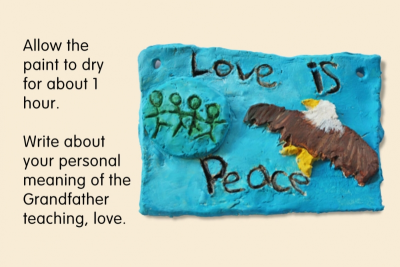
- When you have completed your painting allow it to dry.
- Write about your personal meaning of the Grandfather teaching, love.
- Share your relief sculpture with the other people in your class.
Subjects:
Language Arts,
Visual Arts,
First Nations, Metis, Inuit
Grades:
Grade 1,
Grade 2,
Grade 3,
Grade 4,
Grade 5,
Grade 6,
Grade 7,
Grade 8