Supplies:
- Crayola Construction Paper - 22.9 cm x 30.5 cm (9" x 12") - variety of colours
- Crayola Glue Sticks
- Crayola Scissors
- Pencils
Steps:
1
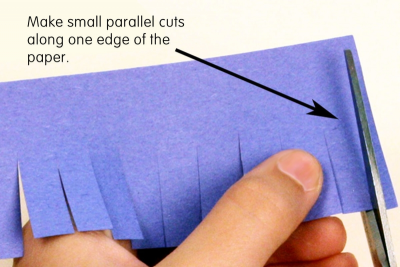
FRINGE
- Cut a piece of paper about 6 cm x 9 cm (2.5" x 3.5).
- Make a row of small cuts at right angles to the edge and parallel to each other along one long edge of the paper.
- Layer fringed paper to add texture and interest to your work.
2
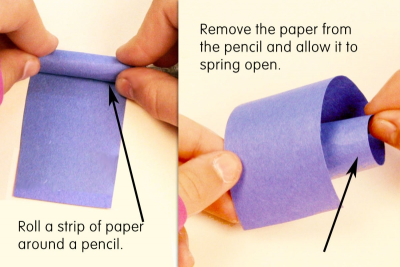
CURL - 1
- Cut a long strip of paper.
- Wrap one end around a pencil and roll it to the other end.
- Remove the paper from the pencil and allow it to spring open.
3
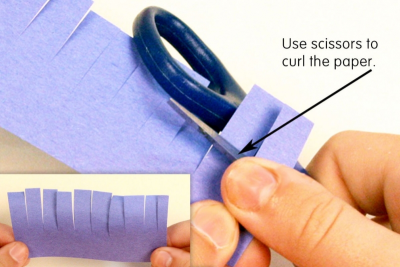
CURL - 2
- Another way to curl paper is to use scissors.
- Hold the paper in one hand.
- Place the flat edge of the blade of a scissors under the strip of paper you want to curl.
- Place your thumb on top of the paper and hold it in place while you gently pull the blade of the scissors away from you.
- Do this several times to curl the paper.
4
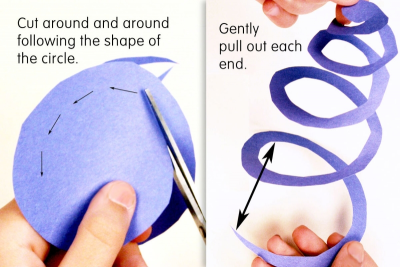
SPIRAL
- Start with a circle.
- Begin cutting into the edge of the circle and slowly cut around and around following the shape of the outer edge of the circle.
- Gently pull out each end of the paper to extend the spiral.
- You can use this technique on any shape as long as you cut around and around following the shape of the outer edge of the object.
5
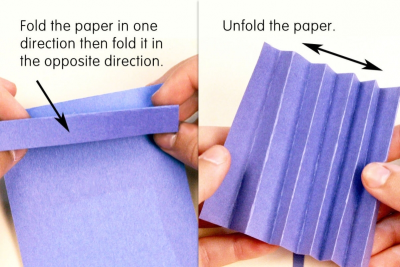
PLEAT
- Fold the edge of the paper in one direction, then fold it in the opposite direction back and forth until you get to the end of the paper.
- Make sure each fold is the same width.
- Gently unfold the paper.
6
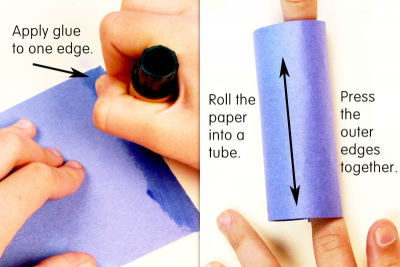
CYLINDER
- Start with a rectangle or a square.
- Apply glue to one edge.
- Roll the paper into a tube.
- Press the two outer edges together to fasten them.
7
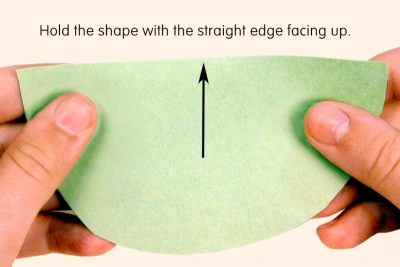
CONE
- Cut out a half circle.
- Hold the shape with the straight side facing up.
8
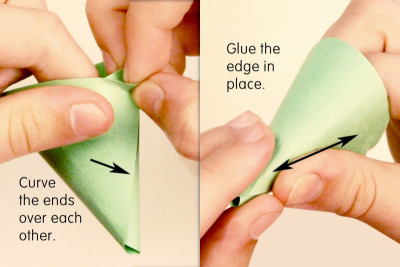
- Curve the ends closest to the straight side towards yourself, and then over each other.
- Adjust the size of the cone by wrapping it more or less tightly.
- Glue the edges together to hold it in place.
9
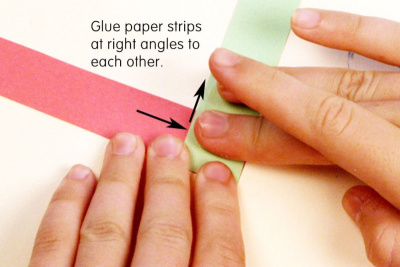
SPRING
- Cut 2 straight strips of paper the same size and length.
- Place the end of one strip on top of the end of the other strip so they form a right angle.
- Glue the strips together.
10
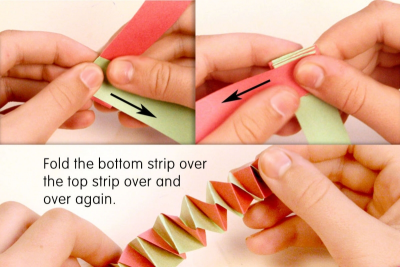
- Fold the lower paper strip over the top one.
- Now fold the new lower paper strip over the top one.
- Keep folding the lower paper strip over the top one until you reach the end of the paper strips.
- Glue the last paper fold in place.
- Gently pull the folded spring to see how far it will expand.
11
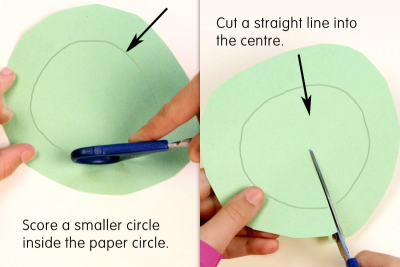
SCORE
- Cut out a circle.
- Use the tip of your scissors to scratch a smaller circle inside the paper circle.
- This is called scoring the paper. - Let the outer edge of the circle be your guide.
- Cut a straight line into the centre of the circle.
12
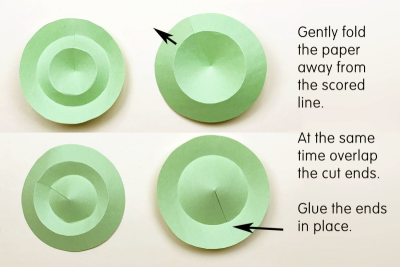
- Gently fold the paper away from the scored line.
- At the same time overlap the cut ends.
- Glue the ends in place.
- View the paper from both sides.
- Repeat this process with more circles,
- score the first circle on one side of the paper,
- score the second circle on the opposite side of the paper.
13
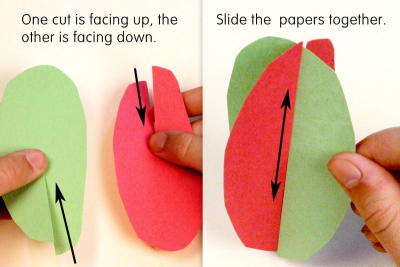
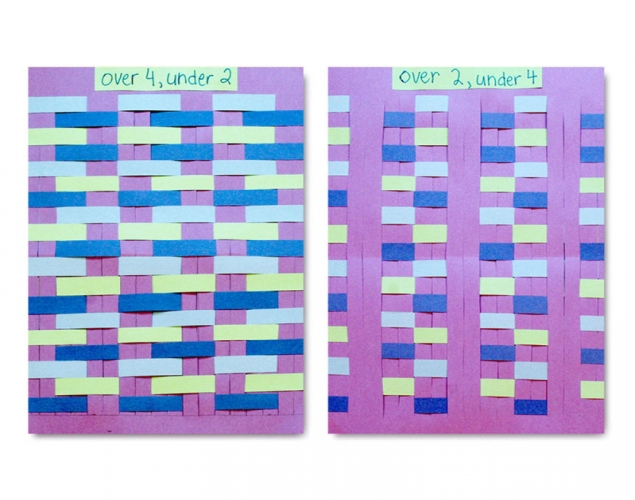
JOINING PAPER – SLOTS
- Cut 2 pieces of paper the same size.
- Hold the papers together and make a cut about half way up the centre of both papers.
- Turn one of the papers in the opposite direction so one cut is facing up and the other is facing down.
- Slide the papers together.
14
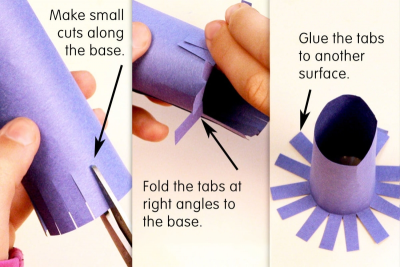
TABS
- Make small cuts along the base of a form to create tabs.
- Fold the tabs out so they are at right angles to the base.
- Put glue on the tabs to fasten the form to another surface.
15
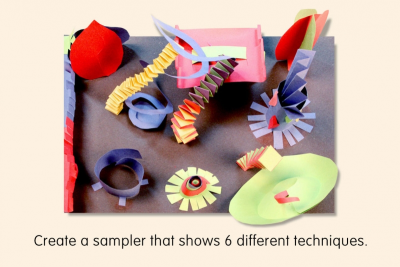
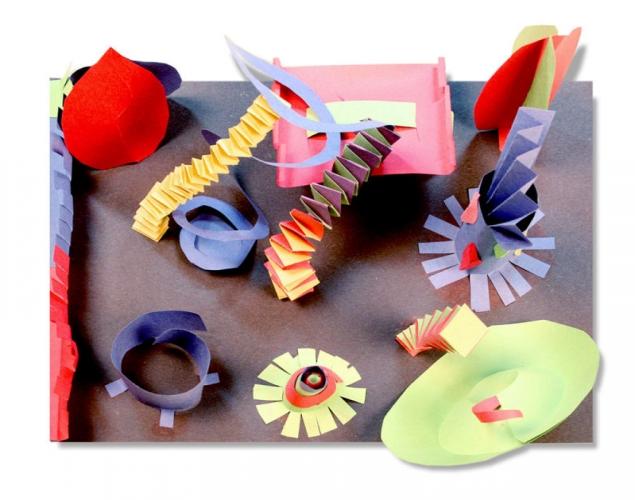
- Create a sampler that shows 6 different techniques.
- Make sure the forms move your eye throughout the space.
Subjects:
Grades:
Grade 1,
Grade 2,
Grade 3,
Grade 4,
Grade 5,
Grade 6,
Grade 7,
Grade 8