Supplies:
- Crayola Broad Line Markers - 8 Count
- Crayola Ultra-Clean Washable Broad Line Markers, Assorted Colours - 16 Count
- Crayola Marker & Watercolour Paper - 22.9 cm x 30.5 cm (9" x 12")
- Crayola Scissors
- Crayola Glitter Glue
- Crayola Washable No-Run School Glue
- Spray Water Bottles
- Plastic Page Protectors
- Ribbon
- Bamboo Skewers
- Clear Tape
Steps:
1
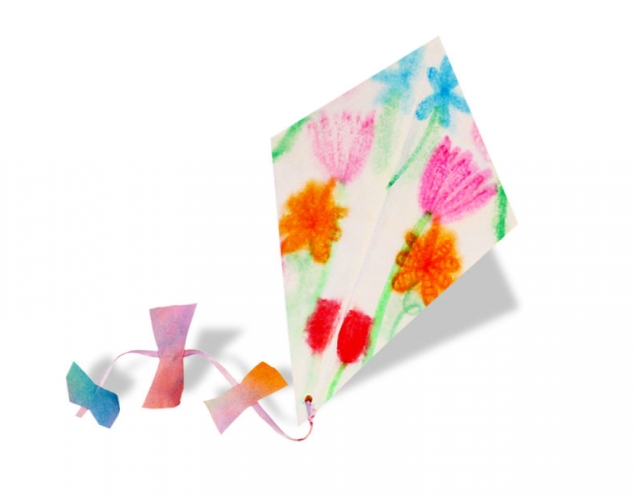
PART ONE
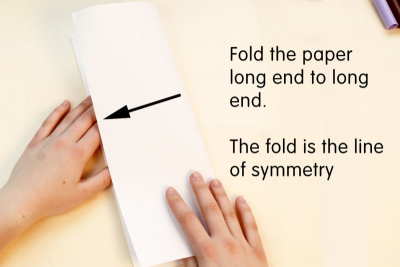
- Fold your paper lengthwise - long end to long end.
- The fold is the line of symmetry.
2
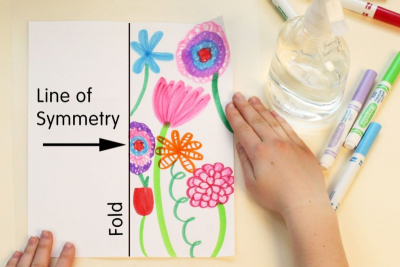
- Use markers to draw a design on half the paper.
- Make sure you stay on one side of the line of symmetry.
- Draw shapes and lines close to the line of symmetry.
3
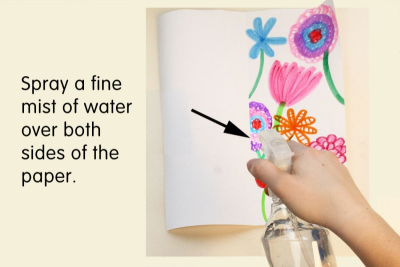
- Spray a fine mist of water over both sides of the paper.
4
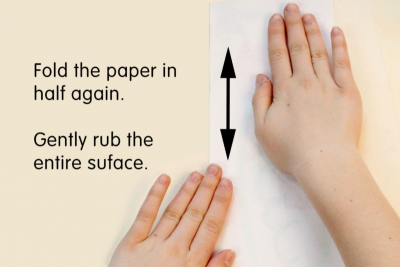
- Fold the paper in half along the original fold.
- Gently rub the entire surface of the paper.
5
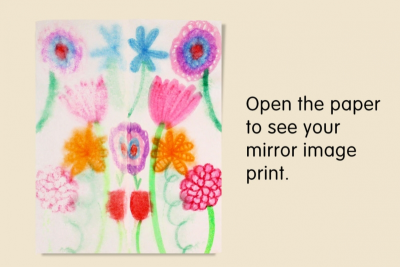
- Open the paper to see your mirror image print.
6
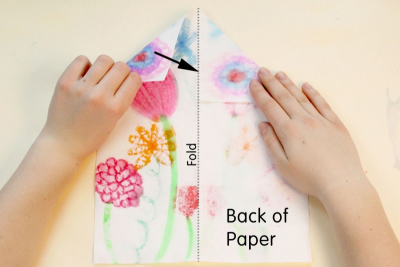
- Place the print good side down on your table.
- Make sure it is in the vertical position with the top of your design pointing up.
- Fold one top corner over so the top edge of the paper lines up with the fold.
- Press the paper in place to form a triangle.
- Repeat with the other corner.
7
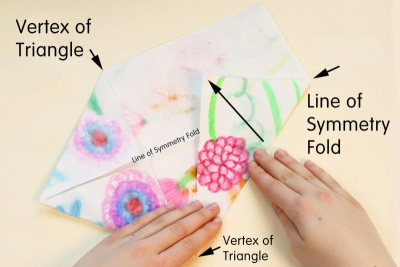
- Turn the paper sideways.
- Fold one bottom corner over so the outside edge of the fold lines up with an imaginary line that runs from the vertex of the small triangle to the line of symmetry fold at the bottom of your design.
- Press the paper in place to form a triangle.
- Repeat with the other corner.
8
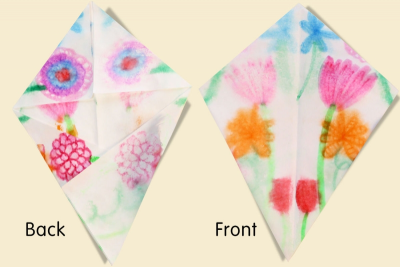
- Turn the paper over to see the front of your kite.
9
PART TWO
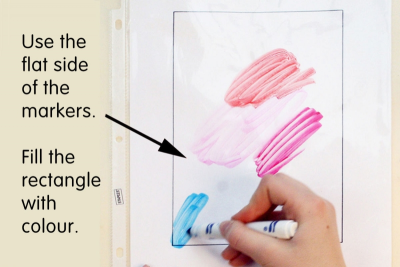
- Place the plastic printing plate on your desk with the rectangle facing up.
- Use the flat side of the markers to draw lots of colours on the plastic surface.
- Draw the colours to fill the rectangle.
10
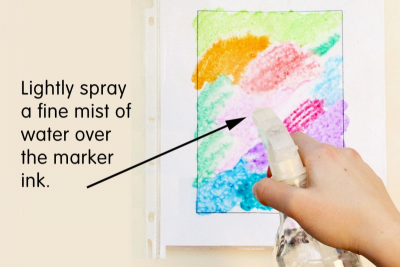
- Lightly spray a fine mist of water over the marker design.
- the more water you apply, the more the colours will bleed together
11
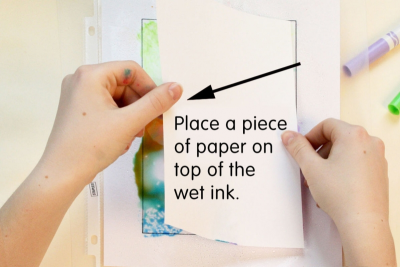
- Place a piece of paper 13.9 cm x 21.6 cm (5.5” x 8.5”) on top of the wet ink.
- be sure to line the paper up with the rectangle - Gently rub the entire surface of the paper to pick up the wet ink.
- Remove the paper.
- Allow the paper to dry for about 30 seconds.
12
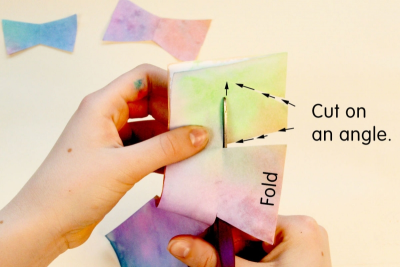
- Fold the paper in half lengthwise - long end to long end.
- Start cutting at the fold.
- Cut on an angle to make an irregular polygon in the shape of half a bow.
- Open the symmetrical shape.
- Make several different sized bows.
13
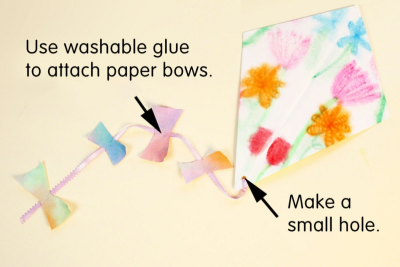
- Use a hole punch to make a small hole at the bottom vertex.
- Tie a ribbon through the hole.
- Use washable glue to attach the bows at intervals along the ribbon.
14
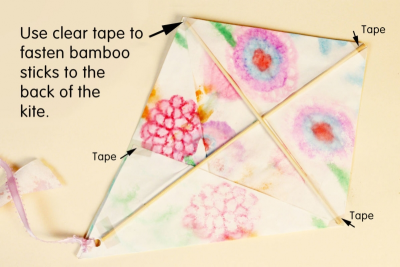
FLY THE KITE
- Use clear tape to attach bamboo sticks to the back of the kite.
- Place one stick along the line of symmetry.
- Place another stick along the bottom of the small triangles at a right angle to the first stick.
- Use clear tape to fasten any loose edges.
- Attach kite string to the centre of the cross formed by the bamboo sticks.
- Go outside and see if it will fly.
Subjects:
Grades:
Grade 1,
Grade 2,
Grade 3