Supplies:
- Crayola Non-Washable Broad Line Markers - 10 Count
- Crayola Marker & Watercolour Paper - 22.9 cm x 30.5 cm (9" x 12")
- Crayola Paintbrushes - 5 Count
- Crayola Scissors
- Crayola Washable Glue Sticks
- Water Containers
- Plastic Placemats - 1 per student
- Masking Tape
- Small Pieces of Foam Core Board
- Paper Towels
Steps:
1

- Tape the paper to a plastic placemat.
- Draw the background scene getting inspiration from research photos.
- Draw the horizon line about one-third down from the top of the paper.
- Block in key details in pencil.
- Draw an outline with marker.
- Paint into the marker with water.
2
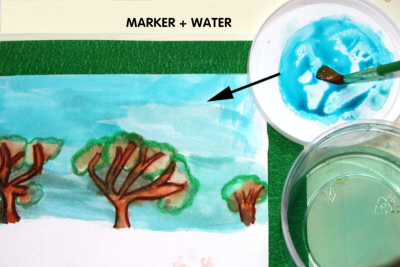
- Draw some marker onto a plastic lid.
- Paint into the marker with water to liquify it.
- Colour large areas of your scene using this marker ink.
- Use both techniques to complete your scene.
3
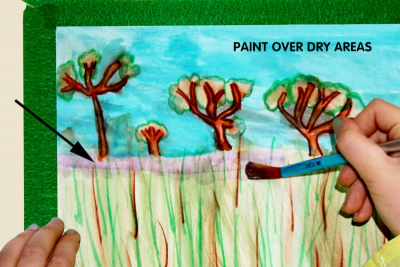
- Paint over dry areas.
- Things further back in the picture look muted.
- Painting purple over the other colours helps create the feeling of shadows and depth.
- Set the background picture aside.
4
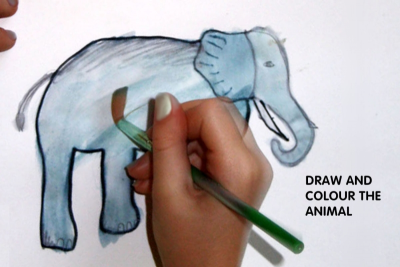
- Refer to your research photo as you draw your animal.
- Remember to look at the animal picture often.
- Make the animal fairly large.
- Use the marker technique to colour the animal drawing.
5
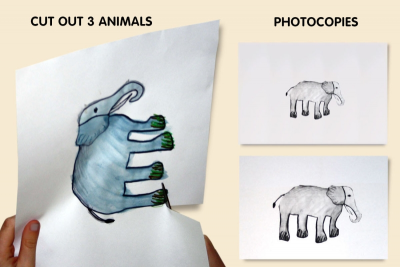
- Photocopy the animal drawing in two smaller sizes, for example, one at 75% and another at 50% of original size.
- Cut out the original animal drawing.
- Colour the two photocopied drawings and cut them out.
6
- Gently remove the tape from the background drawing.
- Figure out where you want to place the animals.
- The smallest one should be highest on the picture plane.
- The largest one should be lowest on the picture plane.
- Try overlapping the animals. - Once you are happy with the arrangement begin to glue the animals down.
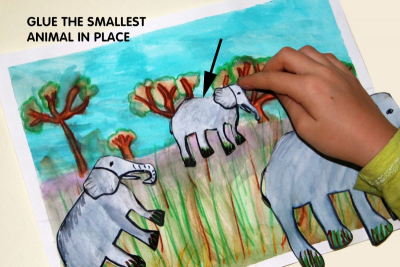
- Glue the smallest one first.
- Position it and lightly press it into place.
- Place a spare piece of paper over the animal and rub it gently.
- The paper keeps the animal shape from tearing or moving while you press it onto the page. - Repeat with the middle sized animal.
7
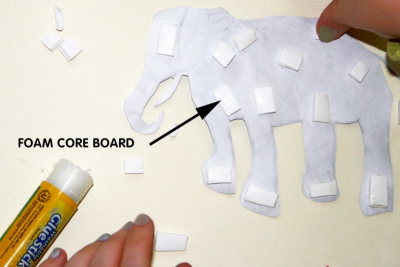
- Glue some small pieces of foam core board onto the back of the largest animal.
- These will raise the shape and make the whole composition feel more 3-dimensional.
- Be sure to place the small pieces all over the back of the animal.
- Put glue on each piece of foam core board.
- Press the animal shape onto the picture plane and gently turn it over.
- Gently rub the back of the paper to fix the large animal in place.
- Turning it over allows you to apply even pressure without tearing or moving the shape.
8
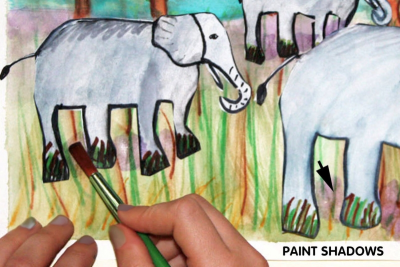
- Add some shadows under the animals with marker ink.
9
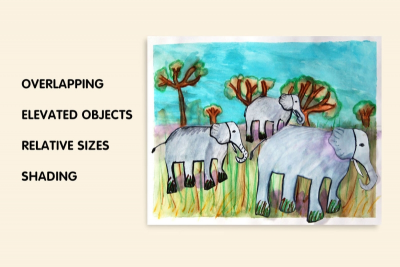
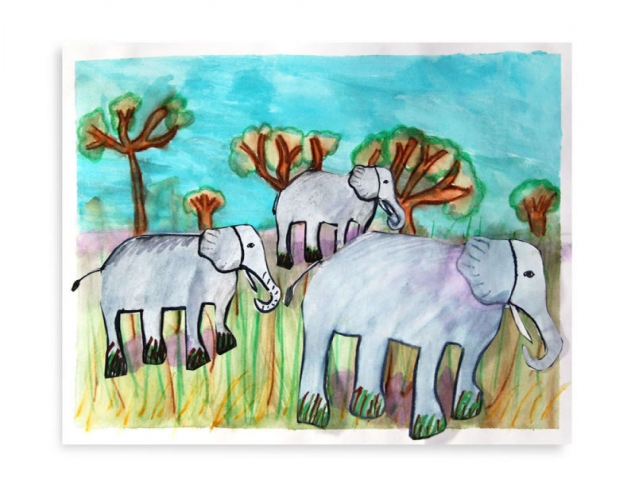
- In the completed picture we see:
- Overlapping – Objects block out parts of other objects and get progressively smaller.
- Elevated Objects – Objects higher in the picture plane appear farther away.
- Relative Sizes – Objects in front look larger than those in the middle and background.
- Shading – Areas modelled with light and shadow give the illusion that they are 3-dimensional and occupy space.
Subjects:
Language Arts,
Mathematics,
Science,
Visual Arts
Grades:
Grade 4,
Grade 5,
Grade 6,
Grade 7,
Grade 8