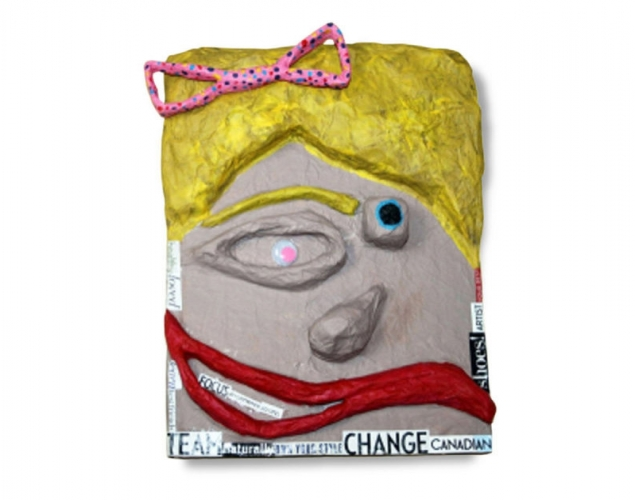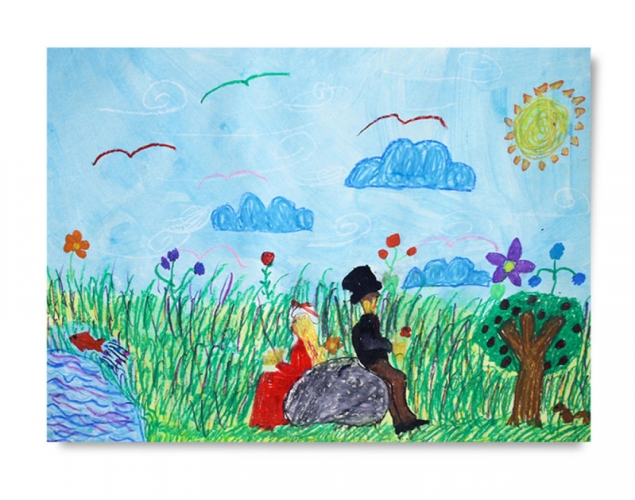
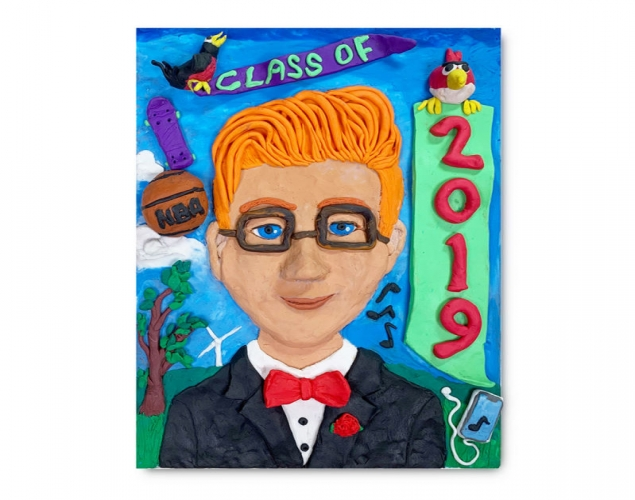
GRAD PICTURES - MODELING CLAY – Colour Mixing, Form, BalanceStudents use modeling clay to create a self-portrait that communicates something about them and how they feel about graduating from grade 8. (Crayola modeling clay is an easy to shape, wax and oil-based medium that will not harden or dry out.)
Students use modeling clay to create a self-portrait that communicates something about them and how they feel about graduating from grade 8. (Crayola modeling clay is an easy to shape, wax and oil-based medium that will not harden or dry out.)
Supplies:
- Crayola Modeling Clay - Natural Colours 136 g (4.8 oz)
- Crayola Modeling Clay - Classic Colours 136 g (4.8 oz)
- Crayola Modeling Clay - 2 lb Jumbo Pack
- Canvas Boards - 20 cm x 25.5 cm (8" x 10") - 1 per student
- Toothpicks
- Bamboo Skewers
- Crayola Scissors
Steps:
1
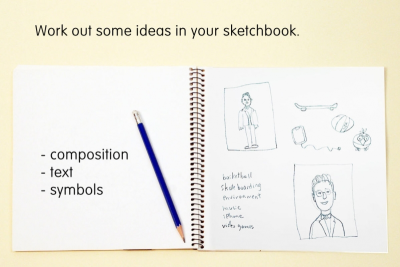
- Use your sketchbook to brainstorm ideas.
- Think about the composition and what you want to include.
- text
- symbols
- profile, front view, face and shoulders, whole body
2
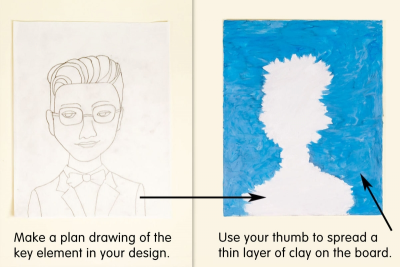
- Make a plan drawing of the key element in your design.
- it should be the same size as your design
- it should have most of the details you want to include - Draw the outline of your key element on the canvas board.
- Use your thumb to spread a thin layer of modeling clay on the canvas board for the background of your design.
- Leave the area for your key element mostly blank.
3
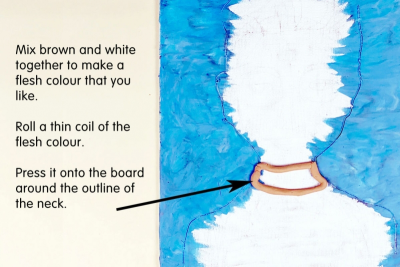
- Mix brown and white together to make a flesh colour that you like.
- Roll a thin coil of the flesh colour.
- Press it onto the board around the outline of the neck.
4

- Use your thumb to spread the flesh colour into the space to fill in the neck.
- Repeat this process for each layer.
- Build the form by starting with a part that is the furthest away from you and then adding the part that is in front of that until you have completed all the parts. For example, in this picture the neck and ears are further away from the front of the face.
- Add details that communicate your ideas.
5
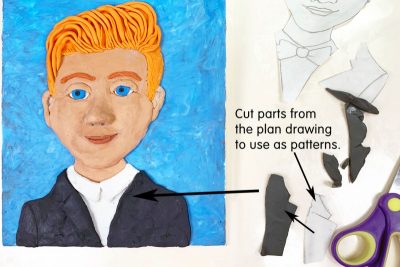
- You may want to use the plan drawing as a pattern for some details.
- Cut out the shape you need.
- Place the paper shape on a flattened piece of modeling clay.
- Cut out the clay shape with scissors.
- Add details that communicate your ideas.
6
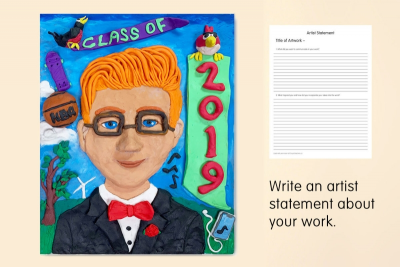
- Once you are satisfied with your grad picture look at it with fresh eyes.
- Use the worksheet to write an artist statement about your work. (Downloads - WriteArtistStatement.pdf)
Subjects:
Language Arts,
Social Studies,
Visual Arts
Grades:
Grade 8