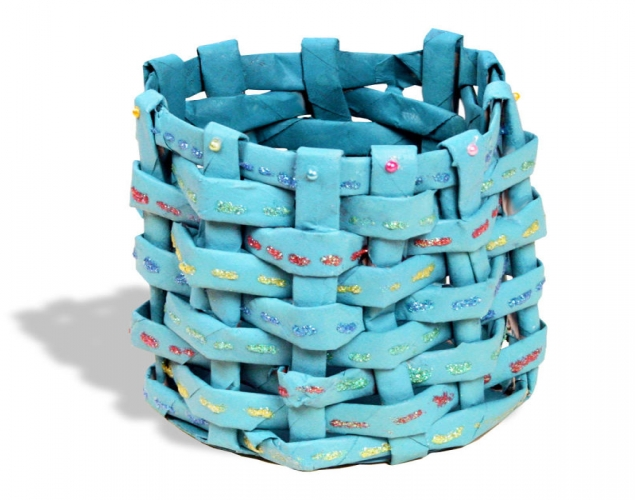
Supplies:
- Crayola Acrylic Paint - 6 Count
- Crayola Washable No-Run School Glue
- Crayola Scissors
- Crayola Paint Brushes - 5 Count
- Crayola Glitter Glue
- Newspapers
- Cereal Boxes
- Pencils
- Clothes Pins
- Water Containers
- Paper Towels
Steps:
1
- Cut 11 pieces of newspaper 13 cm x 27 cm.
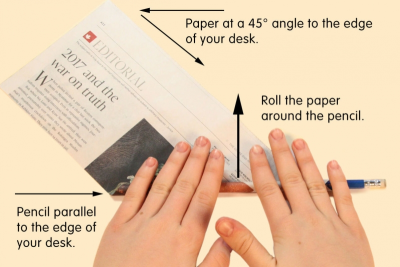
- Place 1 piece of the newspaper flat on your desk and at a 45 degree angle to the edge of your desk.
- Place a pencil on one corner of the paper so that it is parallel to the edge of your desk.
- Slowly begin to roll the paper around the pencil keeping it fairly tight.
2
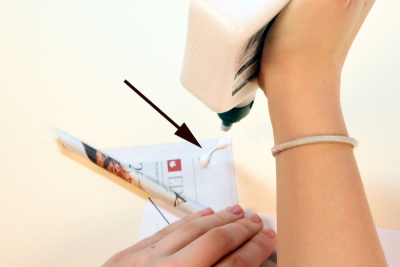
- When you are almost at the end put a small amount of glue on the corner of the paper, then finish rolling the paper.
- Press the glued tip against the rolled paper to hold it in place.
- Remove the pencil and you have made a paper rod.
- Make 11 rods.
3

- Use a tracer to draw 2 circles with a diameter of about 9 - 11 cm on the cereal box cardboard.
- Cut them out.
4
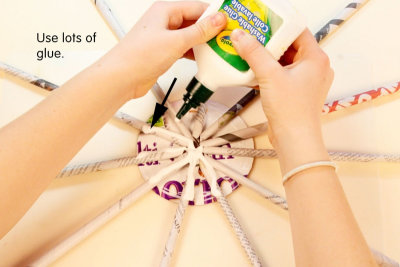
- Arrange the 11 newspaper rods on one of the circles, radiating out from the centre and evenly spaced.
- Glue them in place.
- These are the warp rods.
- Put lots of glue on top of the rods and cardboard.
5
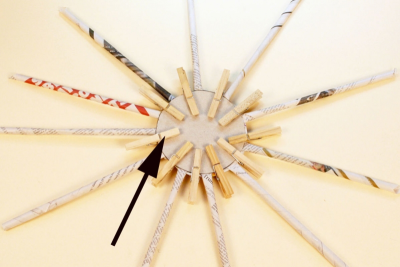
- Place the other cardboard circle on top.
- Make sure to line the 2 circles up carefully.
- Squeeze them together and clamp them in place with clothespins.
- Set this base aside to dry.
6
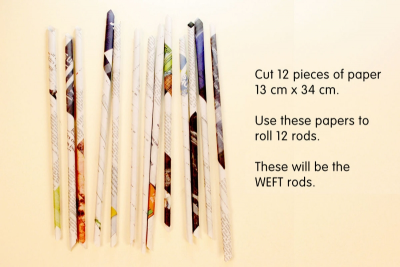
- While the base is drying cut 12 pieces of newspaper 13 cm x 34 cm.
- Use the paper to roll 12 rods.
- These will be your weft rods.
7
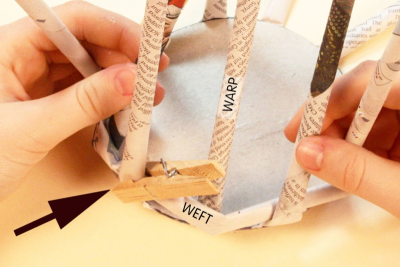
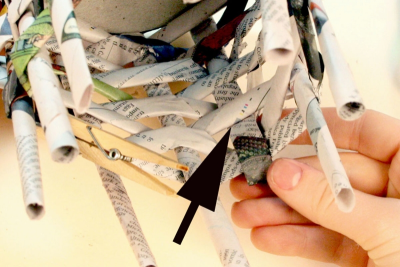
- Fold the warp rods up at right angles to the base.
- Put a small amount of glue on the end of a weft rod.
- Use a clothespin to fasten it to a warp rod close to the cardboard.
- Weave it over and under the warp rods until you get to the end.
- Gently push the weft rod down evenly along the bottom of the base.
8
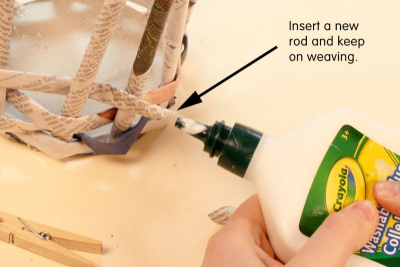
- When you get to the end of a weft rod add another rod to it.
- Put a small amount of glue in the end of the rod.
- Gently insert a new rod.
- Pinch them together and keep on weaving.
9
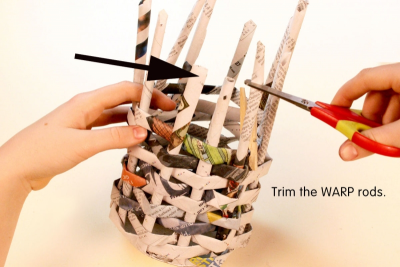
- Glue the end of the last rod to the warp rod.
- Hold it in place with a clothespin.
- Cut the ends of the warp rods so they are all the same length – about 6 cm above the weaving.
10
- Bend the ends of the warp rods and tuck them between the weft rods.
11
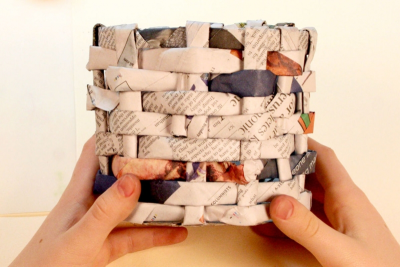
- Examine your basket from all directions.
- Make sure it is nicely rounded and that the weft rods are snug against each other.
12
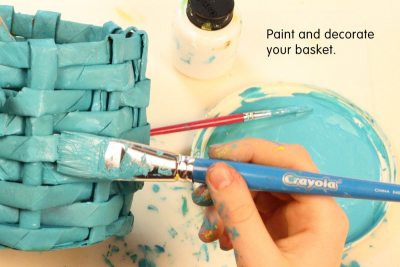
- Paint the basket and decorate it with glitter glue and/or other embellishments.
Subjects:
Grades:
Grade 3,
Grade 4,
Grade 5,
Grade 6,
Grade 7,
Grade 8