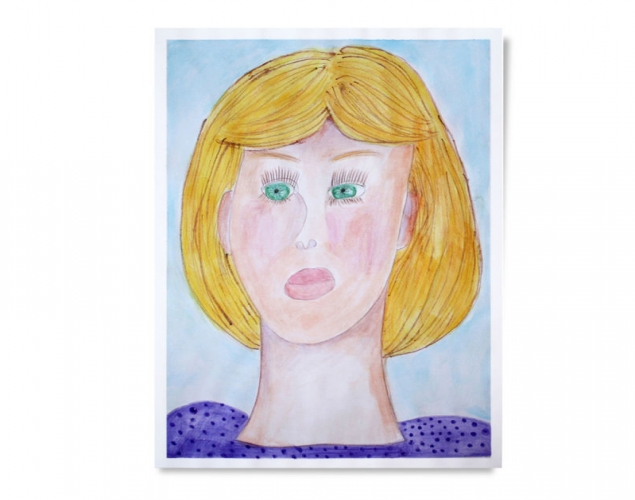
I SEE MYSELF – Detail, Proportion, Self-PortraitStudents learn about the proportions of the face and use watercolour pencils to create a front view self-portrait.
Students learn about the proportions of the face and use watercolour pencils to create a front view self-portrait.
Supplies:
- Crayola Watercolour Pencils - 12 Count
- Crayola Marker & Watercolour Paper - 22.9 cm x 30.5 cm (9" x 12")
- Crayola Variety Brush Set - 5 Count
- Water Containers
- Paper Towels
- Green Masking Tape
- Small Pencil Sharpeners
- Plastic Placemats - 1 per student
- Small Mirrors - 1 per student
- Pencils
- Erasers
Steps:
1
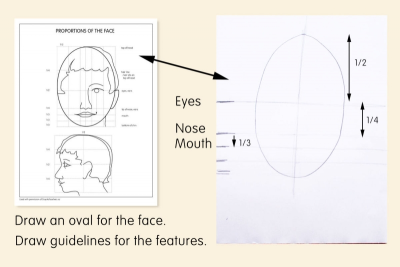
- Follow the worksheet to draw guidelines. (Downloads - Proportions_Face.pdf)
- Lightly draw a large oval for the face.
- Lightly draw a line half way across the oval to mark where the eyes will go.
- Lightly draw a line half way between the eye line and the chin to mark where the tip of the nose will go.
- Divide the space between the tip of the nose line and the chin into three.
- Draw a line 1/3 down from tip of nose to mark where the mouth will go.
2
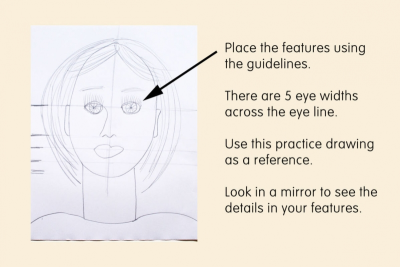
- Place the features using these guidelines.
- There are 5 eye widths across.
- Use this practice drawing as a reference for the watercolour pencil painting.
- Look in a mirror to see the details in your features.
3
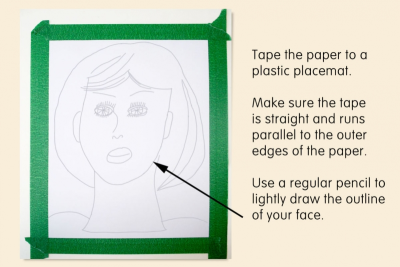
- Tape the paper to a plastic placemat.
- Make sure the edges are even and the paper is flat and smooth.
- Use a regular pencil to lightly draw the outline of your face.
4
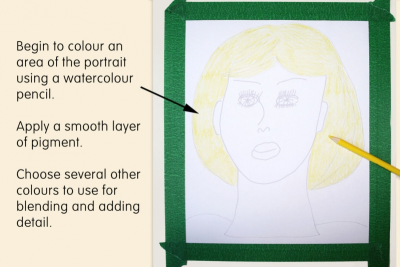
- Begin to colour in an area of the portrait using a watercolour pencil.
- Apply a smooth layer of pigment.
- Choose several other colours to use for blending and adding detail.
5
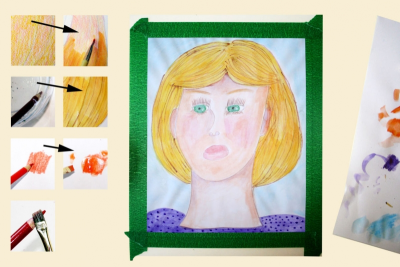
- Colour a new colour over the first one. Apply a smooth layer of pigment.
- Paint water into the areas where you have coloured.
- Dip a watercolour pencil into the water. Draw directly on the paper with it while it is still wet.
- Colour around the edges of the face and then paint into it with water.
- Colour a patch of pigment on a spare piece of paper. Paint into the patch with a wet paintbrush to pick up the pigment, OR pick up pigment from the tip of a watercolour pencil using a wet paintbrush,
- Paint with the pigment directly on the paper.
- For the background try wetting the paper first and then painting colour into it.
6
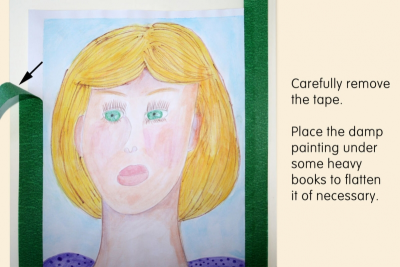
- Carefully remove the tape.
- Place the damp painting under some heavy books to flatten it if necessary.
Subjects:
Language Arts,
Mathematics,
Visual Arts
Grades:
Grade 3,
Grade 4,
Grade 5,
Grade 6,
Grade 7,
Grade 8