ANIMALS IN WINTER – Clay, Texture, SpaceIn this 2-part lesson, students construct 2 triaramas to create a model that shows the habitat of a hibernating Canadian animal above and below the ground in winter. Next they use Crayola Air-Dry clay to sculpt the animal and place it in the setting.
In this 2-part lesson, students construct 2 triaramas to create a model that shows the habitat of a hibernating Canadian animal above and below the ground in winter. Next they use Crayola Air-Dry clay to sculpt the animal and place it in the setting.
Supplies:
- Crayola Air-Dry Clay
- Crayola Washable Project Paint - 10 Count
- Crayola Paintbrushes - 5 Count
- Crayola Washable No-Run School Glue
- Crayola Scissors
- Crayola Construction Paper - 22.9 cm x 30.5 cm (9" x 12")
- Bristol Board - 30.5 cm x 30.5 cm (12" x 12") - 1 per student
- Paper Towel Rolls - ½ per student
- Water Containers
- Paper Towels
- Small Objects Found in Nature - Twigs, Acorns, Leaves, Pebbles
- Pencils
- Masking Tape
- Shaving Foam
- Bristol Board - 17 cm x 17 cm (7" x 7") - 1 per student
- Rulers
Steps:
1
PART ONE - MAKE THE ANIMAL
- Use Crayola air-dry clay to make your animal.
- In this example we are making a bear.
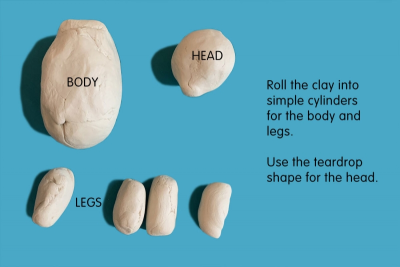
- Use the same general ideas for other animals and just change the shapes you make depending on your animal. - Roll the clay into simple shapes.
- 1 large cylinder for the body,
- 4 small cylinders for the legs
- 1 teardrop shape for the head
2

- Use a pin tool to score the clay where tou are going to join it to another piece of clay.
- You can make a pin tool by taping a half opened paper clip to the end of a pencil.
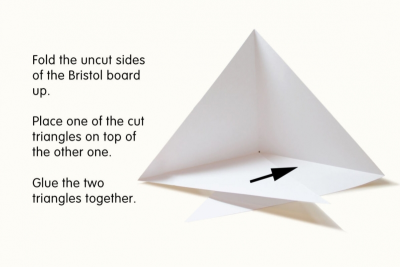
- Fold the uncut sides of the Bristol board up.
- Place one of the cut triangles on top of the other one.
- Glue the triangles together.
3
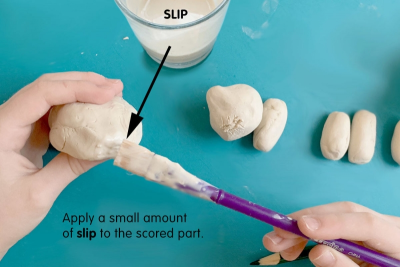
- Apply a small amount of slip to the scored part.
- You can make slip by mixing small pieces of clay with a small amount of water until it is like thick cream.
4
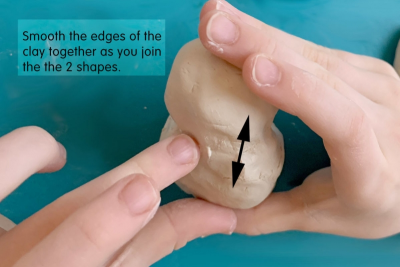
- Smooth the edges of the clay together as you join the 2 shapes.
5
- Join all the shapes to create your animal.
- Be sure to score and add slip everytime you join pieces of clay together. - Pose the animal in a sleeping position.
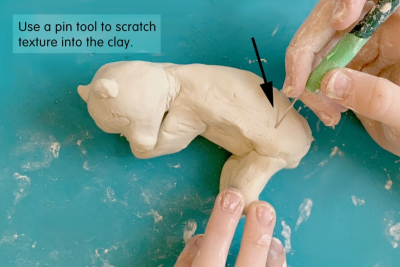
- Use a pin tool to scratch texture and other details into the clay.
- Set the animal aside to dry for 4 days.
6
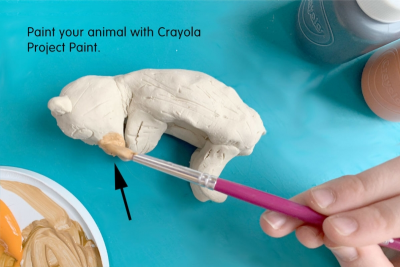
- When the clay is completely dry paint your animal with Crayola Project Paint.
7
PART TWO - MAKE THE SETTING
- Begin with a square of Bristol board 30.5 cm x 30.5 cm (12" x 12").
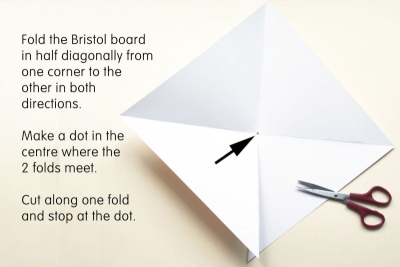
- Fold the Bristol board in half diagonally from one corner to the other.
- Make a firm crease.
- Open the Bristol board up and fold it diagonally in the opposite direction.
- Make a firm crease.
- Make a dot in the centre of the 'X' where the two folds meet.
- Cut along one of the folds and stop at the dot.
8
- Fold the uncut sides of the Bristol board up.
- Place one of the cut triangles on top of the other one.
- Glue the 2 triangles together.
9
- Make another smaller triarama.
- Begin with a square of Bristol board 17 cm x 17 cm (7" x 7").
- Repeat the steps you followed for the first one.
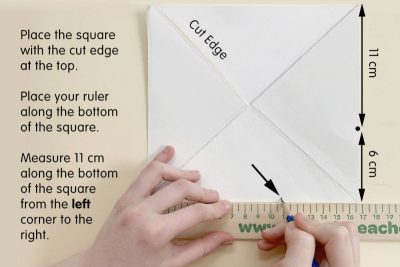
- Place the square with the cut edge at the top.
- Place your ruler along the bottom of the square.
- Measure 11 cm (5") from the left corner of the square to the right corner.
- Mark the spot.
- Repeat the measurement on the opposite side.
10
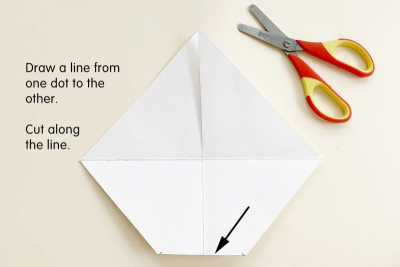
- Draw a line from one dot to the other.
- Cut along the line.
11
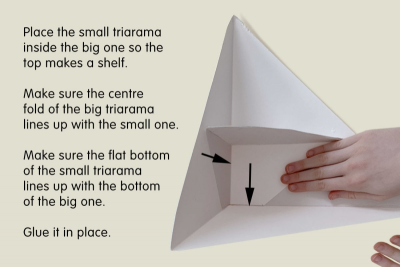
- Hold the small triarama with the flat bottom facing down.
- Place it inside the big triarama so the top makes a shelf.
- Make sure the centre fold of the big triarama lines up with the centre fold of the small one.
- Make sure the flat bottom of the small triarama lines up with the bottom of the big one.
- Glue it in place.
12
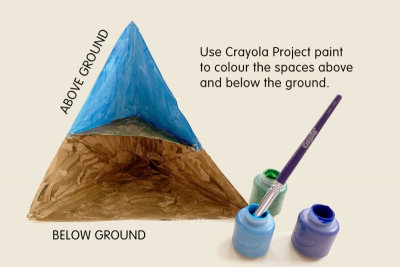
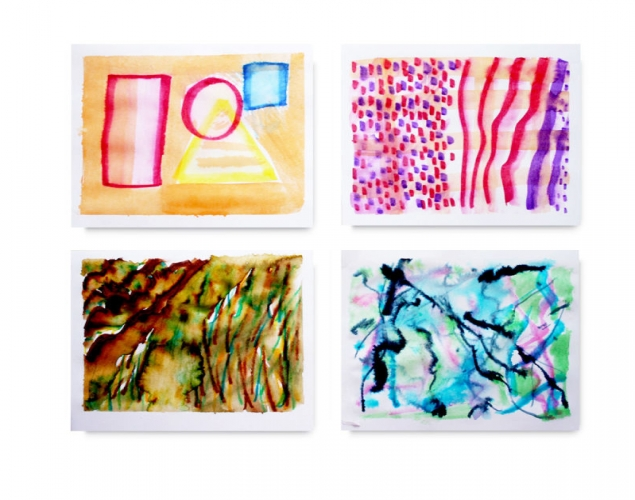
- Use Crayola Project paint to colour the ABOVE and BELOW ground spaces.
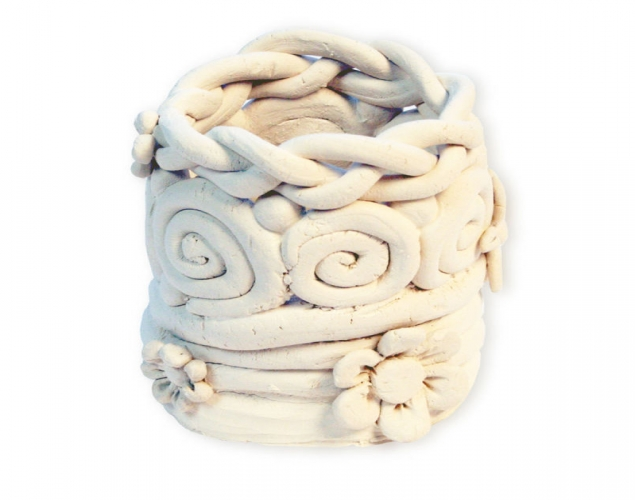
13
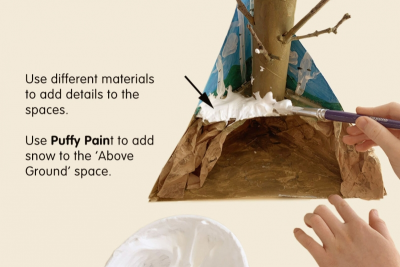
- Use different materials to add details to the ABOVE and BELOW ground spaces, for example,
- twigs
- recycled brown paper bags
- paper towel rolls - Use Puffy Paint to add snow to the 'Above Ground' space.
PUFFY PAINT - Mix equal amounts of Crayola Washable No-Run School Glue and Shaving Cream together until it is thick and fluffy.
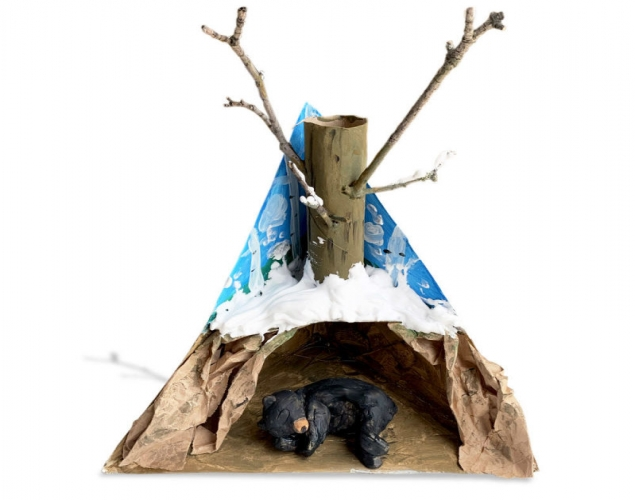
14

- Place your animal in its den.
- View your model with fresh eyes.
- What do you like best about it? Why?
Subjects:
Language Arts,
Mathematics,
Science,
Visual Arts
Grades:
Grade 2,
Grade 3,
Grade 4