Supplies:
- Crayola No. 2 Pencil
- Crayola Crayon Sharpener
- Crayola Crayons
- Crayola Scissors
- Crayola Fabric Markers
- Crayola No-Run Washable School Glue
- Crayola Take Note Permanent Markers
- Crayola Crayon Melter
- Cardstock
- Parchment Paper
- Iron
- Sandpaper
- Cotton T-Shirt
- Cardboard
- Craft Knife
- Ribbon
- Canvas
CIY Staff Tips:
- These crafts include the use of an iron, a craft knife, and our Crayola Crayon Melter. Adult assistance required.
- A pencil sharpener will work if you don’t have a crayon sharpener on hand.
- Use sandpaper with a fine grit for best results when making your Crayon Art T-Shirt.
- Crayon Letter Decoration can also be displayed in a shadow box!
- For additional tips and tricks on how to use the Crayola Melter, reference the included instruction sheet.
- If using wrapped crayons, use the label cutter included with the Crayon Melter to unwrap.
- When color begins to run out in your Crayon Melter, add more crayons to the unit and wait approximately 1 minute for new crayons to melt.
Melted Crayon Butterflies
1

To create Melted Crayon Butterflies: Fold cardstock sheet in half. Draw outlines of half butterflies along crease of cardstock.
2
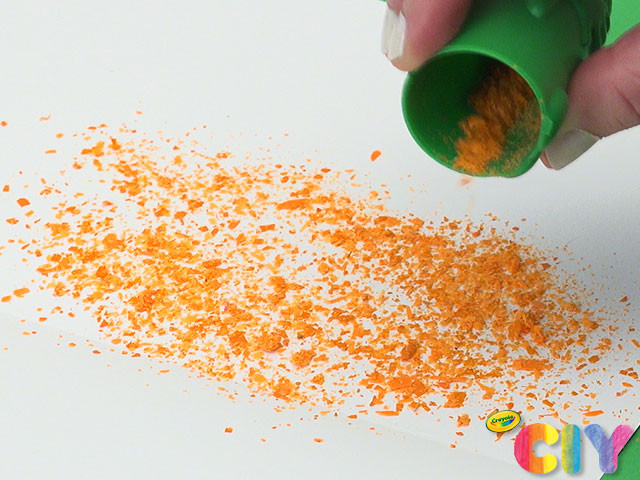
Sharpen unwrapped crayons to create shavings. Unfold cardstock, sprinkle in shavings, re-fold, and place parchment paper on top.
3
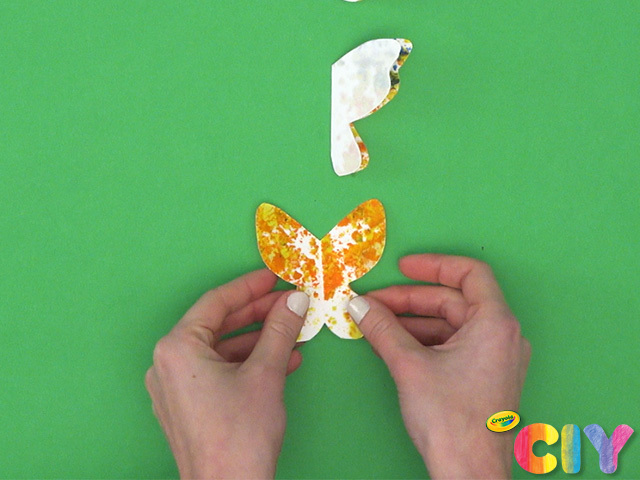
Have an adult iron parchment paper on low heat for 1 minute. Cool 15 minutes. Cut out butterflies and unfold.
Crayon Art T-Shirt
1
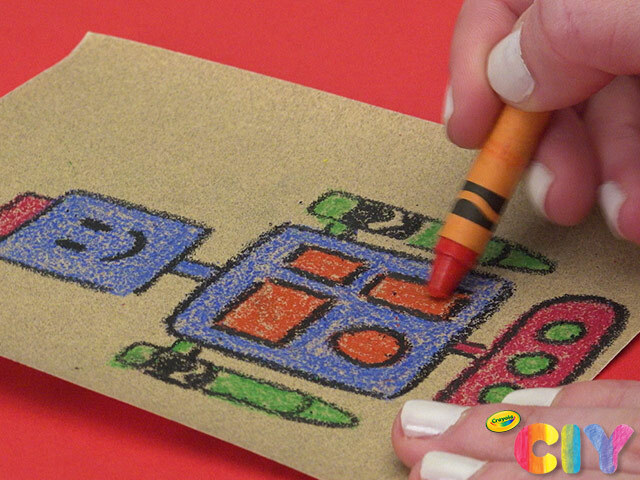
To create Crayon Art T-Shirt: Draw design on sandpaper with crayons.
2
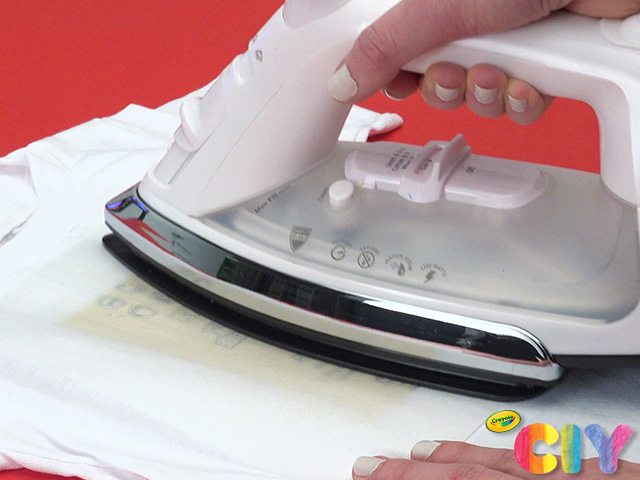
Place cardboard inside shirt. Place sandpaper design face down on shirt. Place parchment paper on top of sandpaper. Have an adult iron over design on low heat 3–5 minutes.
3
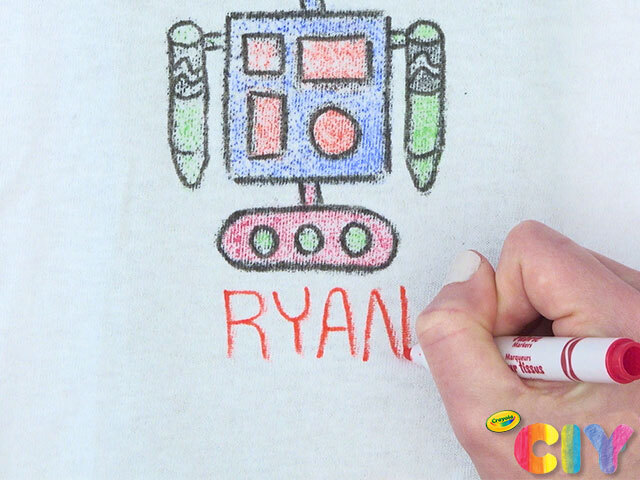
Add details with fabric markers.
Crayon Letter Decoration
1
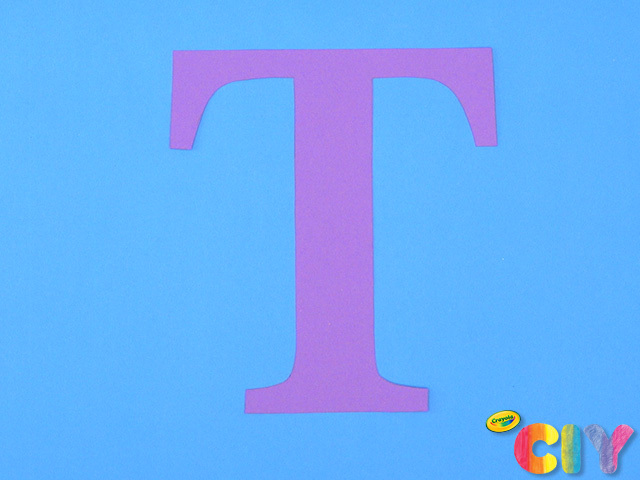
To create Crayon Letter Decoration: Draw outline of initial on cardstock and cut out.
2
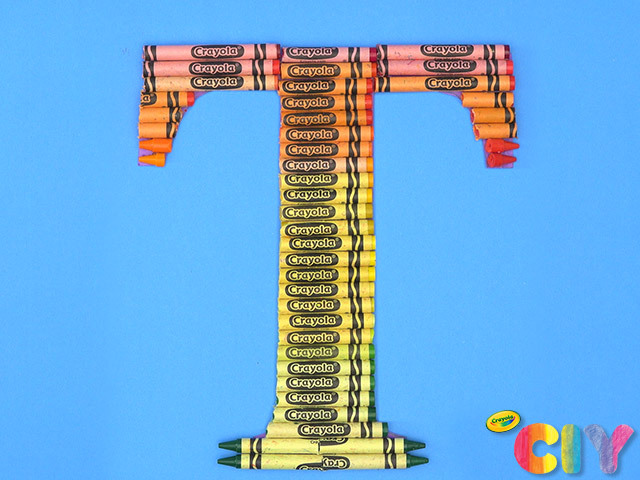
Ask an adult to trim crayons with craft knife to fit in outline. Glue to cardstock.
3
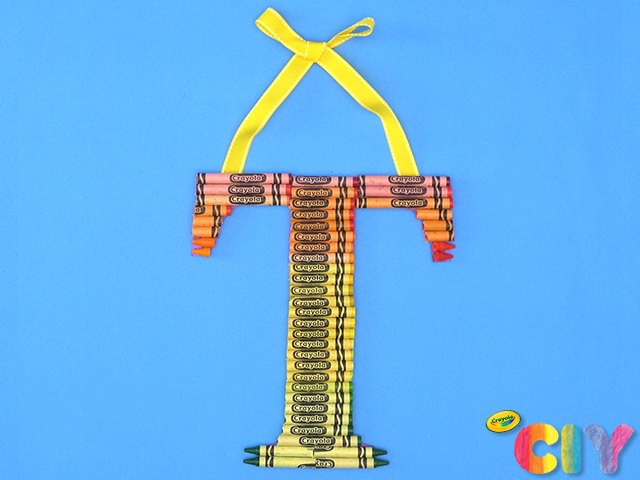
Attach a ribbon to hang.
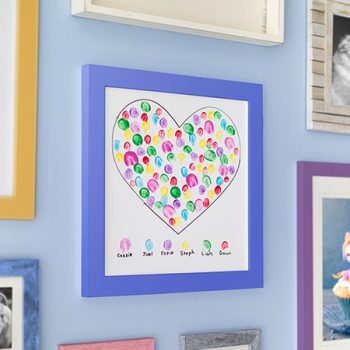
Crayon Melter Canvas Art
1
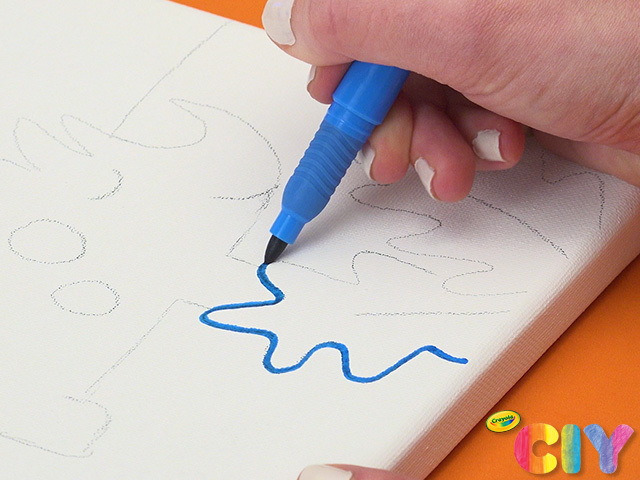
To create Crayon Melter Canvas Art: Sketch design on canvas in pencil. Trace over with permanent markers.
2
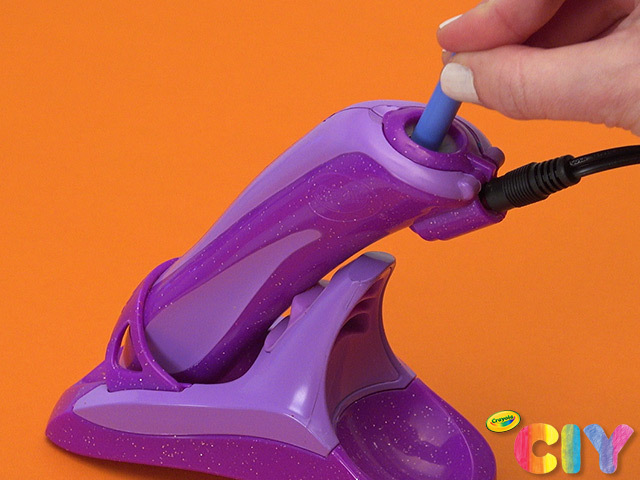
Break crayons into smaller pieces. Load 2–3 pieces into top of Crayon Melter. Have an adult plug in and set up Crayon Melter.
3
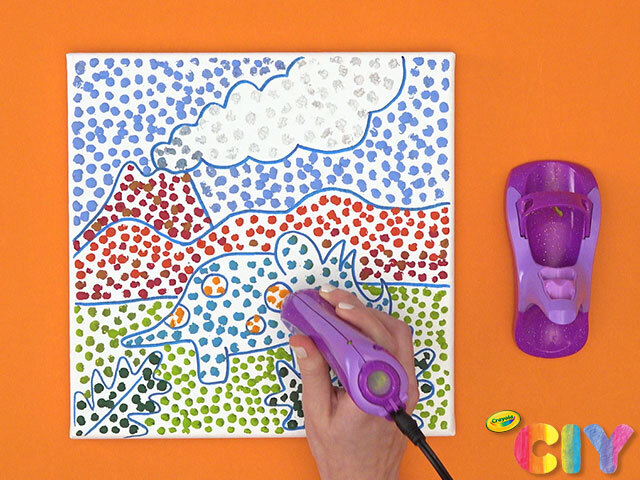
Hold Crayon Melter upright and press to canvas, creating dots in the open areas of the design until filled. Cool for 5 minutes.
Occasion:
National Crayon Day,
Rainy Day Crafts,
Back to School
Age: