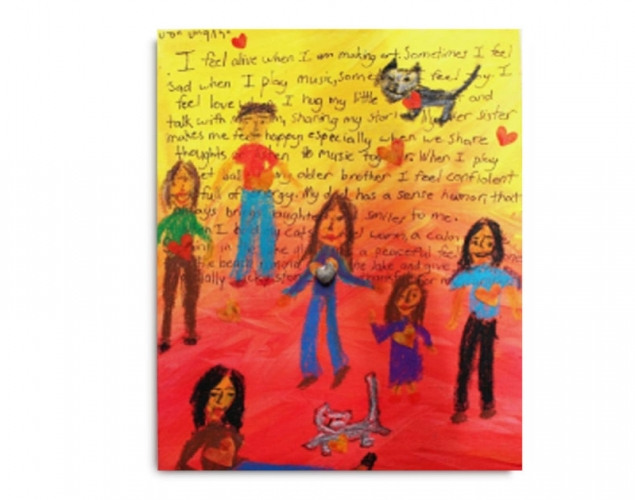
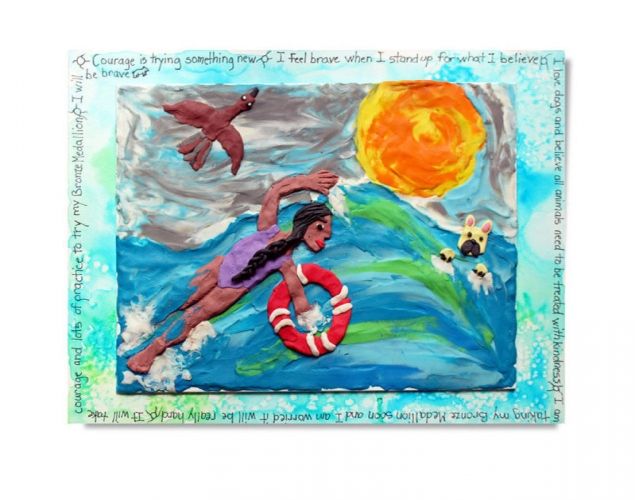
COURAGE – Seven Grandfather Teachings, Cree Métis Artist George LittlechildStudents use modelling clay to create a low relief sculpture that tells a personal story connected to the Grandfather Teaching courage/ bravery. Then they reflect on, and write about their experiences in life when they have needed courage.
Students use modelling clay to create a low relief sculpture that tells a personal story connected to the Grandfather Teaching courage/ bravery. Then they reflect on, and write about their experiences in life when they have needed courage.
Supplies:
- Crayola Modeling Clay - Jumbo Pack
- Crayola Watercolour Paints - 8 Count
- Crayola Paint Brushes - 5 Count
- Crayola Fine Line Markers - 12 Count
- Crayola Marker & Watercolour Paper - 22.9 cm x 30.5 cm (9" x 12")
- Crayola No-Run School Glue
- Salt
- Variety of Sculpture Tools
- Flat Canvas Painting Boards - 15.2 cm x 20.3 cm (6" x 8")
Steps:
1
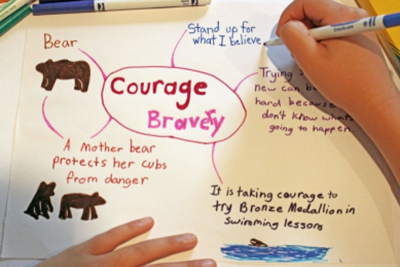
- Brainstorm the Grandfather teaching courage/ bravery.
- Use images and words to create a mind map about courage/ bravery.
- Describe and draw a life experience you have had where you needed to have courage and be brave.
- Explain the meaning of courage/ bravery.
- Remember a time when you stood up for something you believed in, how did you feel?
2
- Close your eyes and think about a time in life when you have been courageous.
- Where were you?
- What were you doing?
- Look around, what is the environment like?
- What colour is the sky
- What is the land like?
- Are there buildings? - Form a picture of the event in your mind's eye.
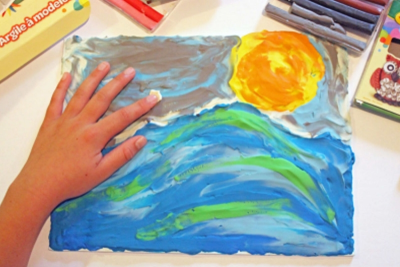
- Begin your artwork by gathering a variety of modelling clay colours and a flat canvas board.
- Create a background using colours and shapes that represent the environment you are in.
- Mix colours together to make new colours.
3
- Reflect on why you needed to have courage and be brave.
- Create your self-portrait from modelling clay that contrasts against your background.
- Skin colours can be made from mixing white, yellow, red, and blue together.
- Experiment with different colour combinations.
- Begin your self-portrait with larger shapes.
4
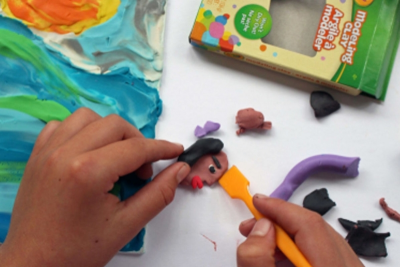
- Add detail to your face by using different colours and a variety of sculpture tools such as toothpicks, rollers, and combs.
5
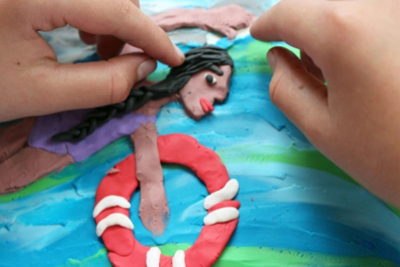
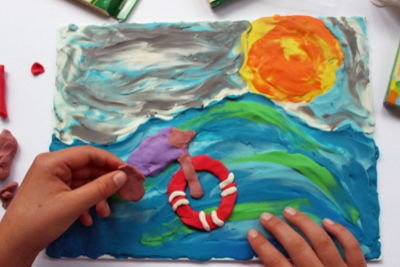
- Attach larger shapes onto your background by smoothing the edges together.
6
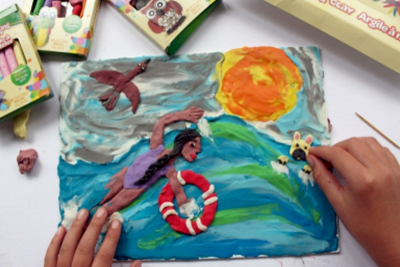
- Add other animals, people, or plants to your background to create a story about a time in your life when you were brave and showed courage.
- Continue to add detail to your artwork.
- When it is complete reflect on the story you have told through your low relief sculpture.
7
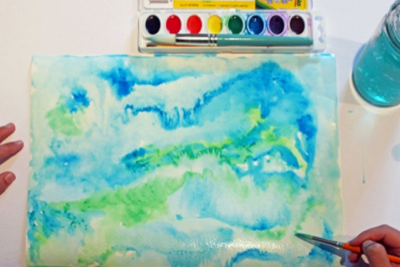
- Create a mat to frame your artwork.
- Begin your mat by painting watercolour paper with clear water.
- Brush watercolour paints in colours similar to an area in your low relief sculpture that is important to your story into the wet paper.
- Allow the paints to flow into each other naturally and fill the space.
8
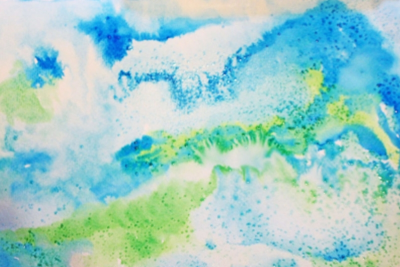
- Add salt to your painting while the paint is still wet to change the way the paints appear.
9
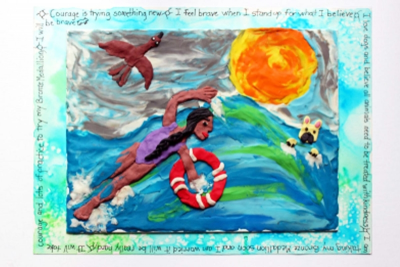
- When your watercolour painting is dry attach your low relief sculpture to it using tape or glue.
- Reflect again on your story of courage/ bravery.
- Use your mind map, thoughts and feelings to write about your life experience, making connections to the Grandfather teaching courage/ bravery.
- Use a fine tip marker to write your ideas around the outer edge of the mat.
Subjects:
Language Arts,
Visual Arts,
First Nations, Metis, Inuit
Grades:
Grade 1,
Grade 2,
Grade 3,
Grade 4,
Grade 5,
Grade 6,
Grade 7,
Grade 8